background image

Digital Video Recorder Quick Start Guide


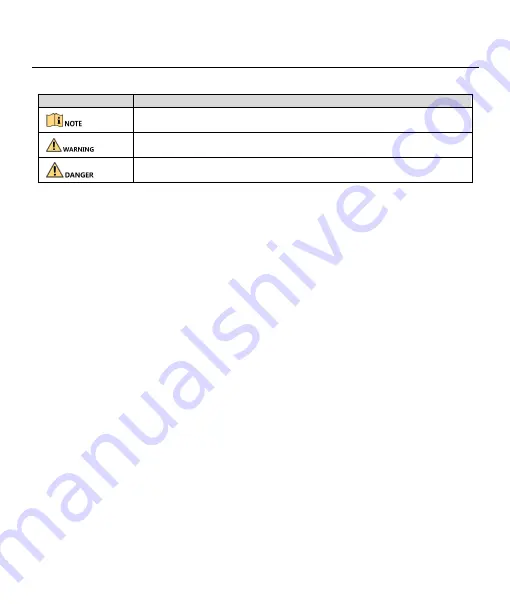
Symbol Conventions 

The symbols that may be found in this document are defined as follows. 

Safety Instructions 


Proper configuration of all passwords and other security settings is the responsibility of the installer and/or 
end-user. 


In the use of the product, you must be in strict compliance with the electrical safety regulations of the nation 
and region. Please refer to technical specifications for detailed information. 


Input voltage should meet both the SELV (Safety Extra Low Voltage) and the Limited Power Source with 100 
to 240 VAC, 12 VDC or 48 VDC according to the IEC60950-1 standard. Please refer to technical specifications 
for detailed information. 


Do not connect several devices to one power adapter as adapter overload may cause over-heating or a fire 
hazard. 


Please make sure that the plug is firmly connected to the power socket.     


If smoke, odor or noise rise from the device, turn off the power at once and unplug the power cable, and 
then please contact the service center.   

Preventive and Cautionary Tips 

Before connecting and operating your device, please be advised of the following tips: 


Ensure unit is installed in a well-ventilated, dust-free environment. 


Unit is designed for indoor use only. 


Keep all liquids away from the device. 


Ensure environmental conditions meet factory specifications. 


Ensure unit is properly secured to a rack or shelf. Major shocks or jolts to the unit as a result of dropping it 
may cause damage to the sensitive electronics within the unit. 


Use the device in conjunction with an UPS if possible. 


Power down the unit before connecting and disconnecting accessories and peripherals. 


A factory recommended HDD should be used for this device. 


Improper use or replacement of the battery may result in hazard of explosion. Replace with the same or 
equivalent type only. Dispose of used batteries according to the instructions provided by the battery 
manufacturer. 

Symbol 

Description 


Provides additional information to emphasize or supplement important points of 
the main text. 


Indicates a potentially  hazardous situation, which  if  not avoided, could result  in 
equipment damage, data loss, performance degradation, or unexpected results. 


Indicates  a  hazard  with  a  high  level  of  risk,  which  if  not  avoided,  will  result  in 
death or serious injury. 

Summary of Contents for Platinum Advanced LTD8304M-ET

Page 1: ...Digital Video Recorder Quick Start Guide...

Page 2: ...Multimedia Interface and the HDMI Logo are trademarks or registered trademarks of HDMI Licensing Administrator Inc in the United States and other countries Legal Disclaimer REGARDING TO THE PRODUCT WI...

Page 3: ...erence 2 This device must accept any interference received including interference that may cause undesired operation EU Conformity Statement This product and if applicable the supplied accessories too...

Page 4: ...ips Before connecting and operating your device please be advised of the following tips Ensure unit is installed in a well ventilated dust free environment Unit is designed for indoor use only Keep al...

Page 5: ...0IC12 0 18P GB MOSO Technology Co Ltd ADS 26FSG 12 12018EPB Shenzhen Honor Electronic Co Ltd European MSA C1500IC12 0 18P DE MOSO Technology Co Ltd ADS 26FSG 12 12018EPG Shenzhen Honor Electronic Co L...

Page 6: ...ld be within the range of 10 C to 55 C 14 F to 131 F Environmental humidity should be within the range of 10 to 90 Item Description Item Description VIDEO IN BNC interface for Turbo HD and analog vide...

Page 7: ...s Refer to Figure 2 2 Please uninstall the upper layer bracket first before installing HDD on the lower layer bracket Step 3 Connect the data cable and power cable Refer to Figure 2 3 You can repeat t...

Page 8: ...Figure 2 9 You can repeat the steps above to install other HDDs Step 4 Reinstall the device cover and fasten screws Figure 2 7 Remove Cover Figure 2 8 Connect Cable Figure 2 9 FixHDD 2 3 RS 485 and C...

Page 9: ...ctivation You can also activate the device via web browser IP PORTAL or client software Step 1 Enter the same password in Create New Password and Confirm New Password STRONG PASSWORD RECOMMENDED We hi...

Page 10: ...When you have enabled Export GUID continue to export the GUID file to the USB flash drive for the future password resetting When you have enabled Security Question Configuration continue to set the se...

Page 11: ...ed the wrong password for 5 times the account will be locked for 60 seconds 3 5 User Logout Shutdown and Reboot You can log out of the system shut down or reboot the device Step 1 Click on the menu ba...

Page 12: ...signal input 1 Click 2 Check the channel s to enable 5 MP long distance transmission 3 Click OK Figure 3 4 5 MP Long Distance Transmission Settings Step 4 Click Apply to save the settings 3 7 Network...

Page 13: ...Cloud service will require internet access Please read Service Terms and Privacy Statement before enabling the service if you agree the service terms and privacy statement 4 Click OK to save the setti...

Page 14: ...r the live view mode You can select a window and double click a camera from the list to play the video from the camera in the selected window Use the toolbar at the playing window bottom to achieve fu...

Page 15: ...d pictures on HDD can be played back Refer to the user manual for details of each playback mode Step 1 Go to Playback Step 2 Check the channel s in the channel list Step 3 Double click a date on the c...

Page 16: ...ed activate the device first by setting the password for the admin user account STRONG PASSWORD RECOMMENDED We highly recommend you create a strong password of your own choosing Using a minimum of 8 c...

Reviews: