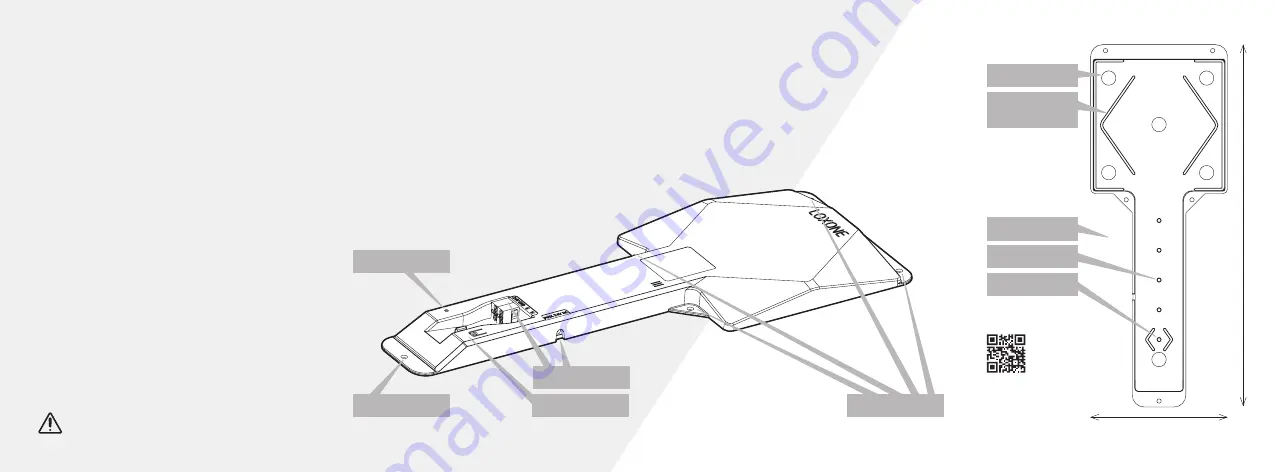
About the product
Installed underneath your non-conducting surface (Note the
max. surface thickness of 30mm), the Loxone Touch Surface
gives you the possibility to control your smart home using the
Loxone switch standard.
To prevent accidental use, there is an activation button.
Upon touching this button, the five touch points of the switch
are activated for 5 seconds, and the remaining time will be
displayed through the activation indicator. If the activation
function is not needed, the activation button can be
reconfigured as necessary in Loxone Config.
Features
• Loxone Switch Standard
• Accidental operation protection
• LED activation indicator
Installation
Installation without activation indicators
If you would prefer not to install the light pipes or mark the
surface at all you can use the provided decal to show the touch
points.
Mount the Touch Surface to the underside of the surface.
Once powered up, learn-in and configure the Touch Surface
using Loxone Config.
For additional information, declaration of confirmity,
visit www.loxone.com/help/touch-surface-air
Installation with activation indicators
Prepare the surface on which the Touch Surface is to be
installed by drilling 5 holes for the LED indicator lights and
marking the touch points (We strongly recommend that the
holes are drilled by a professional to avoid damage to the
surface).
The activation indicator lights need to be installed on the
Touch Surface prior to mounting it.
Mount the Touch Surface to the underside of the surface.
To seal the holes for the activation indicator lights, use a
transparent epoxy resin. It is important to ensure that no dirt or
grit is present in the holes or on the underside of the mounting
surface prior to using the resin. When applying the resin ensure
that no air bubbles are created.
Once powered up, learn-in and configure the Touch Surface
using Loxone Config.
Activation button
Download free
DXF-Template
www.loxone.com/
touch-surface
Status-LED
Mounting Hole
Power Supply
Learn Button
Mounting Holes
Touch points
Decal for touch
surfaces
Support film
Light pipes
3
04
1
2
3
4
5
6
115


