EN
8
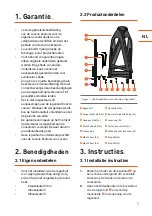
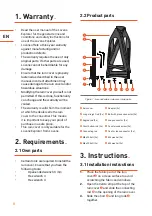
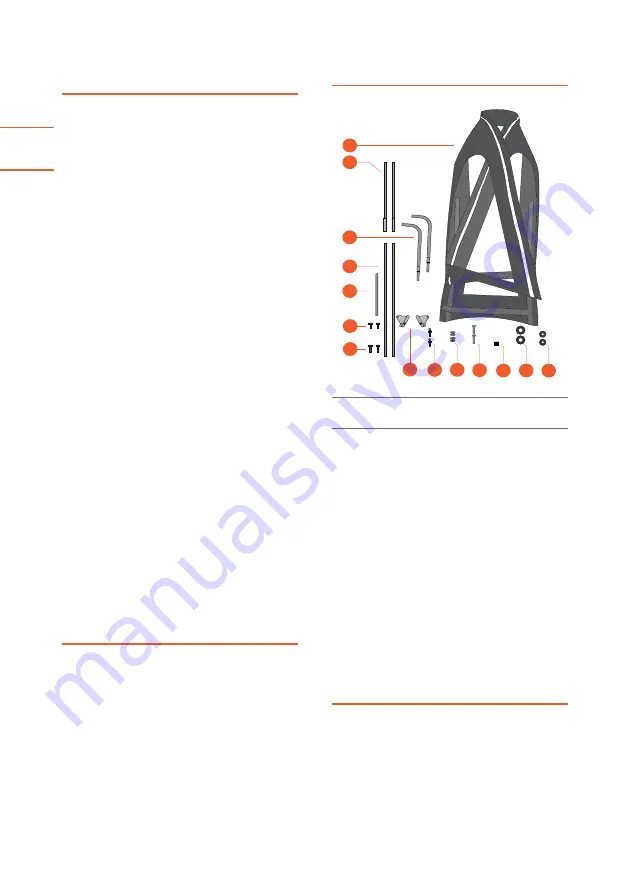
2.2 Product parts
1. Warranty
Rain cover
Long straight rod (2x)
Angled rod (2x)
Short hollow rod (2x)
Connecting rod
M4x20 bolt (2x)
M6x20 bolt (2x)
Adapter (2x)
Bolt with press connector (2x)
Loop connector (2x)
Countersunk screw (2x)
Cap for loop connector (2x)
M6 washer (2x)
M4 washer (2x)
1.
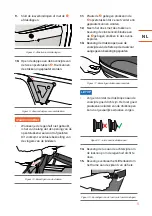
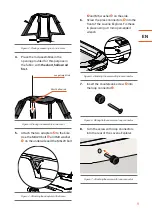
Place the fabric part of the rain
cover
❶
on a clean surface to avoid
scratching the fabric and windows.
2.
Open the Velcro strip at the top of the
rain cover
❶
and slide the connecting
rod
❺
in the opening of the rain cover.
3.
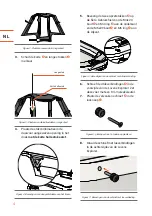
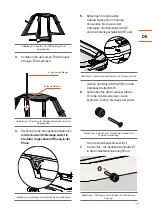
Slide the short
❹
and long rods
❷
together.
❶
❷
❸
❹
❺
❻
❼
❽
❾
❿
⓫
⓬
⓭
⓮
3.1 Installation instructions
3. Instructions
.
.
•
Read the user manual of the Lovens
Explorer for the general terms and
conditions and safety instructions for
use of the Lovens Explorer.
•
Lovens offers a three-year warranty
against manufacturing and/or
production defects.
•
The warranty requires the use of only
original parts. If other parts are used,
Lovens cannot be held liable for any
damage.
•
Ensure that the rain cover is properly
fastened as described in the user
manual. Incorrect attachment may
cause damage to the rain cover and/or
hazardous situations.
•
Modifying the rain cover yourself is not
permitted. If this is done, functionality
can change and the warranty will be
voided.
•
The warran
ty is valid from the moment
at which the dealer sells the rain
cover to the consumer. This means
it is important to keep your proof of
purchase in a safe place.
•
This rain cover is only suitable for the
Lovens Explorer from Lovens.
2.1 Own parts
2.
Requirements
•
Certain tools are required to install the
rain cover. Ensure that you have the
following tools:
•
Open-ended wrench 9 mm
•
Hex wrench 3
•
Hex wrench 4
6
7
8
5
4
3
2
1
10
9
11
12
13
14
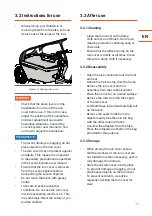
Figure 1 - Lovens Explorer rain cover main parts.
.


