I6
0
4
G
B
I
0
9
1
9
3
1
1
0
0
4
4
2
2
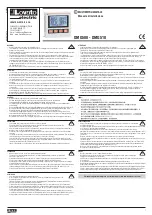
INTRODUCTION
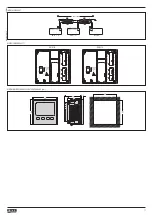
The DMG5... multimeters have been designed to combine the maximum possible easiness of operation together with a wide choice of advanced functions. The flush-mount 96x96mm housing joins the modern design
of the front panel with the tool-less mounting of the device body. The backlighted LCD display offers a user-friendly interface. DMG510 is also provided with a isolated RS485 interface with Modbus protocol to
consent remote supervision.
FRONT KEYBOARD
MENU key
– Used to enter or exit from visualization and setting menus.
s
and
t
keys
– Used to scroll display pages, to select among possible choices and to modify settings (increment-decrement).
key
– Used to rotate through sub-pages, to confirm a choice, to switch between visualization modes.
HARMONIC ANALYSIS INDICATION
– The DMG510 features harmonic analysis up to the 15th order for the following measurements:
• phase-to-phase voltages.
• phase-to-neutral voltages.
• currents.
– To activate harmonic analysis, set P02.12 = THD+HAR.
– With P02.12 = THD, only the THD of the above measurements is displayed.
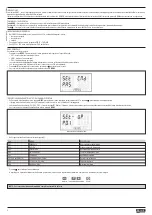
MAIN MENU
To access the main menu:
– Press the
MENU
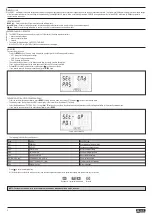
button. The main menu is displayed (see figure) with the following possible choices:
• SET - Access to the Setup menu settings.
• CMD - Access to the command menu.
• PAS - Entering the Password.
– The selected choiche flashes. In the alphanumeric disp lay scrolls a written description.
– If you must enter the password, the menu opens with the voice PAS already selected.
– Press
s t
to select the desired item and then press
to confirm your choice.
– If you want to return to the measurement display, press
MENU
again.
PARAMETER SETTING (SETUP) FROM FRONT PANEL
– From the normal measurement display, press
MENU
to call up the main menu, then select SET and press
to access the settings menu.
– The display shows the first menu level P.01 in the display in the lower left, with selection 01 flashing.
– Select the desired menu (P.01, P.02, P.03 ...) using the
s t
buttons. As you select, the alphanumeric display provides a brief scrolling description of the currently selected menu.
– If you want to exit and return to the measurement display, press
MENU
.
Code
MENU
DESCRIPTION
P01
GENERAL
Detailed data of the installation
P02
UTILITY
Language, backlight, display
P03
PASSWORD
Access codes enabling
P04
INTEGRATION
Readings integration time
P05
HOUR COUNTER
Hour counter enabling
P07 (DMG510 only)
COMMUNICATION (COMn)
Communication ports
P08
LIMIT THRESHOLDS (LIMn)
Limit thresholds on readings
P09
ALARMS (ALAn)
Alarm messages
– The following table lists the available menus:
– Press
to enter the selected menu.
– At this point you can select the submenu (if any) and then the sequential number of the parameter, always with the function keys as follows:
Backward
Increment/decrement
Forward
Setup: menu selection
NOTE: For the other menus, refer to the complete instructions manual available on the website.


