


+2137438 45 ,-+/+.
36
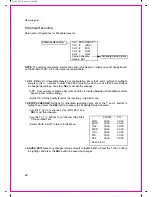
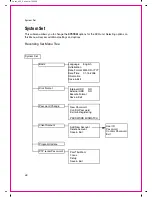
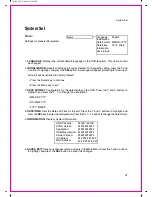
Network Set
IP Set
The options in the IP Set menu control the local network setup for the Unit. See page 45 for
additional network setup instructions.
•
DHCP
: Press the
K
and
L
buttons to highlight,
and press the
mo
buttons to set to NO/YES.
Set this option to YES to allow the unit to get
Network information from the Router; set this
option to NO if information will be manually
assigned to the DVR unit.
•
IP ADDRESS
: Press the
K
and
L
buttons to
highlight, and press the
SEL
button to enter
setup. Use the Numbers on the front panel of
the DVR to set the IP address.
•
GATEWAY
: Press the
K
and
L
buttons to
highlight, and press the
SEL
button to set to
enter setup. Use the Numbers on the front panel
of the DVR to set the Gateway address.
•
NETMASK
: Press the
K
and
L
buttons to highlight, and press the
SEL
button to set to enter
setup. Use the Numbers on the front panel of the DVR to set the Net Mask.
•
DNS SERVER
: Press the
K
and
L
buttons to highlight, and press the
SEL
button to enter
setup. Use the Numbers on the front panel of the DVR to set the DNS Server address.
•
DVR PORT
: Press the
K
and
L
buttons to highlight, and press the
SEL
button to enter setup.
Use the Numbers on the front panel of the DVR to set the DVR Port to
2000
.
•
WEBSERVER PORT
: Press the
K
and
L
buttons to highlight, and press the
SEL
button to
enter setup. Use the Numbers on the front panel of the DVR to set the Webserver Port to
0080
.
•
SAVE & EXIT
: Saves any changes made, and exits to the Main Menu. Press the
K
and
L
buttons to highlight, and press the
SEL
button to accept the changes.
DHCP:
IP Address:
Gateway:
Netmask:
DNS Server:
DVR Port:
Webserver Port:
Save & Exit
NO
###.###.###.###
###.###.###.###
###.###.###.###
###.###.###.###
2000
0080


