3.1
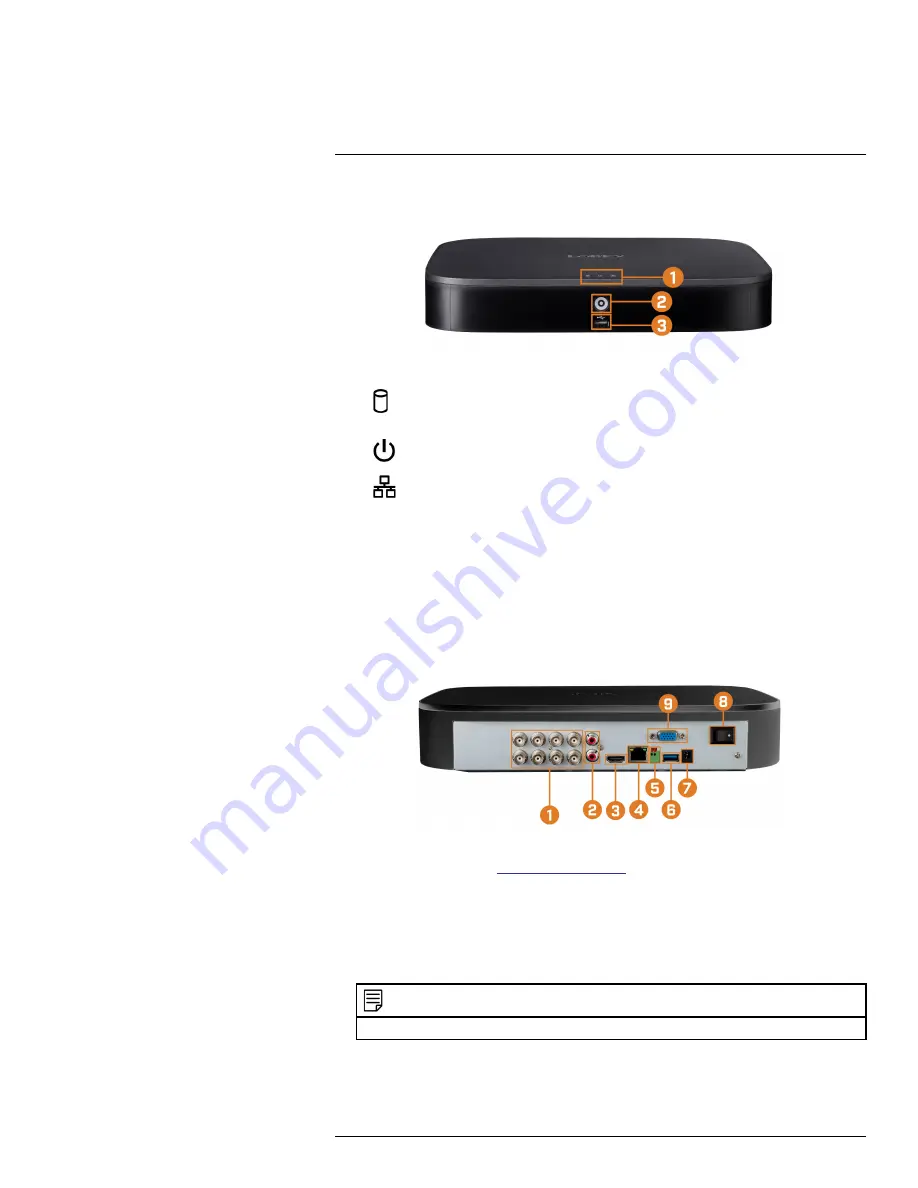
Front Panel
1.
LED Indicators:
•
HDD:
Glows to indicate hard drive is in normal state. Turns off when there is a hard
drive error.
•
POWER:
Glows to indicate the system is on.
•
NETWORK:
Glows when network is in normal state. Turns off when there is a net-
work error.
2.
Info / Panic Button:
•
From live view, press once to open the System Information screen.
•
Press and hold for 3 seconds to activate the warning lights and sirens on all connected de-
terrence cameras.
3.
USB Port:
Connect a USB mouse (included) to control the system, or a USB flash drive (not
included) for data backup or manual firmware updates.
3.2
Back Panel
1.
Video Inputs:
Connect Lorex HD or standard analog cameras to the system. For a full list of
compatible cameras, visit
2.
Audio IN/Audio OUT:
Connect an external microphone for single-channel audio recording,
or an external speaker for system audio. For details on connecting external audio devices, see
18
3.
HDMI:
Connect to an HDMI monitor or TV (not included) to view the system interface.
4.
LAN:
Connect an RJ45 Ethernet cable for local and remote connectivity.
5.
A/B:
Connect RS485 cables.
NOTE
For full details on connecting PTZ cameras, see 17.1
Connecting PTZ Cameras to the Recorder
#LX400111; r. 5.0/56647/56647; en-US
5
Summary of Contents for D861 Series
Page 1: ...User Manual D861 Series...
Page 2: ......
Page 3: ...User Manual D861 Series LX400111 r 5 0 56647 56647 en US iii...
Page 30: ...Recording 8 4 Click Apply LX400111 r 5 0 56647 56647 en US 22...
Page 120: ...LX400111 r 5 0 56647 56647 en US 112...
Page 121: ......


