SMILE RADIO PLAYER QUICK START SET UP GUIDE
Step 2
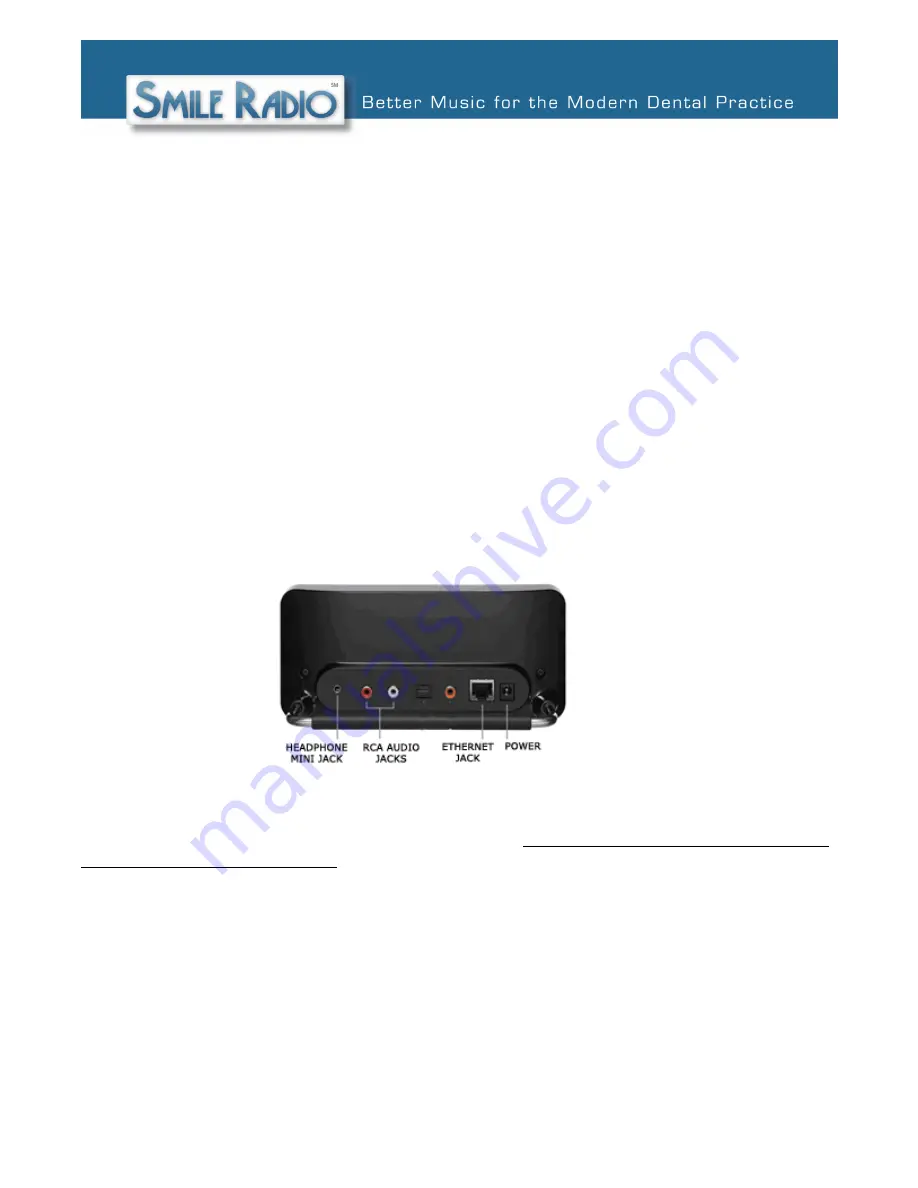
– Connect Ethernet cable (included) to the Internet Outlet and the “Ethernet” jack on the
back of the Smile Radio player.
Step 3
– Connect the RCA audio cables (included) to the red and white jacks on the back of the
Smile Radio player to an available audio input on your stereo receiver– just like hooking up a CD
player. Any available AUDIO input (with the exception of the Phono input – which won’t work) like
CD, MD, Video1, Aux, etc. will usually work just fine. We recommend you label the input for ease
of use and support.
Tip:
If you have an audio cable running from your PC to the stereo, you can use the
same cable to connect to the Smile Radio player by using the Headphone Mini Jack on
the back of the player instead.
Step 4
– put the batteries in the remote (both included). Connect power to the Smile Radio player
using the provided power supply.
Step 5 –
Once connected to power the Smile Radio
player will display a welcome screen and go
through an automatic set up process for a few moments. You should not press any buttons on the
remote while set-up is in process. Once connected to the Internet, music should start playing
automatically.
Adjust the volume to your liking by either using the remote, the volume on your stereo receiver, or
both. We recommend setting the Smile Radio player volume at about 75% and then using your
stereo volume control to adjust the sound level in the office.


