16
3N1
INSTALLATION
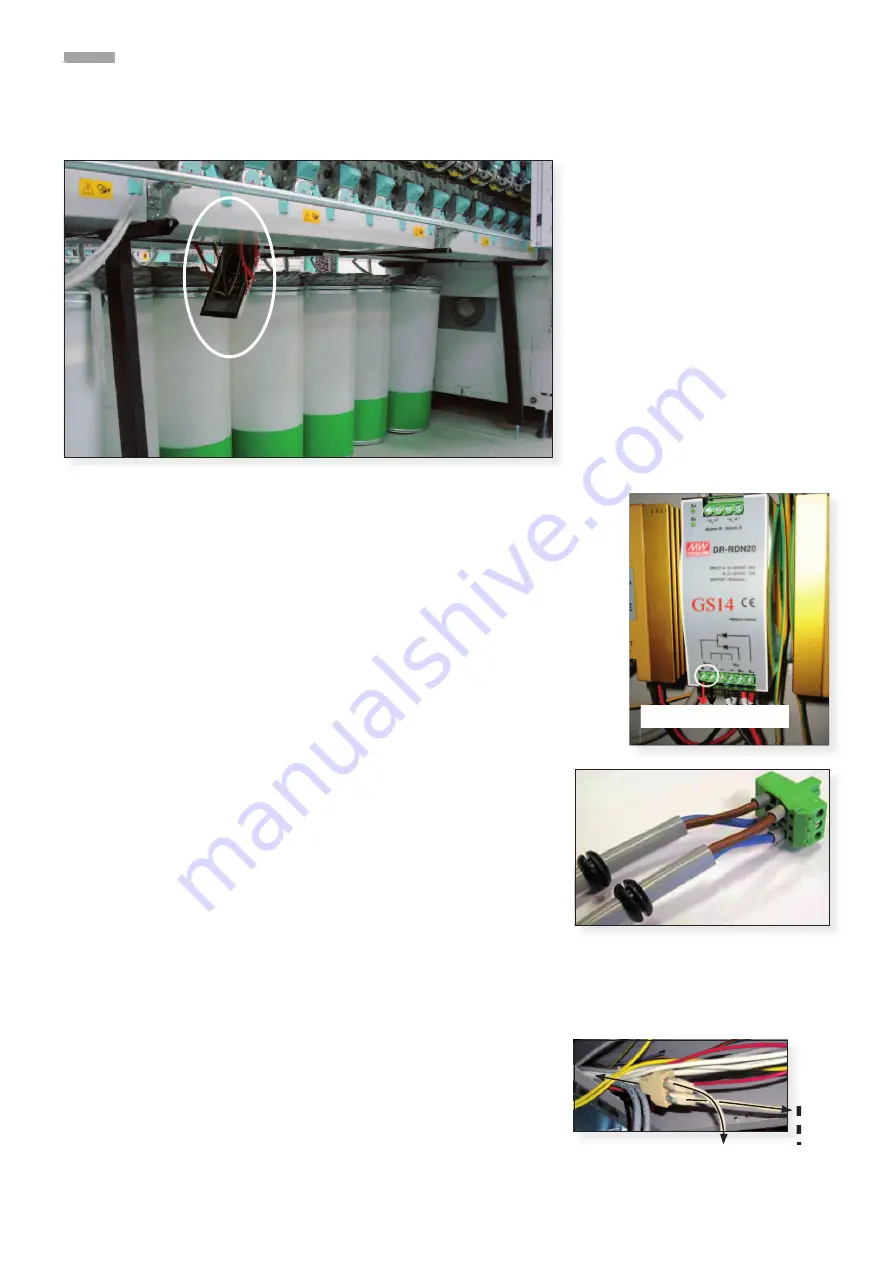
Location of the SE-Unit
Power for First Machine Module
Parts: 1 x power cable A500425, labels “+”, “–“, grommets
1. Connect the wires of one power cable to the power supply
GS14(SX) and label the wires:
– brown wire = positive (+)
– blue wire = negative (–)
2. Route the cable in the left cable channel to the first SE Unit
location.
3. Put a grommet over the cable near the connector.
Power for Subsequent Machine Modules
Parts: 1x power cable A500752 per SE -Unit, grommets
1. Put a grommet over both cable ends.
2. Connect the wires to the connector of the previous power
cable.
Match the wire colors.
3. Route the cable to the next SE-Unit location.
SE-bus
Parts per SE unit: 1x data cable A500426, 1x data cable
A5004281 and 1x T-junctions B338810.
1. Insert the SE-bus cable from the previous SE-Unit location
for the same side in a T- junction B338810. For the SE-Unit
in the first machine module, the cable A5005113 comes
from the SCU.
2. Plug the short cable A500426 at the other side of the T-
junction.
3. Plug the long cable A5004281 in the remaining T-junction
socket and route the cable to the next SE Unit location.
For the last SE-Unit location, no T-junction is used.
24Vdc line to first QB
A500426 to SE unit
A5004281
to next
SE unit
A5004281 to
previous SE unit
Machine Tail
Headstock
SE-Electronic
Summary of Contents for Savio FRS 3000
Page 1: ...YARNMASTER 3N1 46359003en Fitting Instruction Savio FRS 3000...
Page 2: ......
Page 4: ...4 3N1 INHALTSVERZEICHNIS...
Page 6: ......


