background image

6

lococookers.com

WARNINGS: LP TANK

LP TANK FILLING:

  •  Use only licensed and experienced dealers.

  •  LP dealer must purge tanks before filling.
  •  Dealer should NEVER fill LP tank more than 

80% of LP tank volume. Volume of propane 

in tanks will vary by temperature.

  •  A frosted regulator indicates gas overfill. 

Immediately close LP tank valve and call LP 

gas dealer for assistance.

  •  Do not release liquid propane (LP) gas 

into the atmosphere. This is a hazardous 

practice.

  •  To remove gas from an LP tank, contact an 

LP dealer or your local fire department for 

assistance.

LP TANK EXCHANGE:

  Many retailers that sell appliances offer you 

the option of replacing your empty LP tanks 

through an exchange service. Use only those 

reputable exchange companies that inspect, 

precision-fill, test and certify their cylinders. 

Exchange your tank for an OPD safety feature-

equipped tank as described under the “LP 

TANK” section of this manual.

  Always keep new and exchanged LP tanks 

in an upright position during use, transit or 

storage.

  Leak test new and exchanged LP tanks 

BEFORE connecting to the appliance.

LP TANK LEAK TEST:

  For your safety, a leak test must be repeated 

each time an LP tank is exchanged or refilled.

  •  Do not smoke during leak test.

  •  Do not use an open flame to check for gas 

leaks.

  •  LP tank must be leak tested outdoors in a 

well-ventilated area, away from open flames 

or sparks.

LP Tank Leak Test Procedure:

  •  Use a clean paint brush and a 50/50 soap 

and water solution.

  •  Use mild soap and water. 

Do not use 

household cleaning agents.

 Damage to 

gas train components can result.

  •  Brush soapy solution onto all metal seams 

and entire valve area. Any “GROWING” 

bubbles indicate a gas leak.

HOSE CHECK:

  Before each use, check for evidence of 

abrasion, wear, cuts or leaks. If so, the hose 

must be replaced prior to the appliance being 

put into operation. The replacement hose 

assembly must be the assembly specified by 

the manufacturer.

If “growing” bubbles appear, there is a 

leak. Do not use or move the LP tank. 

IMMEDIATELY get away from the LP tank 

and contact an LP gas supplier or your FIRE 

DEPARTMENT (911).

WARNING

Summary of Contents for LCTSK100

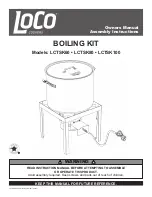
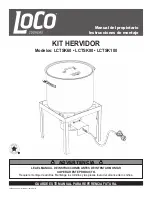
Page 1: ...FUTURE REFERENCE READ INSTRUCTION MANUAL BEFORE ATTEMPTING TO ASSEMBLE OR OPERATE THIS PRODUCT Adult assembly required Keep screws and parts out of reach of children BOILING KIT Models LCTSK60 LCTSK8...

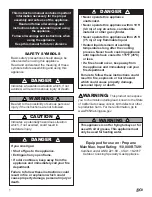
Page 2: ...keep away from the appliance and immediately call your fire department Failure to follow these instructions could result in fire explosion or burn hazard which could cause property damage personal inj...

Page 3: ...okers com TABLE OF CONTENTS Warnings Parts Diagram and Parts List Hardware Assembly Instructions Operating Instructions Care and Maintenance Troubleshooting Warranty Information 1 3 6 7 8 8 10 11 12 1...

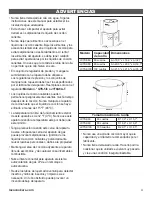
Page 4: ...ce When cooking always have a Type BC or ABC fire extinguisher readily available In the event of a fire do not attempt to extinguish with water Immediately call the fire department 911 A Type BC or AB...

Page 5: ...ature of this appliance is 32 F 0 C Never use this appliance when temperature is below this minimum Use caution when in close proximity to appliance Falling or tripping near the gas appliance may resu...

Page 6: ...tank inside a vehicle which may become overheated by the sun Dust Cap 5 When the appliance is not in use the gas must be turned off at the supply cylinder 6 Storage of an appliance indoors is permiss...

Page 7: ...LP tanks in an upright position during use transit or storage Leak test new and exchanged LP tanks BEFORE connecting to the appliance LP TANK LEAK TEST For your safety a leak test must be repeated ea...

Page 8: ...ng damaged or if replacement parts are needed customerservice lococookers com lococookers com Part Description Qty Part Description Qty 1 Twist DrainTM Twist SteamTM Basket 1 6 Heat Shield 1 2 Lid w L...

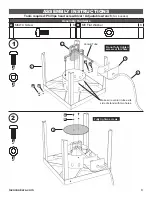
Page 9: ...rew 8 B M6 Flat Washer 8 Tools required Phillips head screwdriver Adjustable wrench Not included A x4 B x4 4 7 A B B A Venturi Tube Make sure venturi tube exits side of stand with two holes Do not ful...

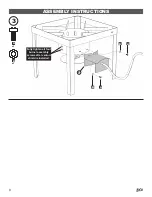
Page 10: ...9 ASSEMBLY INSTRUCTIONS 3 A x2 B x2 B A 9 Fully tighten all four burner assembly screws after venturi shield is installed B A...

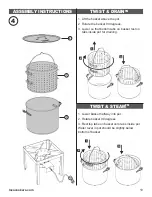
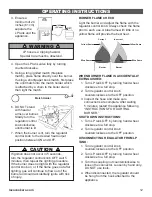
Page 11: ...ove the pot 2 Rotate the basket 90 degrees 3 Lower so that bottom tabs on basket rest on tabs inside pot for draining 1 Lower basket halfway into pot 2 Rotate basket 90 degrees 3 Rest top tabs on bask...

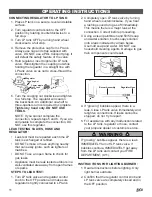
Page 12: ...ppliance must be leak tested outdoors in a well ventilated area away from open flames or sparks STEPS TO LEAK TEST 1 Turn LP tank valve and regulator control knob to the OFF position and make sure reg...

Page 13: ...se to the OFF position 3 Inspect the hose and make sure connections are complete After waiting 5 minutes restart the appliance following INSTRUCTIONS FOR LIGHTING BURNER SHUT DOWN INSTRUCTIONS 1 Turn...

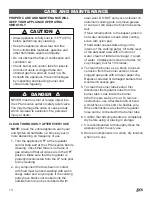
Page 14: ...the appliance prior to every use 8 Store all components in a clean dry location when not in use CAUTION Allow appliance to fully cool to 115 F 46 C before performing any cleaning Keep the appliance a...

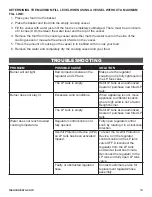
Page 15: ...d To reset the Overfill Protection Device turn the regulator control knob and the LP tank valve OFF Disconnect the regulator from the LP tank and wait at least one minute Reconnect the regulator to th...

Page 16: ...nted parts will be at the consumer s purchaser s expense Defects or damage caused by the use of other than genuine parts are not covered by this warranty This warranty shall be effective from the date...

Page 17: ...IA FUTURA LEA EL MANUAL DE INSTRUCCIONES ANTES DE INTENTAR MONTAR U OPERAR ESTE PRODUCTO Requiere montaje de adultos Mantenga los tornillos y las piezas fuera del alcance de los ni os KIT HERVIDOR Mod...

Page 18: ...arato y llame de inmediato a su departamento de bomberos El incumplimiento de estas instrucciones puede provocar incendios explosiones o quemaduras lo que puede causar da os a la propiedad lesiones pe...

Page 19: ...CE Advertencias Diagrama de piezas y lista de piezas Hardware Instrucciones de montaje Instrucciones de funcionamiento Cuidado y mantenimiento Resoluci n de problemas Informaci n de garant a 1 3 6 7 8...

Page 20: ...la influencia de dicho tipo de drogas Cuando cocine siempre tenga a mano un extintor de incendios tipo BC o ABC En caso de incendio no intente extinguirlo con agua Llame inmediatamente al departamento...

Page 21: ...ma de funcionamiento exterior de este aparato es de 32 F 0 C Nunca use este aparato cuando la temperatura est por debajo de este m nimo Tenga precauci n cuando est cerca del aparato Caerse o tropezars...

Page 22: ...cubierto o cualquier otra estructura Nunca deje un tanque LP dentro de un veh culo que pueda sobrecalentarse por el sol Tapa antipolvo 5 Cuando el aparato no est en uso el gas debe apagarse en el cil...

Page 23: ...cambiados en posici n vertical durante el uso tr nsito o almacenamiento Pruebe fugas en tanques LP nuevos e intercambiados ANTES de conectarlo al aparato PRUEBA DE FUGAS DE TANQUE LP Para su segurida...

Page 24: ...za si estuviese da ada o si necesita piezas de repuesto customerservice lococookers com lococookers com Pieza n Descripci n Cant Pieza n Descripci n Cant 1 Canasta Twist DrainTM Twist SteamTM 1 6 Blin...

Page 25: ...B Arandela plana M6 8 Herramientas necesarias Destornillador Phillips Llave ajustable no incluidos A x4 B x4 Tubo venturi Aseg rese de que el tubo venturi salga del lado de la base con dos agujeros No...

Page 26: ...9 B A 9 B A INSTRUCCIONES DE MONTAJE 3 A x2 B x2 Apriete completamente los cuatro tornillos del conjunto del quemador despu s de instalar el protector venturi...

Page 27: ...do que las pesta as inferiores de la canasta descansen sobre las pesta as dentro de la olla para drenar 1 Baje la canasta hasta la mitad de la olla 2 Gire la canasta 90 grados 3 Apoye las pesta as sup...

Page 28: ...abiertas o chispas PASOS PARA LA PRUEBA DE FUGAS 1 Gire la v lvula del tanque LP y la perilla de control del regulador a la posici n OFF apagado y aseg rese de que el regulador est bien conectado al t...

Page 29: ...ici n OFF apagado 3 Inspeccione la manguera y aseg rese de que las conexiones est n completas Despu s de esperar 5 minutos reinicie el aparato siguiendo las INSTRUCCIONES PARA ENCENDER EL QUEMADOR INS...

Page 30: ...ar a fondo el aparato antes de cada uso 8 Almacene todos los componentes en un lugar limpio y seco cuando no est en uso PRECAUCI N Deje que el aparato se enfr e completamente a 115 F 46 C antes de rea...

Page 31: ...do disparado Para restablecer el dispositivo de protecci n contra sobrellenado apague la perilla de control del regulador y la v lvula del tanque LP Desconecte el regulador del tanque LP y espere al m...

Page 32: ...zadas correr n a cargo del consumidor comprador Los defectos o da os causados por el uso de piezas que no sean originales no est n cubiertos por esta garant a Esta garant a entrar en vigencia a partir...

Reviews: