1
Service
(continued)
21
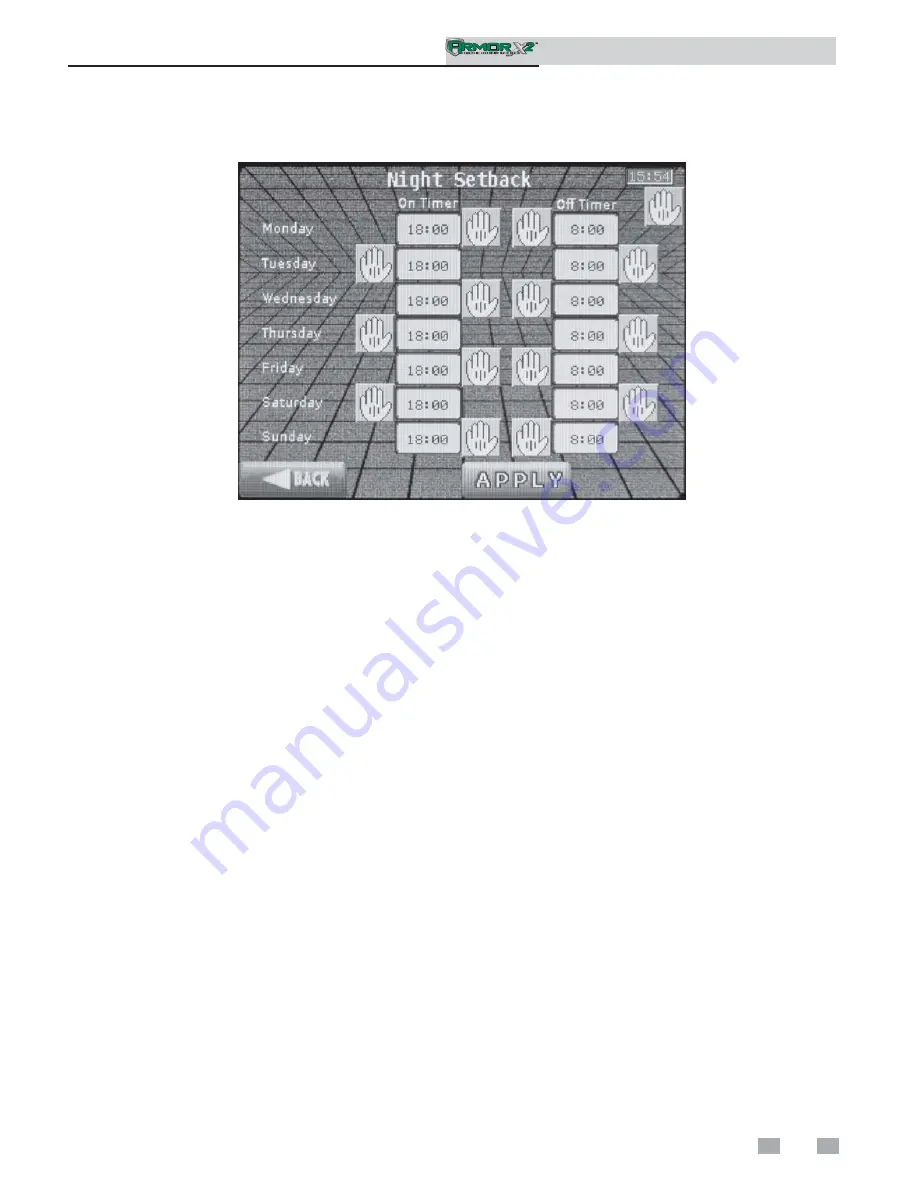
Night Setback Parameters Screen:
The Night Setback Screen allows access to 15 parameters.
Those parameters are as follows:
• Date and Time - The control uses an internal clock for the
night setback feature and for logging of events. For these
features to work correctly, the clock must be set when the
heater is first installed or any time the heater has been
powered off for more than 30 days.
To set the clock, press the SELECT button in the upper right-
hand corner of the display. The date and time are displayed
as “Day dd/mm/yy hh:mm”. Day = day of the week (1 =
Monday, 2 = Tuesday, etc.), dd = date, mm = month, yy =
year, hh = hour, mm = minutes (24 hours time; 2:30 PM =
14:30). Using the keypad, adjust the date and time by working
from left to right. If a digit has been entered incorrectly, press
the left arrow key on the keypad to back the digit up. If a
change is not necessary, press the BACK button to return to
the Parameter List Screen. Once the correct date and time
have been entered press the OK button on the display to
program the date and time into memory and return to the
Parameter List Screen.
The internal clock does not adjust for Daylight Savings Time
and therefore, will require a manual adjustment.
• On Timer and Off Timer - If the parameter night setback
set point is set to anything other than 32°F, the night
setback feature becomes active. This will require on and
off times to be programmed for the days that reduced
temperatures are required. Each day of the week
(Monday through Sunday) will have an on and off time.
Example:
Monday ON: 22:30, Tuesday OFF: 6:45. If you wish
to skip a day and no night setback is necessary, program the on
and off times the same and set them prior to 12:00 (noon). If
you wish to keep night setback active throughout an entire day,
program the on and off times the same and set them after 12:00
(noon). The default times for each day will be on at 18:00 and
off at 8:00.
To adjust the on and off times, select the parameter to be
adjusted by pressing the SELECT button next to the parameter.
Using the keypad, adjust the time by working from left to right.
If a digit has been entered incorrectly, press the left arrow key
on the keypad to back the digit up. If no change is necessary,
press the BACK button to return to the Parameter List Screen.
Once the correct time has been entered press the OK button on
the display to program the time into memory and return to the
Parameter List Screen.
Reference page 21 for information regarding NSB Set Point
Temp programming.
Apply
button - If changes have been made to the date and time
or to one of the on or off timers, the APPLY button must be
pressed to program the changes into the control module and
return to the Setup Screen.
Back
button - Pressing this button will back the screen up to the
previous screen.
Service Manual


