background image

GoMax Smart Vision Accelerator: User Manual

Using GoMax • 35

Configuring Network Settings

You configure network settings of GoMax from the

Networking

category in the

Manage

panel, on the

Manage

page. Thi category lets you do the following:

l

Set the GoMax unit's IP address.

l

Modify or view the ports that SDK applications should use for communication and control of the
accelerated sensors in the system.

Setting the IP Address

Before configuring anything else on the GoMax unit, you should ensure that its IP address does not
conflict with any other device (other GoMax units or Gocator sensors) on the sensor system. For more
information on this, see

Setting the IP Address

on page 16.

Configuring the GoMax Ports

When a GoMax unit is accelerating a sensor, you access the accelerated sensor not by its internal
IP address, but rather by accessing the IP address of the GoMax unit, on a port defined by GoMax.
Typically, you can leave the ports at their defaults: you only need to modify the ports if non-default
ports have been set

Furthermore, you can access the web interface of the accelerated sensors via the GoMax web interface,
so there is no need to remember the accelerated sensor's IP address.

In some situations, for example, if you need to adapt ports to an existing SDK application, you may need
to modify the ports. Otherwise, if you are in the process of developing an SDK application, you can
consult the port assignments for each accelerated sensor by clicking the accelerated sensors in the list of
accelerated sensors.

The

Port Settings

section only lets you define the port range GoMax can use to assign ports. GoMax

automatically assigns the Control, Upgrade, Health, Public, and Web ports for all accelerated sensors in
the defined range.

To set the port range:

1.

On the

Manage

page, under the

Sensor System

category, make sure that acceleration of all sensors is

stopped.

You can't set the port range while GoMax is accelerating any sensor.

2.

On the

Manage

page, under the

Networking

category, expand the

Port Settings

section.

Summary of Contents for GoMax Smart Vision Accelerator

Page 1: ...USER MANUAL GoMax Smart Vision Accelerator Firmware version 6 1 x xx Document revision A ...

Page 2: ...of this publication may be copied photocopied reproduced transmitted transcribed or reduced to any electronic medium or machine readable form without prior written consent of LMI Technologies Inc Trademarks and Restrictions GoMax and Gocator are registered trademarks of LMI Technologies Inc Any other company or product names mentioned herein may be trademarks of their respective owners Information...

Page 3: ...ing DIN Rail Clips 21 Mounting Directly to a Frame 21 Connecting GoMax to a Sensor System 22 Using GoMax 23 Accessing GoMax 24 Changing the Interface Language 26 Starting and Stopping Acceleration 27 Accessing Accelerated Sensors 29 Via a Web Browser 29 Via an SDK Application 30 Upgrading and Restoring GoMax 31 Monitoring GoMax Health Status 33 Configuring Network Settings 35 Setting the IP Addres...

Page 4: ...ncing overall inspection performance GoMax provides this compute power thanks to its NVIDIA Jetson TX2 s 256 core GPU and 64 bit quad core ARM processor all in a compact rugged case To accelerate sensors GoMax takes over a portion of the sensor s data processing data generation 3D measurement and control Relationship between GoMax right and a sensor left GoMax is ideal for accelerating one or more...

Page 5: ...atency will have an impact on performance GoMax can accelerate GDK tools in custom firmware with some limitations for details see Understanding How GDK Tools Work with GoMax on page 38 For information on developing GDK tools see the reference documentation and samples provided with the library This documentation describes how to connect and use a GoMax unit For information on using Gocator sensors...

Page 6: ... 1 Manage page Contains settings and controls in the Manage panel to start and stop acceleration change network settings and perform maintenance on the GoMax unit For more information see the Manage panel categories listed below 2 Dashboard page Provides monitoring of the GoMax unit s health For more information see Monitoring GoMax Health Status on page 33 3 CPU Load and Speed Provides important ...

Page 7: ...at the estimates are based on tests done using Gocator firmware 5 2 SR1 The following tables provide estimates of the scan rates of Gocator 3210 3506 and 3504 under different field of view and resolution settings For these estimates the following settings were used l Exposure was set to 4 milliseconds l No measurement tools added l Reduce Occlusion and Acquire Intensity were disabled l Uniform Spa...

Page 8: ...3 5 3504 14x18x7 0 006 0 15 2 0 13 3 Gocator 3210 3506 3504 Scan Rate Increase Factors The following table lists the running time of various measurement tools with and without GoMax as well as the performance increase factor when running with GoMax Note that although sensor models and job file configurations will affect running times the performance increase factor for tools should be consistent a...

Page 9: ...d sensor ground This voltage potential can be determined by measuring the voltage between Analog_out and system ground The maximum permissible voltage potential is 12 V but should be kept below 10 V to avoid damage to the serial and encoder connections Use the power supply provided with the unit If the power supply or cords get damaged contact LMI Technologies for a replacement Use care when handl...

Page 10: ...al Safety and Maintenance 10 l where water oil or chemicals may splash onto the unit l where static electricity is easily generated Ensure that ambient conditions are within specifications GoMax units are suitable for operation between 0 45 C ...

Page 11: ... Ethernet port Sensors can be connected to this port HDMI Mini HDMI port Reserved for future use Power Jack Accepts screw on connector from supplied power supply Air Intake Vent Intake for air flow Air Outlet Vent Outlet for air flow Opposite the intake vent not shown Serial Number Unique sensor serial number Mounting Holes Holes for mounting the GoMax unit using the provided DIN rail clips or mou...

Page 12: ...output you choose This allows simultaneous connections via an SDK application and a PLC letting you for example archive or display scan data on a PC while controlling equipment with a PLC GoMax does not support the PROFINET protocol Protocols available over Ethernet l Gocator l Modbus l EtherNet IP l ASCII For an overview of the Ethernet ports used by sensors see Required Ports in the user manual ...

Page 13: ...ady fully set up and configured For information on setting up a sensor system see the user manual of the sensors used in the system Follow the instructions in the following sections to install and perform the initial configuration of a GoMax unit Sensors you intend to accelerate using GoMax must be running firmware version 5 1 or higher ...

Page 14: ...Using a higher voltage power supply will damage the unit Take particular care not to use a Master 100 power supply with GoMax as the barrel connector is identical LMI recommends powering up the GoMax unit and performing the initial configuration of the GoMax unit before physically connecting the unit to the sensor system To connect power 1 Connect the power supply connector to the unit and hand ti...

Page 15: ...GoMax Smart Vision Accelerator User Manual Adding GoMax to a Sensor System 15 An LED indicator on the unit lights when power is applied The unit is ready for initial configuration setting an IP address ...

Page 16: ...t ports are set to 192 168 1 6 and 192 168 1 7 You should change the second port s IP address so that it is on a separate subnet such as 192 168 2 6 To set the IP address of a GoMax unit 1 Using an Ethernet cable first connect a computer directly to the ETH 1 port on the GoMax unit Only use the ETH 1 port when connecting a PC to the GoMax unit 2 On the computer launch an Internet browser and navig...

Page 17: ...Adding GoMax to a Sensor System 17 If you can t connect to the GoMax unit or if you don t know what the unit s IP address is follow the instructions in Discovering a GoMax IP Address on page 19 3 In the Manage panel click the Networking category ...

Page 18: ...erface 1 and or Interface 2 set the IP address and click Save The GoMax unit power cycles after you confirm you want to do this Changing network settings disconnects the GoMax unit and stops the acceleration of any accelerated sensors After the GoMax unit restarts its IP addresses are changed 5 Disconnect the laptop from the GoMax unit ...

Page 19: ...it follow the instructions below Make sure the GoMax unit is connected to your network or connect to it as shown in Setting the IP Address on page 16 To discover the IP address of a GoMax unit with Free IP Scanner 1 Launch the IP scanner by double clicking ipscan exe The application launches immediately The executable is not an installer 2 If User Account Control asks whether you want to allow the...

Page 20: ...r User Manual Adding GoMax to a Sensor System 20 The scanner lists the devices found in the range you specify 5 Make note of the GoMax unit s IP address in the list of discovered devices and use that address to connect to the unit ...

Page 21: ...oles with anti dust mesh should be at the bottom You can mount GoMax units to a DIN rail or directly to a frame For details on GoMax s mounting holes see GoMax on page 41 Using DIN Rail Clips LMI provides two DIN rail clips to mount GoMax on a DIN rail Note the recommended orientation smaller vent at the top in the following illustration Mounting Directly to a Frame You can also mount the GoMax un...

Page 22: ...h using an Ethernet cable and the ETH 1 or ETH 2 port on the GoMax unit PCs and PLCs must only be connected to the ETH 1 port over which these devices access the sensors You would typically only need to connect the sensors to ETH 2 using a separate switch and Ethernet cable if you need to isolate the sensors from the PC PLC for example to control visibility of the sensors over the network or adher...

Page 23: ...GoMax Smart Vision Accelerator User Manual 23 Using GoMax The following sections describe how to access and configure GoMax via its web interface how to start and stop sensor acceleration and more ...

Page 24: ...nsors If you are unable to connect to a GoMax unit see Discovering a GoMax IP Address on page 19 To access a GoMax unit 1 If the GoMax unit is not powered up connect the power supply to the GoMax unit For more information see Connecting Power on page 14 2 Connect a computer to the ETH 1 port using an Ethernet cable PCs and PLCs must only be connected to the ETH 1 port directly or via a switch Sens...

Page 25: ...System category is preselected in the Manage panel If necessary you can set the ports GoMax uses for the accelerated sensors for more information see Configuring Network Settings on page 35 You are now ready to start accelerating sensors for more information see Starting and Stopping Acceleration on page 27 ...

Page 26: ...atus bar at the bottom of the interface lets you change the language of the interface To change the language 1 Click the language button at the bottom of the web interface 2 Choose a language from the list The interface reloads on the page you were working in displaying the page using the language you chose The sensor state is preserved ...

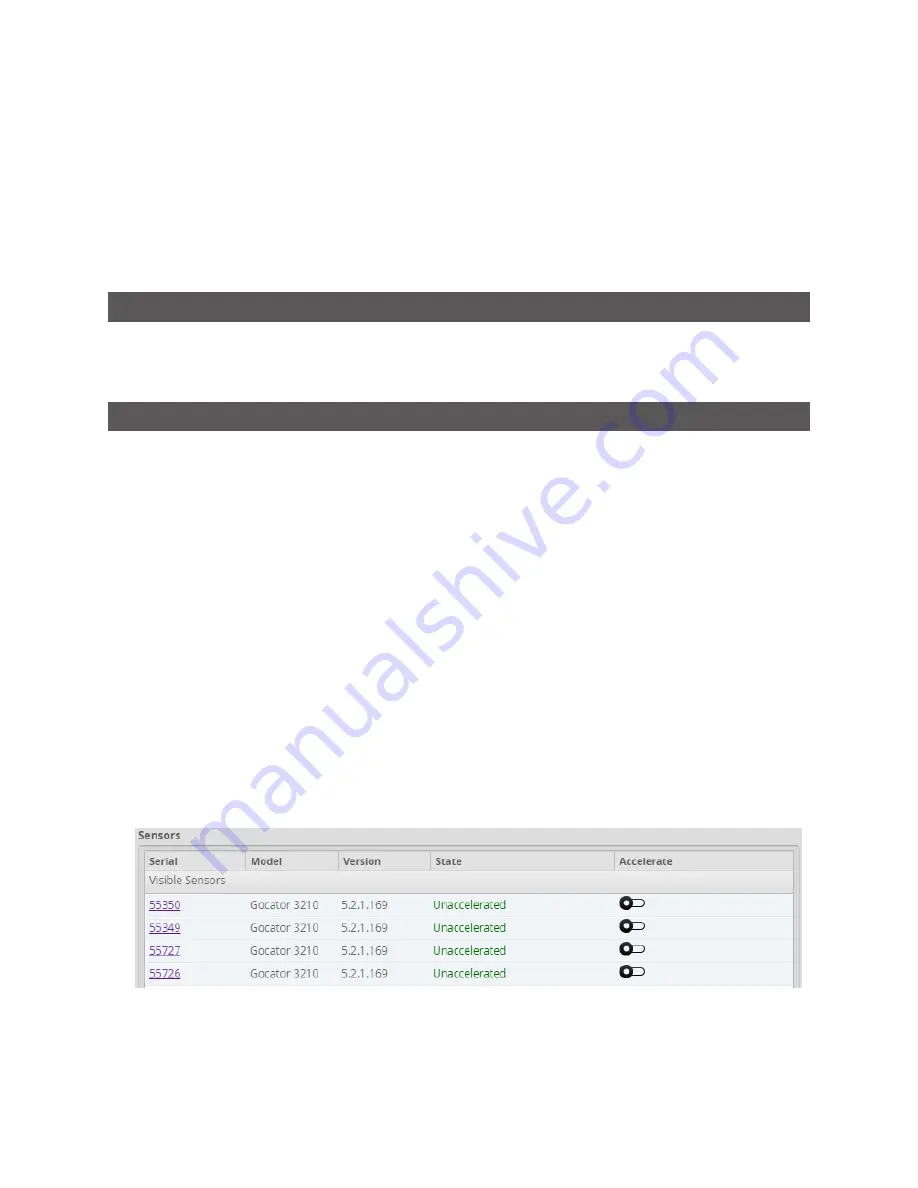
Page 27: ...upgrading or changing the firmware of a Gocator sensor see the user manual of that sensor GoMax can accelerate multi sensor buddied systems However only the Main sensor is displayed in the list of sensors that you can accelerate To accelerate a sensor 1 Using a web browser connect to the GoMax unit using its IP address 2 In the Manage page under Sensors in the Visible Sensors list click the toggle...

Page 28: ...GoMax Smart Vision Accelerator User Manual Using GoMax 28 The sensor is no longer accelerated To access the sensor use the IP address as defined in the sensor s networking settings ...

Page 29: ... accelerated you can access it via the IP address of the GoMax unit and a port defined by GoMax which are listed in the Port Settings section in the Networking category on the Manage page for more information on this see Configuring Network Settings on page 35 However the easiest way to access a sensor is via the GoMax interface To access a sensor via the GoMax interface 1 Using a web browser conn...

Page 30: ...SDK applications built using version 5 1 of the SDK or later you only need the serial number of an accelerated sensor to access it In SDK applications built using SDK versions before 5 1 you must specify the port used to access the sensor for information on setting and viewing the port settings in GoMax see Configuring Network Settings on page 35 For more information on accessing accelerated senso...

Page 31: ... Maintenance category GoMax firmware is available from the LMI Download Center https downloads lmi3d com The GoMax firmware and the sensor firmware must match in order for you to be able to accelerate a sensor Upgrading the GoMax unit or performing a factory restore stops acceleration To upgrade sensor firmware you must do so from the Maintenance category of the sensor s web interface Do NOT disco...

Page 32: ...he File dialog and then click open 4 Wait for the upgrade to complete After the firmware upgrade is complete the GoMax unit will restart To restore the GoMax unit 1 Go to the Manage page and click the Maintenance category 2 Click Factory Restore in the Factory Restore section The GoMax unit is restored to factory defaults ...

Page 33: ... 100 when only one of the six cores is at 100 usage Memory Usage The amount of memory used by the GoMax unit MB used MB total available User Storage Usage The amount of user storage used on the GoMax unit MB used MB total available System Storage Usage The amount of system storage used on the GoMax unit MB used MB total available Ethernet Link Speed Speed of the Ethernet link between GoMax and the...

Page 34: ...GoMax Smart Vision Accelerator User Manual Using GoMax 34 Name Description sensor or hub Internal Temperature Internal temperature of the GoMax unit ...

Page 35: ...y you can leave the ports at their defaults you only need to modify the ports if non default ports have been set Furthermore you can access the web interface of the accelerated sensors via the GoMax web interface so there is no need to remember the accelerated sensor s IP address In some situations for example if you need to adapt ports to an existing SDK application you may need to modify the por...

Page 36: ...g GoMax 36 3 In the Start and End fields type the start and end ports of the range 4 Click Save GoMax will now assign ports using the defined range Make sure to leave a range sufficiently large to accommodate all the sensors you intend to accelerate ...

Page 37: ...the following situations l The GoMax unit is power cycled or otherwise loses power l If an accelerated sensor is disconnected If the GoMax unit is accelerating multiple sensors it will re accelerate the sensors one at a time in the order that they appear in the web interface For this reason allow enough time for a sensor in the system to be accelerated before trying to access it ...

Page 38: ...ee of acceleration available l Third party tools and libraries are not supported unless they compile for ARM8 and can be statically linked into the firmware These limitations will be removed soon in future releases of the GoMax firmware Custom firmware is uploaded via the upgrade functionality in the GoMax web interface in the same way as standard firmware is For information on upgrading the GoMax...

Page 39: ...ator LED should illuminate when it is powered l Check that the client computer s network settings are properly configured l Use IP scanning software to verify the IP address of the GoMax unit For more information see Discovering a GoMax IP Address on page 19 Performance The CPU level is near 100 l Consider reducing the speed If you are using a time or encoder trigger source consider reducing the s...

Page 40: ...n TX2 CPU 64 bit Quad ARM A57 2 GHz plus 64 bit Dual Denver 2 2 GHz GPU NVIDIA Pascal 256 CUDA cores Memory 8 GB 128 bit LPDDR4 IO ports 1x USB3 1x HDMI 2x GigE 1x USB2 Dimensions mm 120x105x43 5 Weight kg 0 7 Operating Temperature 0 45 degrees Celsius The HDMI and USB ports are reserved for future use ...

Page 41: ...GoMax Smart Vision Accelerator User Manual Specifications 41 GoMax ...

Page 42: ...signated LMI location Please ensure that the RMA number is clearly written on the outside of the package Inside the return shipment include the address you wish the shipment returned to the name email and telephone number of a technical contact should we need to discuss this repair and details of the nature of the malfunction For non warranty repairs a purchase order for the repair charges must ac...

Page 43: ...ons The above copyright notice and this permission notice shall be included in all copies or substantial portions of the Software THE SOFTWARE IS PROVIDED AS IS WITHOUT WARRANTY OF ANY KIND EXPRESS OR IMPLIED INCLUDING BUT NOT LIMITED TO THE WARRANTIES OF MERCHANTABILITY FITNESS FOR A PARTICULAR PURPOSE AND NONINFRINGEMENT IN NO EVENT SHALL THE AUTHORS OR COPYRIGHT HOLDERS BE LIABLE FOR ANY CLAIM ...

Page 44: ...n no initial hash supplied API rewrite by Lauris Bukis Haberkorns jQuery mouseWheel Website http brandonaaron net License Copyright c 2010 Brandon Aaron Licensed under the MIT License http www opensource org licenses mit license php jQuery scaling Website http eric garside name License Scaling 1 0 Scale any page element Copyright c 2009 Eric Garside Licensed under the MIT License http www opensour...

Page 45: ...ccelerator User Manual Software Licenses 45 Licensed under the MIT License http www opensource org licenses mit license php node Website https github com nodejs node License https github com nodejs node blob master LICENSE ...

Page 46: ...information below Response times for phone or email support requests are longer than requests submitted through the Help Desk North America Phone 1 604 636 1011 Fax 1 604 516 8368 Email support lmi3d com Europe Phone 31 45 850 7000 Fax 31 45 574 2500 Email support lmi3d com For more information on safety and laser classifications please contact U S Food and Drug Administration Center for Devices a...

Page 47: ...hnologies Head Office Burnaby Canada 1 604 636 1011 LMI Technologies GmbH Berlin Germany 49 0 3328 9360 0 LMI Shanghai Trading Co Ltd Shanghai China 86 21 5441 0711 LMI Technologies has sales offices and distributors worldwide All contact information is listed at lmi3D com contact locations ...

Reviews: