background image

 10 

BASIC NOTES ON ASSEMBLY AND INSTALLATION: 


 

Assembly and installation should be done by trained personnel. 

 

IMPORTANT SAFETY CONSIDERATIONS: For proper installation of the awning, the instructions for 
assembly and installation must be carefully followed step by step.  Keep  plastic bags or any other 
mounting pieces out of children’s reach. 

 

Do not alter the design or the configuration of the system, nor modify the installation method 
without consulting the manufacturer or an authorised representative. 

 

If the awning is motorised and there is a switch, this should be placed so that the user does not 
interfere with the movement of the awning, and at a height of less than 1.3 metres when possi-
ble. 

 

If the awning is manually operated, it should be accessible at a height of 1.8 metres. 

 

If the awning is to be installed in windy areas where there are frequent blackouts, manual opera-
tion or the use of a back-up generator is recommended. 

 

When motorised units are inspected or repaired, always disconnect them from the power supply. 

BASIC PRECAUTIONS FOR SAFE HANDLING OF THE AWNING:


 

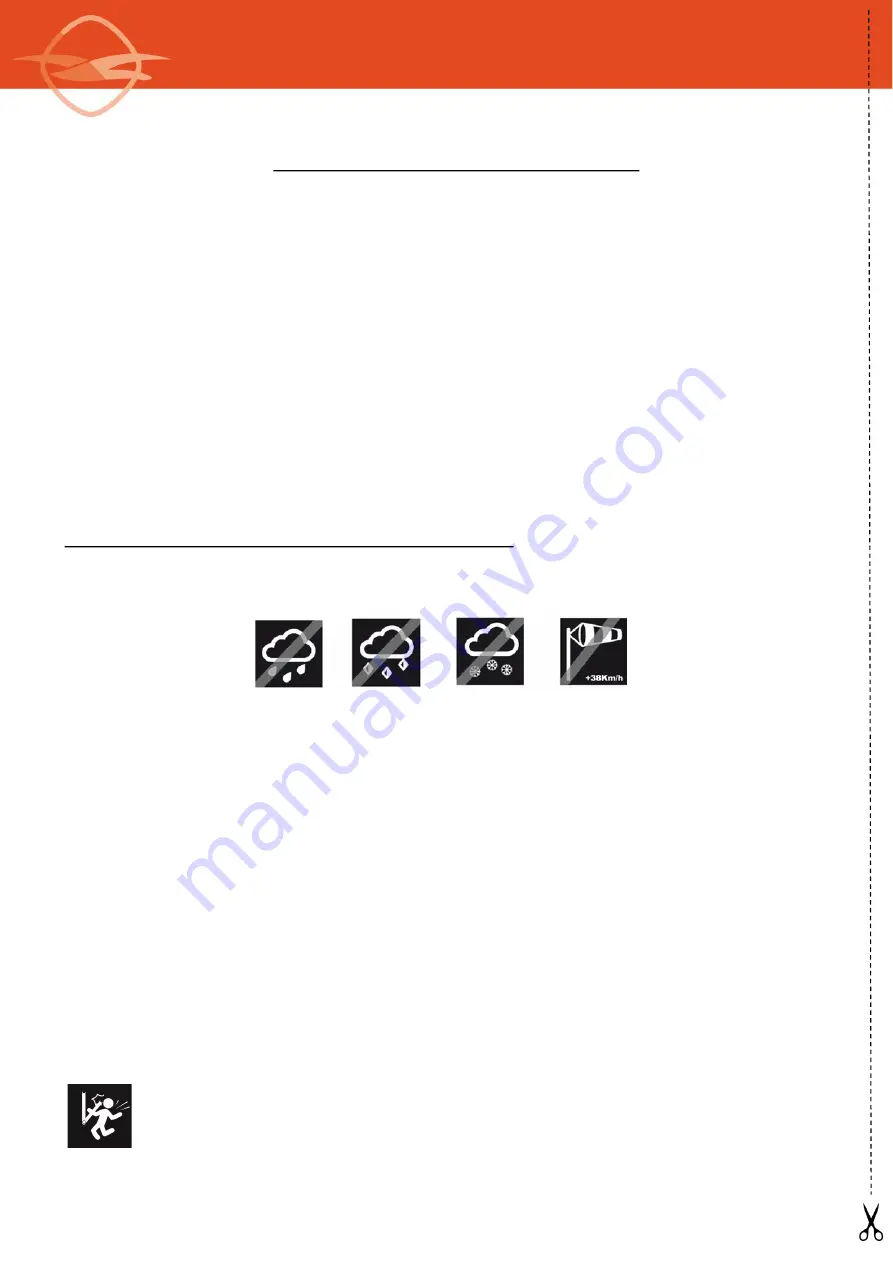
The awning must be rolled away: 

 


 

I

n the event of ice, if operation is particularly difficult and in the absence of safety measures, 

stop the operation until more favorable conditions prevail 

 

During  opening  and  closing,  make  sure  there  is  no  obstacle  which  could  get  in  the  way. NEVER 
FORCE THE AWNING!. If the awning does not move at all when you try to operate it, call a profes-
sional installer. 

 

In the case of motorized awnings, it should be borne in mind that the motor features a thermal 
safety device to avoid overheating and breakdowns. This device is activated when the operating 
switches are pressed insistently. 

 

Do not submit the installation to additional loads or stresses not covered by the manufacturer’s 

 

configuration. Do not interfere with the system’s fixing components. 

 

Examine  the  installation  if  it  has  been  subjected  to  adverse  weather  conditions,  and  if  any 
repairs are needed do not use it. In such cases, a professional installer should be called. 

 

Keep  the  installation  clean  and  in  good  condition.  A  yearly maintenance  check  by  an  au-
thorized professional installer is recommended. 


IMPORTANT SAFETY INSTRUCTIONS. The system has powerful  springs inside it. In the event 
of  poor installation, these may cause the awning to open sharply. If any irregularities are ob-
served  during  opening  and/or  closing,  call  a  professional  installer.  To  avoid  possible  dam-
age, do not allow children to play with the awning.


COMPLET-PRO 350 

Summary of Contents for COMPLET-PRO 350

Page 1: ...1 COMPLET PRO 350 Manual de instalaci n Installation manual Fecha Date 13 diciembre 2016 13th December 2016 REF 45098059000 REV 1...

Page 2: ...ass by N of cicles Manivela Crank Motorizado Motorized Atenci n tensi n brazos Danger Strong arm tension ART 250 Splendor 300 ART 350 Splendor 400 Onyx WIN ART 500 Barra de carga EVO EVO front profile...

Page 3: ...3 3 Despiece del producto Product parts 4 Nomenclatura Nomenclature COMPLET PRO 350...

Page 4: ...acotadas Section dimensions COMPLET PRO 350 6 Tablas de selecci n motor Selecction motor table Salida Projection m 2 00 2 50 3 00 3 50 T de enrolle Rolling tube 70mm 50 Nm T de enrolle Rolling tube 80...

Page 5: ...PERFIL DE CARGA NEVER EXTRACT THE SAFETY TENSION BANDS UNTIL THE ARM HAS BEEN FIXED TO THE FRONT PROFILE COMPLET PRO 350 7 Clasificaci n seg n norma Europea Classification according to European stand...

Page 6: ...nea total m quina interior o motor Total width for interior gearbox or motor L L nea total m quina exterior Total width for exterior gearbox L 7 1 L nea Width 6 1 Herramientas y accesorios recomendad...

Page 7: ...ta del Brazo Be careful when opening the arm bracket attachment Colocaci n maquina exterior Exterior gearbox position Taladrar previamente los alojamientos Pre drill holes Colocaci n maquina motor int...

Page 8: ...tar el tornillo lateral del soporte para dejar bien fijada la tapeta del brazo Tighten the side screw of the bra cket to secure the arm cap 1 2 4 INSTRUCCIONES DE REGULACI N REGULATION INSTRUCTIONS CO...

Page 9: ...m bracket attachment by fastening the side screw Regulaci n del paralelismo del brazo a trav s del esparrago roscado interno Adjust the parallelism of the arm through the internal threaded shaft INSTR...

Page 10: ...rly difficult and in the absence of safety measures stop the operation until more favorable conditions prevail During opening and closing make sure there is no obstacle which could get in the way NEVE...

Page 11: ...te dif cil y en ausencia de dispositivos de seguridad dete ner la maniobra hasta que se restablezcan unas condiciones m s favorables Durante las maniobras de apertura o cierre verificar que no exista...

Page 12: ...WORLD S A Tramuntana 1 Pol Ind Roques Roges 43460 ALCOVER Tel 34 990 600 Fax 34 977 990610 e mail info llaza com Export llaza com Versi n PDF impreso en papel reciclado PDF version printed on recycle...

Reviews: