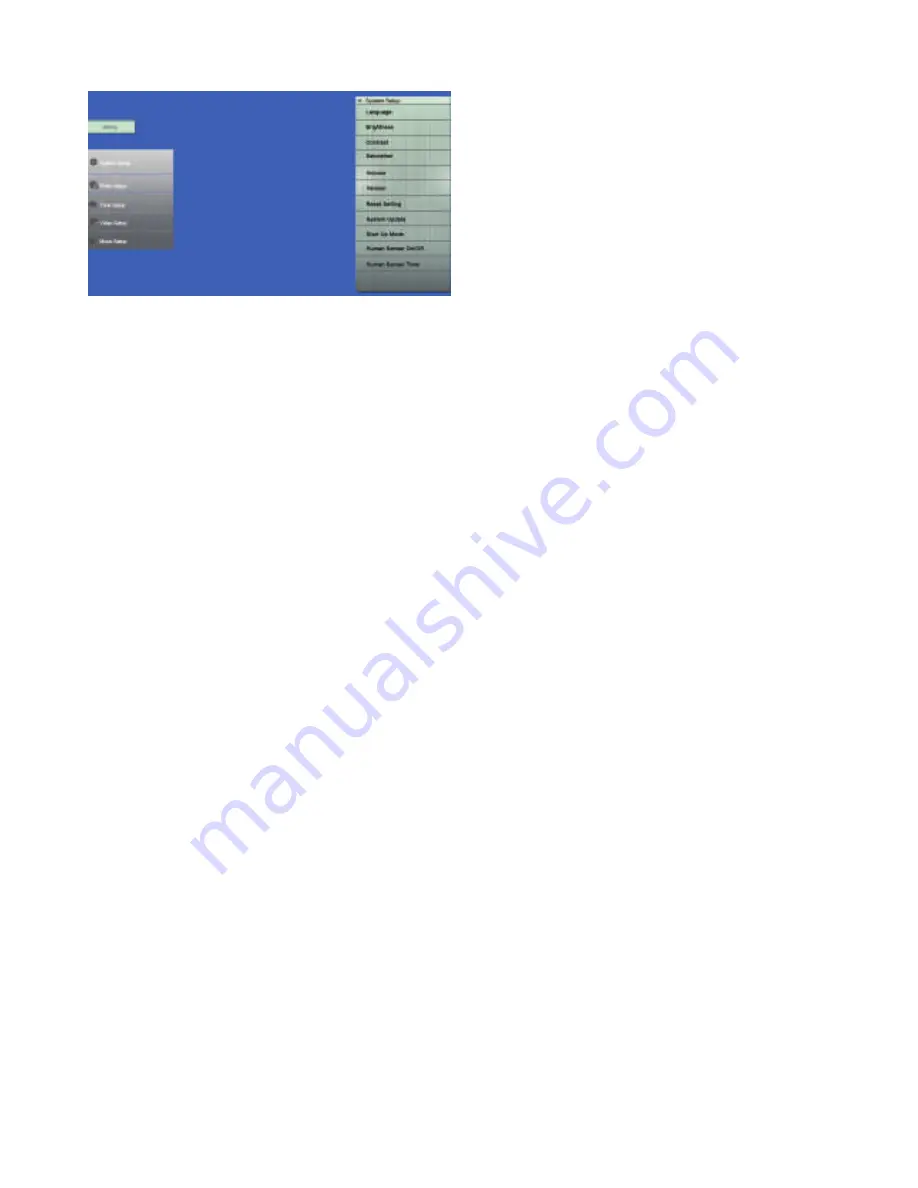
Living Images 10.1

11

12.Setup

In the main menu, Highlight 

Setting


from main menu, press 

OK

 to access 

to Setup interface. Use 



 to select

the item you want to set up. Press 

OK


to show the sub menu, select items 

with



, then press 

OK

 to confirm.

12.1 System Setup

12.1.1 Language: English and other language for selection, press 

OK

 to confirm. 

12.1.2 Brightness: Use 



 to select from 01 (lowest) to 10 (highest), press 

OK

 to confirm. 

12.1.3 Contrast: Use 



to select from 01 (lowest) to 10 (highest), press 

OK

 to confirm. 

12.1.4 Saturation: Use 



 to select from 01 (lowest) to 10 (highest), press 

OK

 to confirm. 

12.1.5 Volume: Use 



to select from 01 (lowest) to 10 (highest), press 

OK

 to confirm. 

12.1.6 Version: Check version, press 

OK

 to confirm. 

12.1.7 Reset Setting: Press 

OK

 to confirm, press 

OK

 to confirm. 

12.1.8 System Upgrade: 

Press 

OK

 to Start FW upgrade.(Need to use Firmware)

12.1.9 Start Up mode: Video+photo, Photo+video,Video, Calendar, Main menu, Photo, 

           Music, press 

OK

 to confirm.

12.2 Photo Setup

12.2.1 Background Music: Press



to choose on/off, press 

OK

 to confirm. 

12.2.2 Display Ratio: Fit to screen, Crop to fill, full screen, press 

OK

 to confirm. 

12.2.3 Slideshow Speed: 3/5/10/15 /30 seconds, 1/15 minutes, press 

OK

 to confirm. 

12.2.4 Slideshow effect: Circle rotation, Open horizontal, Heart expand, Move out, Zoom in 

           Fade in, Zoom out, Random, press OK to confirm. 

12.2.5 Slide Mode: Single /Two/Three /Four windows, press 

OK

 to confirm. 

12.2.6 Photo Play Sequence: Sequence , Random, press 

OK

 to confirm.

12.3 Time Setup

12.3.1 Date: Press 

OK

, then use



to select setup items, then use



to set Year, Month, 

           Day, press 

OK

 to confirm. 

12.3.2 Set Time format: 12/24 hour, Press



to set, use 

OK

 to confirm. 

12.3.3 Clock: Press 

OK

, press



to select setup items, then use



to set Hour, Min, 

           Second, press 

OK

 to confirm. 

12.3.4 Alarm Status: press 



to choose on/off, press 

OK

 to confirm. 

12.3.5 Alarm Time: Press 

OK

, press



to select setup items, then use



To set Hour, 

           Min, press 

OK

 to confirm. 

12.3.6 Alarm Tone: press 



to choose Alarm 1 2 or 3, press 

OK

 to confirm. 

12.3.7 Alarm Frequency: Once, Everyday, Mon. to Fri., Weekend, press 

OK

 to confirm. 

12.3.8 Auto Power On

Press 

OK

, then use



to select setup items, then use



to set 

           Hour, Min, ON/OFF, press 

OK

 to confirm. 

Summary of Contents for 10.1" HD Memory View

Page 1: ...10 1 HD Memory View Instruction Manual...

Page 2: ...to Frame will void your warranty Cautions Cleaning the LCD Screen Treat the screen carefully Because the screen of the Digital Photo Frame is made of glass and it would easily be broken or scratched I...

Page 3: ...ory card SD MMC MS 5 USB connection USB 2 0 and Mini USB 6 Built in 4GB memory for file storage 7 Support viewing pictures in thumbnail mode 8 Built in clock alarm and calendar with slideshow window 9...

Page 4: ...ry 6 5 Getting Started 6 6 Operating Instruction 6 6 1 Card and USB 7 6 2 Main Menu 7 7 Photo Mode 7 8 Music Mode 9 9 Video Mode 10 10 Calendar 10 11 File 10 11 1 Copy Delete Function 10 12 Setup 11 1...

Page 5: ...Adapter Instruction Manual Remote Control USB to Mini USB cable SETUP ENTER PHOTO MUSIC MOVIE MENU CALE NDAR ROTATE VOL VOL 2 Product Overview Main Unit 1 1 Remote window 2 SD MMC MS 3 Earphone jack 4...

Page 6: ...o directly to calendar mode Functional selection button from right to left cursor ENTER Press to confirm Play pause Functional selection button from left to right cursor VOL Turn up the volume Functio...

Page 7: ...pressing the Power button on the remote control 6 Operating Instruction 6 Installing Replacing the Battery If you need a new battery please refer to the following Place the upside of the remote contr...

Page 8: ...supports SD SDHC MMC MS and USB 2 0 After inserting a card or USB device slideshow will play automatically then press RETURN twice to access to main menu Photo Music Video Calendar File Setting Note M...

Page 9: ...re g Copy function i Return to thumbnail mode a b c d e f g h i Note The slide show is with background music if there is any music files you can enter the Photo menu by pressing the Setup button to se...

Page 10: ...ory and delete files in the built in memory and cards 8 Music Mode In the main menu Highlight Music press OK to access the music mode or press MUSIC directly on the remote control The first music will...

Page 11: ...he main menu highlight Calendar press OK to enter use to show the the last next month of the calendar use to scroll the previous next year of the calendar 11 File In the main menu highlight File then...

Page 12: ...o choose on off press OK to confirm 12 2 2 Display Ratio Fit to screen Crop to fill full screen press OK to confirm 12 2 3 Slideshow Speed 3 5 10 15 30 seconds 1 15 minutes press OK to confirm 12 2 4...

Page 13: ...shed the copy delete operation IMPORTANT Never disconnect the USB cable while files are transferring Doing so may damage your DPF 14 Technical Specifications Adapter Input AC 100 240V 50 60HZ 500mA Ou...

Page 14: ...half a year in normal conditions Replace with new battery if necessary Can not read the CARD or USB Please confirm whether there is storage in the card or USB device Empty devices cannot be read Can n...

Reviews: