OPERATION
BATTERIES
TROUBLESHOOTING
Belt Clip Locking
Release Clip
(3) AAA Batteries
Per Walkie Talkie
Battery Door
Screw Location
To install the batteries release the belt clip locking clip and slide the belt clip
vertically off the back of the walkie talkie body. Remove the battery
compartment screw and lift the battery door off. Insert (3) AAA batteries as
shown in illustration. Replace battery door and secure with screw. Replace
belt clip and ensure it’s secure.
If you are not receiving a message:
make sure both walkie talkies are
switched on and the your not holding the Talk Button while waiting for a
message to be heard. If this doesn’t work check the batteries. They must be
properly installed and in good working order.
If a message is fading or you hear interference:
make sure the antenna is
pointing up. Don’t get to close to buildings or large structures. Power lines can
also cause interference. Move closer if your out of range. Keep the walkie
talkie 1.5 - 2 inches from your mouth and speak in at a normal volume.
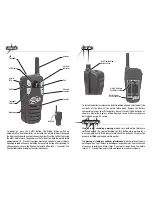
To power on press the On/Off Button. The Walkie Talkies switch on
automatically when the batteries are installed. The walkie talkie will beep and
the display will show the current channel number. Press the Call Button to ring
the other walkie talkie. To speak press the Talk Button. Hold the walkie talkie
approximately 1.5 - 2 inches from your mouth and speak at a normal volume.
Speaking to loud will cause distortion. Release Talk Button after speaking. To
change channels press the Channel Selector Button for 2 - 3 seconds. The
Channel Indicator will display the selected channel.
Belt Clip
LED
Flashlight
LCD Display
Push to
Talk
On/Off
Flashlight
On/Off
Microphone
Antenna
Channel
Indicator
Call
Channel
Selector
Speaker


