7
English
NOTE:
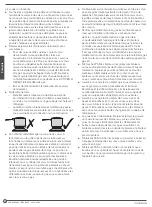
Make sure the gas supply pipe cannot contact
any moving parts after installed. Be sure all openings
in the cabinet around the gas line are sealed at time of
installation.
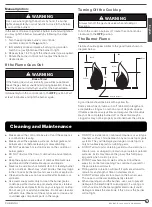
3. Place the cooktop into the cutout and verify that the
cooktop is level from side to side and front to rear. Press
on the cooktop edges to seal.
If installed with a Furrion range oven, refer to the separate
range oven instruction manual about the cabinet
constructions and range oven installation instructions.
Gas Connection
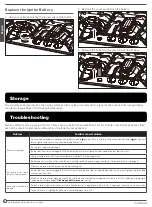
Connect the cooktop to a designated gas supply line from
the RV main gas line which runs externally under the RV floor.
Do not use an existing gas connection inside the RV to supply
two appliances.
This cooktop can be used with Propane Gas only.
This cooktop is fitted with a gas supply hose with a 3/8"
female flare fitting with a 5/8"- 18UNF thread connection.
For installation use copper pipe and CSA or UL certified
connectors which conform to USA and Canadian safety
standards.
Ensure when cooktop is installed the flexible gas supply hose
cannot touch any moving parts. Make sure adequate space is
available so the supply pipe will not be bent or damage after
installation.
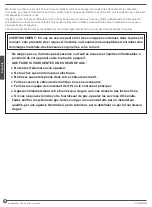
Leak Check
WARNING
FIRE OR EXPLOSION
●
Extinguish all open flames.
●
NEVER leak test when smoking. Never use a flame.
●
Do not use the appliance until connection has been leak
tested and does not leak.
●
Pressure/Leak test using 11-13.8 WC pressure.
WARNING
●
Gas leaks may occur in your system and result in
a dangerous situation. Always perform a leak test
for possible leaks according to the manufacturer’s
instructions after installation and before any operation.
●
Gas leaks may not be detected by smell alone. Gas
suppliers recommend you purchase and install a UL
approved gas detector.
1. Make sure all control knobs are in the
OFF
position.
2. Apply a gas leak detection liquid to the connections.
Any
gas leaks will be indicated by bubbles.
3. If a gas leak is detected, tighten the loose joint, or replace
the faulty part with a replacement part recommended by
Furrion authourized retailer.
Using your Cooktop
WARNING
●
Keep your arms and face away from being directly
above the cooking area while in operating the appliance.
●
Do not attempt to light more than one burner at a time.
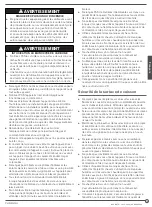
Ignition Button
Cooktop Control Knob
Lighting the Cooktop
Before Ensure all the cooktop knobs are turned to
OFF
position. Check the gas supply valve at the gas tank is in
OPEN
position.
Standard Ignition:
1. Push and turn the desired cooktop knob
counterclockwise to position.
2. Keep the cooktop control knob being pushed in and press
the ignition button repeatedly until the burner is lit.
3. Keep the cooktop knob being pushed in for 10-15 seconds
until the flame steady to disable the safety cut off.
4. Turn the control knob clockwise or counterclockwise
to the desired heat level. For simmer function, turn the
control knob to the lowest setting.
5. Repeat steps 1 to 4 to light the other burner(s).
NOTES:
●
This cooktop is fitted with a burner safety cut off, if a flame
is not present, the gas supply will shut off automatically.
●
If no spark is present when pressing the igniter, check or
replace the AA battery by unscrewing the igniter cover.
Never attempt to operate the appliance with battery
power exhausted.
If the burner does not ignite
This cooktop is fitted with a burner safety cut off, if a flame
is not present, the gas supply will shut off automatically.
In the event of failure to light the burner within 5 seconds,
immediately turn the control knob clockwise to the
OFF
position. Wait at least 5 minutes and repeat the igniting
procedure. If ignition still not occur, use a gas lighter or a
match to light the burner. Refer to the ‘
Manual Ignition
’
section.
CCD-0005583 | REV DATE: 10.14.2022


