– –
– –
22
23
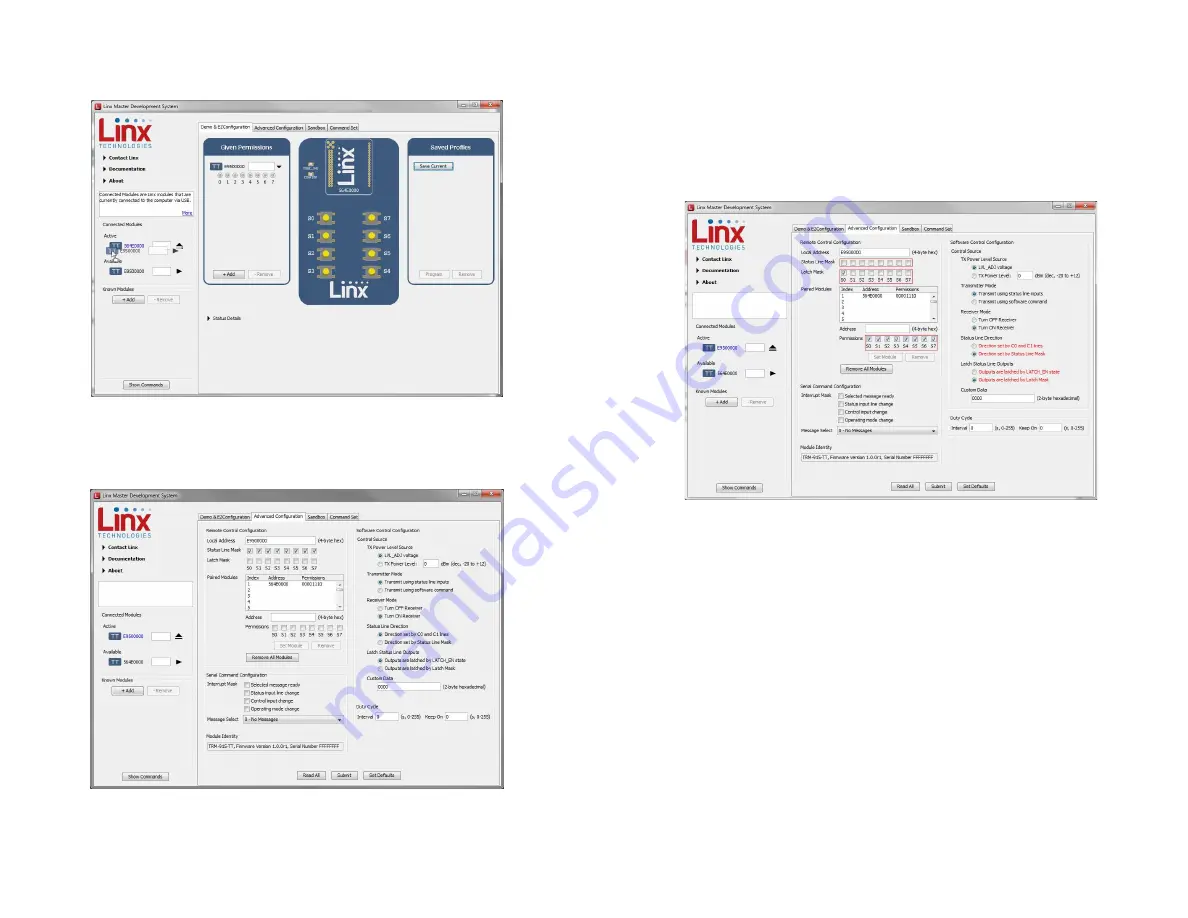
Changing the active module is accomplished by dragging a module from
the Available list to the Active spot, as shown in Figure 25.
With the new module active, drag the original module to the Given
Permissions window. Click on the Advanced Configuration tab (Figure 26).
Figure 25: The Master Development System Software Changing the Active Module
Figure 26: The Master Development System Software Advanced Configuration
This tab shows the advanced configurations enabled by the module’s
Command Data Interface. Any changes are highlighted in red. In the
example in Figure 27 the output mask has been changed to all inputs, S0 is
latched, the Paired module is given full permissions, the status line direction
is set by the mask and the outputs are latched by the Latch Mask. Clicking
the Set Module button sets the updated Permissions Mask. Clicking the
Submit button writes all of the changes to the module’s memory.
This configuration changes the module to have all outputs. This is shown
by clicking on the Demo & EZConfiguration tab Figure 28.
Figure 27: The Master Development System Software Advanced Configuration with Changes


