background image


1


SAFETY INSTRUCTIONS 


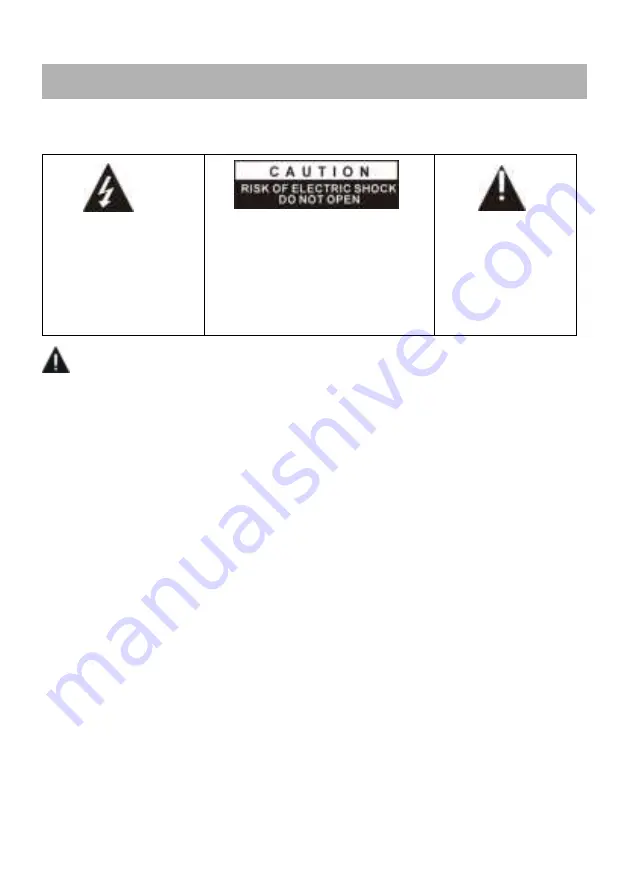
The lightning flash and 

arrow head within the 

triangle is a warning 

sign alerting you of 

“dangerous voltage” 

inside the product. 


CAUTION: TO REDUCE THE RISK 

OF ELECTRIC SHOCK. DO NOT 

REMOVE COVER (OR BACK). 

NO USER SERVICEABLE PARTS 

INSIDE. REFER SERVICING TO 

QUALIFIED SERVICE PERSONNEL. 


The exclamation 

point within the 

triangle is a warning 

sign alerting you of 

important 

instructions 

accompanying the 

product.


WARNING – TO REDUCE THE RISK OF FIRE, ELECTRIC SHOCK, OR 

SERIOUS PERSONAL INJURY: 


If the cord is damaged, have it repaired by the manufacturer, its service or a similarly 
qualified person in order to avoid any hazard. 


The cord should always be readily accessible. 


The apparatus shall not be exposed to dripping or splashing of water or liquids and that 
no objects filled with liquids such as flowers vases shall be placed on the product. 


The normal ventilation of the product shall not be impended for intended use. 


Always leave a minimum distance of 10 cm around the unit to ensure sufficient 
ventilation. 


Naked flame sources, such as candles, should not be placed on top of the device. 


The device is intended for use only in a temperate climate. 


Situate this product away from heat sources such as radiators, heat registers, stoves, or 
other appliances (including amplifiers) that produce heat. 


Clean the product only as recommended by the manufacturer (see “Maintenance” 
section for details). Unplug the power plug from the wall outlet before cleaning, 


Unplug the power plug from the wall outlet when left unused for an extended period. 


Prevent objects/liquids from falling or spilled on the product. 


Operate the product only with the supplied power cord. Route power cords so they are 
not likely to be walked on or pinched by items placed upon or against them, paying 
particular attention to plugs, convenience receptacles, and the point where they exit from 
the product.   


Where the MAINS plug or an appliance coupler is used as the disconnect device, the 
disconnect device shall remain readily operable. 


IMPORTANT INSTRUCTIONS 

Summary of Contents for 32LED320

Page 1: ...32 Widescreen LED TV MODEL NO 32LED320 USER MANUAL Please read this manual carefully before using and keep it for future reference...

Page 2: ...ded for intended use Always leave a minimum distance of 10 cm around the unit to ensure sufficient ventilation Naked flame sources such as candles should not be placed on top of the device The device...

Page 3: ...er purpose Do not subject the product to violent shocks extreme temperatures or lengthy periods of direct sunlight Keep the product away from magnetic objects motors and transformers Do not use outdoo...

Page 4: ...ng contribute to preserve natural resources and warrant waste recycling to protect environment and health In order to receive further information about electrical and electronic waste collecting and r...

Page 5: ...7 REMOTE CONTROL 8 9 REMOTE CONTROL PREPARATION 10 BASIC CONNECTION 11 15 OPERATIONS BASIC OPERATIONS 16 21 MAIN MENU 22 33 FIRST TIME INSTALLATION 22 DTV MODE 23 32 ATV AND OTHER MODES 33 PC MODE 33...

Page 6: ...TV Guide Function Support TELETEXT Europe Function Support USB Multimedia Playback Support Multi languages On Screen Display Support Full Function Remote Control Support HDMI SCART YPBPR AV VGA PC AU...

Page 7: ...ht is blue color 3 Stand holder 4 VOL button To increase decrease the volume level or move left right 5 CH button To select next previous channel or move up down 6 MENU button To open menu setting pag...

Page 8: ...terminal 6 HDMI 1 2 3 input terminal Note only HDMI 1 supports ARC 7 EARPHONE output terminal 8 USB 1 2 input terminal 9 CI input terminal 10 Mini YPbPr input terminal 11 Mini AV input terminal 12 OP...

Page 9: ...REC D SETUP Record Display the DVD setup menu 12 Stop playing 13 MENU Display the main TV menu 14 Press the LEFT RIGHT UP DOWN button to navigate the on screen menus and adjust the system settings to...

Page 10: ...DVD 29 Play the previous file 30 INDEX Play next file Display the record program list DTV 31 Move fast backward 32 Move fast forward 33 ASPECT Press repeatedly to select the desired screen aspect rati...

Page 11: ...impact the remote control This may damage the parts or lead to malfunction If the remote control is not going to be used for a long time remove the batteries REMOTE CONTROL OPERATION Point the remote...

Page 12: ...instructions before connecting other equipments CONNECTING TO AC POWER SOURCE CONNECT EXTERNAL ANTENNA TO UNIT Install external antenna into antenna jack for best picture BASIC CONNECTION Antenna Outd...

Page 13: ...DMI cable to connect the unit with other devices to receive high definition multimedia signal Back of DVD VCR Back of PC Use VGA cable and Audio cable to connect the unit with TV or PC and use this pr...

Page 14: ...ble Not included Use Optical cable to connect the unit with amplifier or other audio decoding devices for audio signal output Optical cable is not included Use a LAN cable not included to connect this...

Page 15: ...connection use the composite Audio L R white red and CVBS yellow cable to connect the unit with other devices Adaptor Cable for Mini AV included Back of DVD VCR YPbPr cable Not included Audio L R of A...

Page 16: ...NECTION INSERT A CI CARD EARPHONE CONNECTION Insert your CI card Conditional Access Module to watch special digital channels in your area EARPHONE cable Not included Not included USB Memory Device Not...

Page 17: ...digit VOLUME CONTROL Press VOL or VOL to adjust the level of current volume Available range 0 100 MUTE CONTROL Press MUTE button to mute the sound press it again to turn on the sound SOURCE SETTING P...

Page 18: ...repeatedly to select desired audio language NOTE To enable this function make sure that the channel you are viewing supports multi audio languages INFORMATION DISPLAY Press DISPLAY button on remote co...

Page 19: ...ailable teletext information and press it repeatedly to stop playing the teletext TV RADIO FOR DTV MODE ONLY Press TV RADIO button on remote control to switch the unit between TV and radio mode SUBTIT...

Page 20: ...ble TIMESHIFT function Press LEFT or RIGHT navigation button to select desired option Press OK button to confirm selection If the tool bar disappeared press EXIT button on remote control to display it...

Page 21: ...nu and press OK button to enter it Use navigation buttons to select desired folder or file and press OK to start playback Press DISPLAY button to dismiss recall the tool bar Use navigation buttons to...

Page 22: ...e control to play or pause playing Press button on remote control to stop playing Press button on remote control to move fast backward Press button on remote control to move fast forward Press button...

Page 23: ...ect different menus Press UP or DOWN navigation button to select the item that want to adjust Press OK button to enter adjusting menu page Press MENU button to save current setting and return to previ...

Page 24: ...the value of Contrast Brightness Colour Sharpness is changed Picture Mode will turn to Personal automatically 1 2 Colour Temp This item is used to adjust the optimum color temperature for suitable vie...

Page 25: ...ht speaker from 50 to 50 2 3 Auto Volume Level This item is used to turn on off Auto Volume Level function 2 4 Surround Sound This item is used to turn on off Surround Sound function 2 5 Digital Outpu...

Page 26: ...nd sound doesn t work simultaneously 3 CHANNEL 3 1 Auto Tuning Press OK or RIGHT navigation button to enter it Use navigation buttons to set the Tuning Mode and Country Then highlight Auto Tuning and...

Page 27: ...ress FAV button again to set it as a normal channel 3 5 Signal information This item is used to display signal details for example channel number and strength 3 6 CI Information When an available CAM...

Page 28: ...ed to turn on off Lock System 4 2 Change Password Input the old password using number buttons on remote control and then input your private password twice to finish it 4 3 Channel Lock Press OK or RIG...

Page 29: ...ould just ignore it if take this TV for home use only Hotel Mode Turn on off Hotel lock Source Lock Turn on off the lock of all available sources Default Source Select the default source DTV Channel T...

Page 30: ...Once Every Day Mon Fri Mon Sat Sat Sun Sun Time press OK button to enter adjusting mode and press 0 9 numeric button to input the hour and minute Input Source Channel Volume use navigations to select...

Page 31: ...select Manual to configure IP manually IP Netmask Gateway DNS press OK button to enter adjusting mode and use numeric buttons on remote control to MAC Addr show the MAC address When above settings are...

Page 32: ...is item is used to select available subtitle languages 7 6 Hearing Impaired This item is used to turn on off Hearing Impaired function For Hearing Impaired users this function can assist help to know...

Page 33: ...pdate software through USB memory device 7 11 Software Update Net This item is used to update software through network 7 12 Reset TV This item is used to reset to factory default settings 7 13 HDMI CE...

Page 34: ...tion button and press OK to enter it Press UP DOWN navigation button to select preferred item Press OK button to enter submenu Press LEFT RIGHT navigation button to adjust the value 1 Auto Adjust This...

Page 35: ...en wipe again with a dry cloth Never use alcohol benzene thinner cleaning fluid or other chemicals And do not use compressed air to remove dust Contact a professional for assistance when wall mounting...

Page 36: ...t cloth or cushion to prevent the panel from being damaged Step 2 Align the Stand with TV bottom and then force the end of stand until the TV is fully seated on the stand Step 3 Tighten the included s...

Page 37: ...16 9 Life Time 30 000 Hrs USB Multimedia Playback Format Movie AVI MPG MKV Music MP3 Photo JPG JPEG Power Source AC 100 240V 50 60Hz Power Consumption 60W Operation Temperature 5 to 45 Measurement 73...

Page 38: ...remote control unit at a distance of no more than 6m from the remote control sensor Remove the obstacles between the remote control and remote control sensor No key operation by the main unit and or...

Page 39: ...38...

Reviews: