background image

- 37 -

Safety Information

CAUTION

DVD Player is a class 1 laser product. However this 

product uses a visible laser beam which could cause 

hazardous radiation exposure. Be sure to operate the 

player correctly as instructed.

CLASS 1  

LASER PRODUCT

RISK OF ELECTRIC SHOCK

The  lightning  flash  with  arrowhead 

symbol, within an equilateral triangle, is 

intended to alert the user to the presence 

of uninsulated “dangerous voltage” within 

the product’s enclosure that may be of 

sufficient magnitude to constitute a risk 

of electric shock of persons.

The exclamation point within an equilateral 

triangle is intended to alert the user to the 

presence  of  important  operating  and 

maintenance  (servicing)  instructions 

in  the  literature  accompanying  the 

appliance.

Notes on Discs

On handling discs

• To keep the disc clean, handle the disc by its edge. 

Do not touch the surface.

• Do not stick paper or tape on the disc.
• If the disc is contaminated with any substance like 

glue remove before using it.

• Do not expose the disc to direct sunlight or heat 

sources such as hot air ducts, or leave it in a car 

parked in direct sunlight as the temperature can rise 

quickly and damage the disc.

• After playing, store the disc in its case.
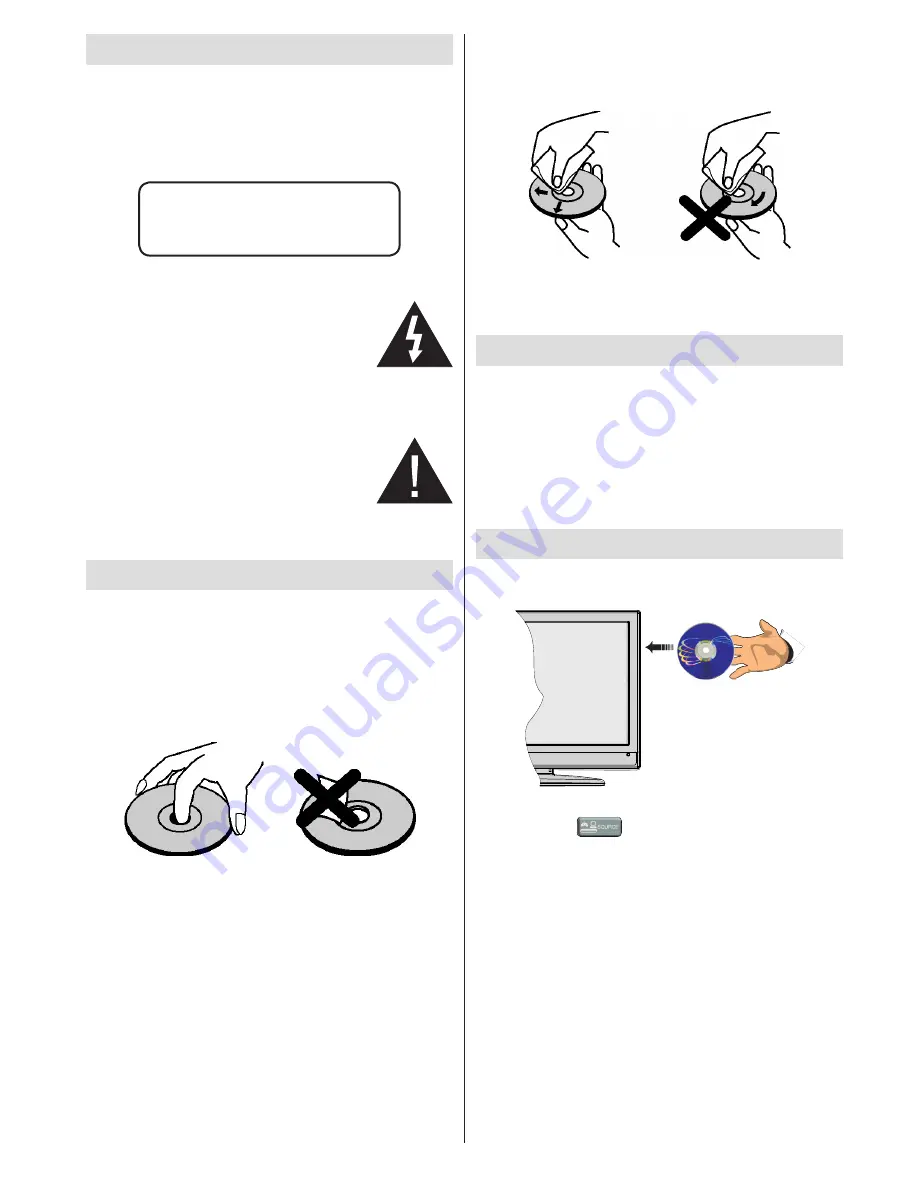
On cleaning

• Before playing, clean the disc with a cleaning cloth. 

Wipe the disc from the center out.

•    Do  not  use  solvents  such  as  benzine,  thinner, 

commercially available cleaners or anti-static spray 

intended for vinyl LPs.

Licence Notification

•  This  product  incorporates  copyright  protection 

technology  that  is  protected  by  U.S.  patents 

and  other  intellectual  property  rights.  Use  of 

this  copyright  protection  technology  must  be 

authorized by Rovi Corporation, and is intended for 

home and other limited viewing uses only unless 

otherwise authorized by Rovi Corporation. Reverse 

engineering and disassembly are prohibited.

How to Watch a DVD

When placing a disc into the loader, labeled side of 

the disc should be on the front:

When TV set is turned on, first switch to DVD source 

by using the “

” button on the remote control. 

Press play on the remote control, or directly press play 

button at the front panel. If there is no disc inside the 

loader,  place a DVD first and press play.

Note:

 For proper operation, only 12 cm discs 

must be used.

Summary of Contents for 26LED906T

Page 1: ...26LED906T 26LED906T COLOUR TELEVISION OPERATING INSTRUCTIONS OPERATING INSTRUCTIONS Customer Helpline 0845 555 1101 ...

Page 2: ...king a Channel 16 Managing Stations Favourites 16 Button Functions 16 Managing Stations Sorting the Channel List 16 On Screen Information 17 Media Playback Using Media Browser 17 Viewing Videos via USB 17 Viewing Photos via USB 18 Recordings Library 19 Media Browser Settings 19 Timeshift Recording 19 Instant Recording 20 Watching Recorded Programmes 20 Changing Image Size Picture Formats 21 Config...

Page 3: ...udio USB input Programme recording Programme timeshifting 1000 programmes analogue digital On Screen Display OSD menu system Integrated tuner DVB T MPEG 2 compatible Scart socket for external devices Stereo sound system Nicam Teletext fastext TOP text Headphone connection Automatic programming system Forward or backward manual tuning Sleep timer Child lock Automatic sound mute when no transmission...

Page 4: ...inch the cord Handle the power cord by the plug Do not unplug the appliance by pulling from the power cord and never touch the power cord with wet handsasthiscouldcauseashortcircuitorelectricshock Never make a knot in the cord or tie it with other cords The power cord should be placed in such a way that they are not likely to be stepped on A damaged power cord can cause fire or give you an electri...

Page 5: ...ly Servicing Please refer all servicing to qualified personnel Do not remove the cover yourself as this may result in an electric shock Waste Disposal Instructions for waste disposal Packaging and packaging aids are recyclable and should principally be recycled Packaging materials such as a foil bag must be kept away from children Batteries including those which are heavy metal free should not be ...

Page 6: ...n disconnecting the TV from the mains plug instead of keeping stand by mode Therefore it is highly recommended to activate Power Save Mode setting to reduce your annual power consumption And also it is recommended to disconnect the TV from the mains plug to save energy more when you do not use Please help us to save environment by following these steps Repair Information Please refer all servicing...

Page 7: ...mode 12 Timeshift recording Pause in media 13 browser mode Programme recording 14 Play in media browser mode 15 Stop in media browser mode 16 Fast forward in media browser mode 17 Subtitle on off Subtitle in media 18 browser mode Image size 19 Teletext Mix 20 Media Browser 21 Electronic programme guide 22 Exit 23 Navigation buttons 24 No function 25 Info Reveal in TXT mode 26 Volume up down 27 Mut...

Page 8: ... 2 HDMI Input 1 HDMI 1 HDMI Input 2 HDMI Inputs are for connecting a device that has a HDMI socket Your TV is capable of displaying High Definition pictures from devices such as a High Definition Satellite Receiver or DVD Player These devices must be connected via the HDMI or Component source These sockets can accept either 720p or 1080i signals No sound connection is needed for a HDMI to HDMI con...

Page 9: ...ctor into the YELLOW input located on the plural side of the supplied AV connection cable The colours of the connected jacks should match To enable audio connection you must use RED and WHITE inputs of the side AV connection cable Afterwards insert your device s audio cable s connectors into the RED and WHITE jack of the supplied side AV connection cable Colours of the connected jacks should match...

Page 10: ...d from the mains socket Note When the TV is switched to standby mode the standby LED can blink to indicate that features such as Standby Search Over Air Download or Timer is active First Time Installation IMPORTANT Ensure that the aerial is connected and a Common Interface module is not inserted before switching on the TV for the first time installation When the TV is operated for the first time t...

Page 11: ...as an HDMI socket you can connect via HDMI for better video and audio quality HDMI 1 DM H I 2 SPDIF Coax OUT External device not supplied HDMI Cable When you connect to DVD player as illustrated above switch to the connected HDMI source See Input Selection section for more information on changing sources Connecting to a DVD Player Some DVD players are connected through COMPONENT SOCKETS YPbPr YPbP...

Page 12: ...nection cable First plug single jack of the cable to the TV s AV IN socket side Afterwards insert your camera cable s not supplied connectors into the plural part of the video audio connection cable Colours of the connected jacks should match See illustration below Afterwards you should switch to SideAV source See the section Input selection in the following sections for more information Camera Si...

Page 13: ...ted to FAT32 in such a case USB Disk Connection Plug your USB device to the USB input of the TV Note Plug or unplug your USB disk while the TV is switched off Note If you are going to connect a USB hard disk drive to the TV set USB connection cable used between the disk drive and the TV should have a USB logo and should be as short as possible Note While formatting a USB hard disk that has 1TB Ter...

Page 14: ...lume Setting Press V button to increase the volume Press V button to decrease the volume Avolume level scale slider will be displayed on the screen Programme Selection Previous or Next Programme Press P button to select the previous programme Press P button to select the next programme Programme Selection Direct Access Press the numeric buttons on the remote control to select programmes between 0 ...

Page 15: ...be cancelled Note You cannot switch to any other channel or source while there is an active recording on the current channel Set Timer Delete Timer After you have selected a programme in EPG menu press the OK button and and Options screen will be displayed Select Set Timer on Event option and press OK button You can set a timer for future programmes To cancel an already set reminder highlight that...

Page 16: ...K buttons The analogue fine tune screen will be displayed The Analogue Fine Tune feature will not be available if there are no analogue channels digital channels and external sources stored Press OK button to proceed Use or button to set Fine Tune When finished press OK button again Managing Stations Channel List The TV sorts all stored stations in the Channel List You can edit this channel list s...

Page 17: ... to continue You will be asked to enter parental control PIN Default PIN is set as 0000 Enter the PIN number Press OK button when the desired channel is highlighted to lock unlock the channel The Lock symbol will be displayed next to the selected channel Managing Stations Favourites You can create a list of favourite programmes Press MENU button to view the main menu Select Channel List item by us...

Page 18: ...button to continue Media Browser menu options will be displayed Also when you insert USB devices the media browser screen will be displayed automatically You can play music picture and video files from the connected USB memory stick Use or button to select Videos Photos Music Recordings library or Settings Viewing Videos via USB When you select Videos from the main options the available video file...

Page 19: ... playback RED button Sorts files by Title Artist or Album Loop Shuffle GREEN button Press once to disable Loop Press again to disable both Loop and Shuffle Press once more to enable only Shuffle Press again to enable all You can follow the disabled functions with the change of the icons Note If you start the playback with the button and activate the symbol the TV will play the next music video fil...

Page 20: ...show interval time Show Subtitle Sets subtitle enabling preference Subtitle Language Sets supported subtitle language Subtitle Position Sets subtitle position as up or down Subtitle Font Size Sets subtitle font size max 54pt Timeshift Recording IMPORTANT To record a programme you should first connect a USB disk to your TV while the TV is switched off You should then switch on the TV to enable reco...

Page 21: ...grammes In the main menu use or buttons to select Media Browser Highlight Recordings Library item by using or button and press OK button to enter Recordings Library will then be displayed IMPORTANT To view recordings library you should first connect a USB disk to your TV while the TV is switched off You should then switch on the TV to enable recording feature Otherwise recording feature will not b...

Page 22: ... aspect ratio to fill the wide TV screen For 16 9 aspect ratio pictures that have been squeezed into a normal picture 4 3 aspect ratio use the 16 9 mode to restore the picture to its original shape Subtitle This zooms up the wide picture 16 9 aspect ratio with subtitles to the full screen Note You can shift to screen up or down by pressing buttons while picture zoom is selected as 14 9 Zoom Cinema...

Page 23: ...Setting Warm option gives white colours a slight red stress Picture Zoom Sets the picture size to Auto 16 9 Subtitle 14 9 14 9 Zoom 4 3 or Cinema HDMI True Black While watching from HDMI source this feature will be visible in the Picture Settings menu You can use this feature to enhance blackness in the picture You can set this feature as On for activating HDMI True Black mode Film Mode optional F...

Page 24: ...NU button to return to the previous menu Note Equalizer menu settings can be changed manually only when the Equalizer Mode is in User Balance This setting is used for emphasizing left or right speaker balance Headphone Sets headphone volume Sound Mode You can select Mono Stereo Dual I or Dual II mode only if the selected channel supports that mode AVL Automatic Volume Limiting AVL function sets th...

Page 25: ...cted message appears on the screen Refer to the module instruction manual for details of the settings Viewing Conditional Access Menu These menu settings may change depending on the service provider Press MENU button and select the icon by using or button Press OK button to view Settings menu Use or button to highlight Conditional Access and press OK to view menu items Configuring Language Prefere...

Page 26: ... Timers To view Timers menu press MENU button and select Settings icon by using or button Press OK button to view Settings menu Use or button to highlight Timers and press OK to continue Setting Sleep Timer This setting is used for setting the TV to turn off after a certain time Highlight Sleep Timer by using or button Use or button to set The timer can be programmed between Off and 2 00 hours 120...

Page 27: ...eration however ALL the data stored on the USB disk will be lost in such a case Press OK button while the Format Disk option is highlighted A menu will appear on the screen requiring you to enter a pin number If you have not changed the pin number the factory default is 0000 After you enter the pin a pop up menu appears on the screen to ensure that the hard disk should be formatted select YES and ...

Page 28: ...most update information you can use this setting In order for the proper operation please ensure that the TV is set to standby mode You can enable or disable automatic upgrade by setting Automatic Scanning option You can manually search for new software by selecting Scan for upgrade Application version Displays the current application version Hard of Hearing If the broadcaster enables any special ...

Page 29: ...place the teletext screen over the programme mix Pressing again will quit the teletext mode RETURN Index Selects the teletext index page Reveal Shows hidden information e g solutions of games OK Hold Holds a text page when convenient Press again to resume Subcode Pages Selects subcode pages if available when the teletext is activated CH or CH and numbers 0 9 Press to select a page Note Most TV sta...

Page 30: ... Are the plugs connected tightly to the aerial socket Is the aerial cable damaged Are suitable plugs used to connect the aerial If you are in doubt consult your dealer No Picture means that your TV is not receiving a transmission Have you selected the correct button on the remote control Try once more Also make sure the correct input source has been selected Sound If you cannot hear any sound chec...

Page 31: ...6 1400x1050 75Hz 85Hz 17 1400x900 65Hz 75Hz 18 1600x1200 60 Hz 19 1680x1050 60 Hz 20 1920x1080 60 HzA 21 1920x1080 60 HzB 22 1920x1200 60HzA 23 1920x1200 60Hz Appendix B AV and HDMI Signal Compatibility Input Signal Types Source Supported Signals Available EXT SCART PAL 50 60 O NTSC 60 O RGB 50 O RGB 60 O Side AV PAL 50 60 O NTSC 60 O YPbPr 480I 60Hz O 480P 60Hz O 576I 50Hz O 576P 50Hz O 720P 50Hz...

Page 32: ...grade item and press OK button to open Upgrade Options menu In Upgrade Options menu select Scan for upgrade and press OK button If a new upgrade is found it starts to download the upgrade A progress bar indicates the remaining download progress When the download completes successfully a message is displayed for reboot to activate new software Press OK to continue with the reboot operation 2 3 AM s...

Page 33: ...Sampling rate Photo jpg jpeg Baseline JPEG max WxH 15360x8640 4147200bytes Progressive JPEG max WxH 1024x768 6291456bytes bmp max WxH 9600x6400 3840000bytes Subtitle sub srt Products Battery Information for Users on Disposal of old Equipment and Batteries European Union only These symbols indicate that equipment with these symbols should not be disposed of as general household waste If you want to...

Page 34: ... W max PANEL 16 9 display 26 Screen Size DIMENSIONS mm DxLxH With foot 203 x 641 x 451 Weight Kg 6 95 DxLxH Without foot 58 x 641 x 407 Weight Kg 6 55 Digital Reception DVB T MHEG 5 ENGINE compliant with ISO IEC 13522 5 UK engine Profile 1 for UK Object carousel support compliant with ISO IEC 135818 6 and UK DTT profile Frequency range 474 850 MHz for UK models 170 862 MHz for EU models Transmissi...

Page 35: ...een or green and yellow The wire which is coloured blue or black must be connected to the terminal which is marked with the letter N or coloured Black The wire which is coloured brown or red must be connected to the terminal which is marked with the letter L or coloured Red For continued protection against risk of fire replace only with same type and rating of fuse ASTA approved 5A 250VAC fuse CAU...

Page 36: ...conds until the red light on the SKY remote blinks twice 5 Key in 065 on your SKY remote The light on the SKY remote should blink twice 6 Press the STANDBY button on your SKY remote control Your TV should now switch off 7 Press SELECT again The light on your SKY remote control should now blink twice You should now be able to control some basic functions on your TV from your SKY remote control e g ...

Page 37: ...JPEG MPEG playback NTSC PAL playback according to disc content LPCM audio via coaxial digital audio output optional Multi Audio up to 8 support According to disc content Multi Subtitle up to 32 support According to disc content Multi Angle up to 9 support According to disc content 8 level parental control Fast forward and rewind in 5 different speeds 2x 4x 8x 16x 32x Slow motion playback in 4 diff...

Page 38: ...t or heat sources such as hot air ducts or leave it in a car parked in direct sunlight as the temperature can rise quickly and damage the disc After playing store the disc in its case On cleaning Before playing clean the disc with a cleaning cloth Wipe the disc from the center out Do not use solvents such as benzine thinner commercially available cleaners or anti static spray intended for vinyl LP...

Page 39: ...ject or Load the disc Note You cannot eject the disc via the remote control While playing a file you should press STOP button three times to eject Overview of the Remote Control 1 Standby 2 Menu 3 OK Select 4 Return back 5 Angle 6 Display 7 Repeat 8 Zoom 9 Lang 10 Rapid reverse 11 Pause 12 Play 13 Stop 14 Fast forward 15 Subtitle 16 Root 17 Title 18 Search Mode 19 Navigation buttons 20 Info 21 Vol...

Page 40: ...ction b language Disp En Displ urns back to t Goes back to n of scenes o ss repeatedly options if av menu if avail e Press repe ns Button During playba Slow Sets Sets Sets Conf c keys directly ress 0 and 5 ovie yback lay use top d picture left o s the zoomed dvance Rap t angles Views DVD m during playb between mod plays main m nter View P lays repeat o the previous the root fold or time y to switc...

Page 41: ...o the initial settings If a language is selected not supported by the 7 disc the subtitle language will automatically be set to the disc s priority language Usually a circulation will happen while switching 8 to another language that is you can cancel the subtitle by pressing this button a number of times until Subtitle Off appears on the screen When the power is turned on or the disc is 9 removed...

Page 42: ...nical service SPDIF OUTPUT You can set Spdif Output as PCM or RAW If you select PCM from SPDIF Output in DVD menu and play DVD with Dolby audio you can get audio output with two channels via the speakers and the SPDIF Out If you select RAW from SPDIF Output in DVD menu and play DVD with Dolby audio speakers will be muted and you can get 5 1 Dolby audio via the SPDIF Out Troubleshooting The picture...

Page 43: ...ave been recorded by means of digital signals Incorporating a new video compression technology MPEG II and high density recording technology DVD enables aesthetically pleasing full motion video to be recorded over long periods of time for instance a whole movie can be recorded DVD has a structure consisting of two 0 6 mm thin discs which are adhered to each other Since the thinner the disc the hig...

Page 44: ...stem Various screen and audio functions can be easily selected through the on screen menu CD is recorded as a Digital Signal with better audio quality less distortion and less deterioration of audio quality over time 12 cm 12 cm For proper operation only 12 cm discs must be used Specifications Types of Discs Supported DVD SS SL 4 7 DVD 5 SS DL 4 7 DVD 9 DS SL 4 7 DVD 10 DS DL 4 7 DVD 18 CD DA CD R...

Page 45: ...50221404 ...

Reviews: