background image


11. 

Your mark should be just a fraction above center point so the RP-SMA adapter will clear the board. 

<<Very important IF YOU DRILL TOO LOW THE BOARD WON’T CLEAR 


12. Drill a smaller hole first with a smaller bit and then go ahead and finish the drilling with the 1/4" drill 
bit.  
13. You may want to get someone to help you hold the unit in place as you drill. Hold the unit vertically 
on a solid service before drilling. Take your time. No hurry!  
14. After drilling there will be a little plastic left around the inside hole that will need removing. Just use 
a kitchen knife or other small knife to remove the plastic.  
15. Attach the UFL cables and the RP-SMA Plugs and of course the 6dBi Antennas and you are set to go.  
Do not remove any built in antennas. 
Be sure the nut on the RP-SMA plug is nice and tight, otherwise your antennas will flop.  

 
NOTE: When putting the case back together make sure none of the cables get pinched with screws. 
You 

can secure them in place by using clear tape.


Enjoy 


Summary of Contents for WRT610N V1

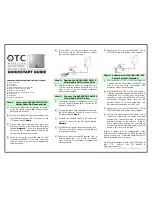
Page 1: ...ou with a tool that will help test the performance of your newly modified router WRT610N V1 Antenna Installation Instructions 1 No soldering required 2 Open the unit You can use a torque wrench size T10 or the sharp end of a kitchen knife will work we don t recommend this 3 Remove the UFL antenna connectors If you use both 2 4 ghz and 5 ghz remove top one of each ...

Page 2: ...oles can take a little practice and patience 6 So do this first Practice removing the original UFL antenna cables and then putting them back on 7 You will be attaching UFL cables to RED Antenna TX RX see images below for reference if using both bands other wise use both TX RX on either band ...

Page 3: ...8 Now you are ready to drill 9 Detach the stock UFL cables and remove the board from the unit 10 Mark on the unit with a pen or whatever where you want to drill ...

Page 4: ... service before drilling Take your time No hurry 14 After drilling there will be a little plastic left around the inside hole that will need removing Just use a kitchen knife or other small knife to remove the plastic 15 Attach the UFL cables and the RP SMA Plugs and of course the 6dBi Antennas and you are set to go Do not remove any built in antennas Be sure the nut on the RP SMA plug is nice and...

Page 5: ...he signal strength of your router We recommend using it before and after installing the antennas to see the improvement of the signal strength It can also show you which antenna position and router location can give you the best signal The closer to 0db the better the signal and the closer to 100db the worse ...

Reviews: