Minimum Requirements
• Network Adapter with Ethernet (UTP
CAT 5) Cabling and TCP/IP Protocol
Installed per PC
• Internet Explorer 4.0 or Netscape Navigator
4.7 or Higher for Web-based configuration
• Cable Modem with Ethernet Connection
and Internet Access
• Windows 98SE, Me, 2000, and Xp for the
Setup Wizard
• CD-ROM Drive
Instant Wireless
TM
Series
For more detailed instructions, please refer to the User Guide.
You will connect the Router to your cable modem and to your home or busi-
ness computers.
First, make sure that all devices you’ll be working with are powered down,
including your PCs, modem, and the Router.
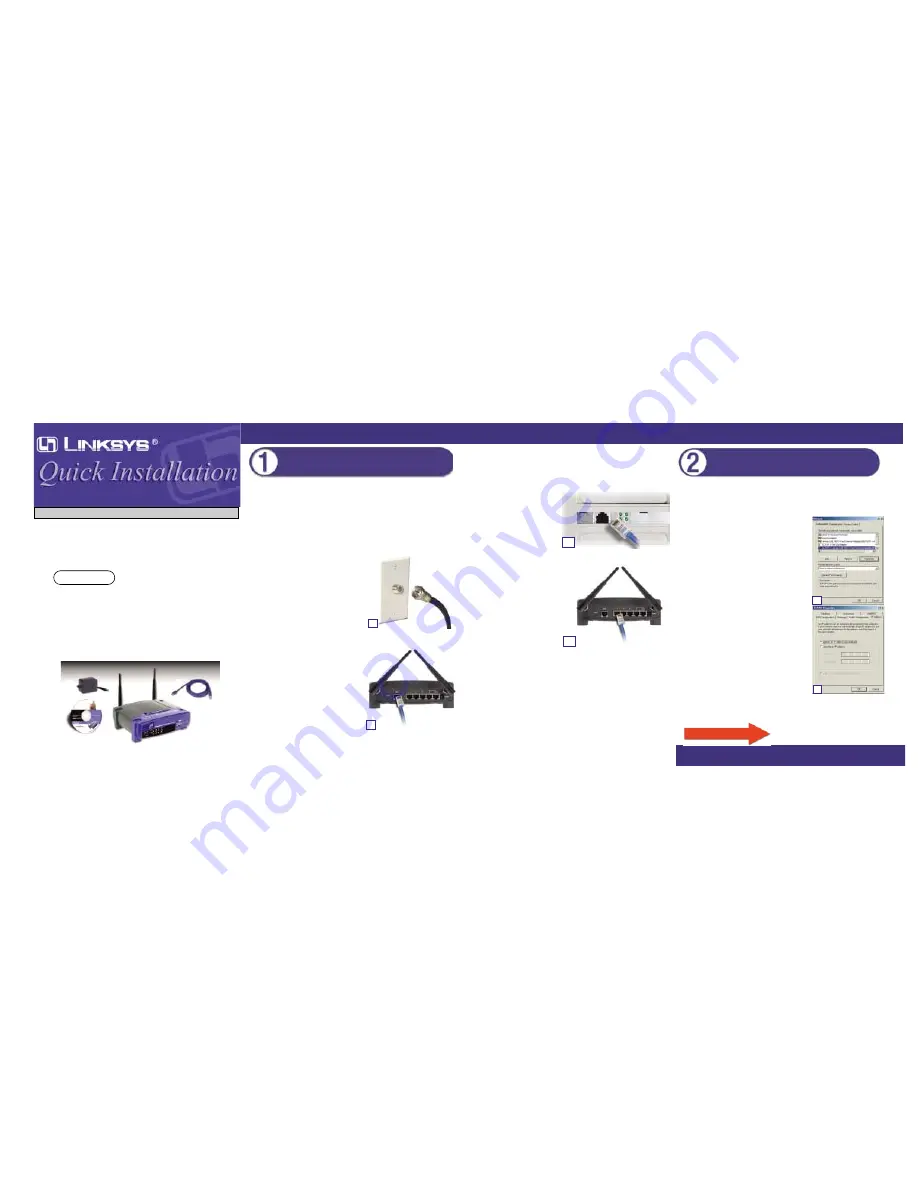
A. If you haven’t already done so, connect
your cable modem to the coaxial jack
(Figure A). (Follow the instructions from
your cable modem’s documentation.)
B. Using the provided UTP Category 5 (or
better) Ethernet cable, connect the LAN
or Ethernet port of the cable modem to
the Router’s WAN port (See Figure B.)
Connecting the Router
C. Connect an Ethernet cable to your PC’s Ethernet adapter (Figure C1.)
Connect the other end of the cable to one of the Router’s LAN ports (Figure
C2.) Repeat this process for every PC you want to connect to the Router.
Note: If your PC’s Ethernet
adapter is not set up, refer to the
Ethernet adapter’s documentation
for more information.
Note: For ease of installation,
start with LAN Port 1 on the
Router, then Port 2, Port 3, and
finally Port 4.
If you are connecting more than
four PCs to the Router, you will
need to connect a hub or switch
to the Router’s Uplink port (if
you use the Uplink port, then you
cannot use Port 4). For informa-
tion on Uplinking, refer to the
User Guide located on the Setup
Wizard CD-ROM.
D. Connect the power adapter to the Router’s Power port. Then, connect the
power adapter to an electrical outlet. Turn on the cable modem. Then turn
on the first PC you wish to use when configuring the Router.
Go to Step 2: Configuring the PCs.
A. Click the Start button, click Settings and open the Control Panel. From
there, double-click the Network icon to open the Network screen.
B. Select the Configuration tab and highlight
the TCP/IP line for the applicable Ethernet
adapter*. If the word TCP/IP appears by
itself, select that line**. Then, click the
Properties button.
C. Click the IP Address tab and select Obtain
an IP address automatically.
D. Click the Gateway tab and verify the Installed
Gateway field is blank. Click the OK button.
E. Click the OK button again. Windows may
ask you for the original Windows installation
disk or additional files. Supply them by point-
ing to the correct file location, e.g., D:\win98,
D:\win9x, c:\windows\ options\cabs, etc.
(This assumes that “D” is the letter of your
CD-ROM drive).
F. If Windows asks you to restart your PC, click
the Yes button. If not, restart your computer
anyway.
*Note: Do not choose a TCP/IP entry whose
name mentions DUN, PPPoE, VPN, or AOL.
**Note: If there is no TCP/IP line listed, refer to the User Guide found on
the Setup Wizard CD-ROM or your Ethernet adapter’s documentation to
install TCP/IP now.
Go to Step 3: Configuring the Router.
Wireless Access Point Router
with 4-Port Switch
This Quick Installation is meant to help you install the product quickly and easily. For detailed instructions on installation,
configuration, and further setup options, please consult the User Guide.
BEFW11S4-AT
Continued on back!
Configuring the PCs
A
B
C
1
C
2
B
C
If you are using:
Windows 98SE or Me
1
2
5
4
3
Package Contents
• One Wireless Access Point Router with 4-
Port Switch (
1
)
• One Setup Wizard CD-ROM with User
Guide included (
3
)
• One Power Adapter (
4
)
• One CAT 5 UTP Cable (
5
)
• One Quick Installation (this document)
• One Registration Card (not shown)


