User Manual
English
Operation
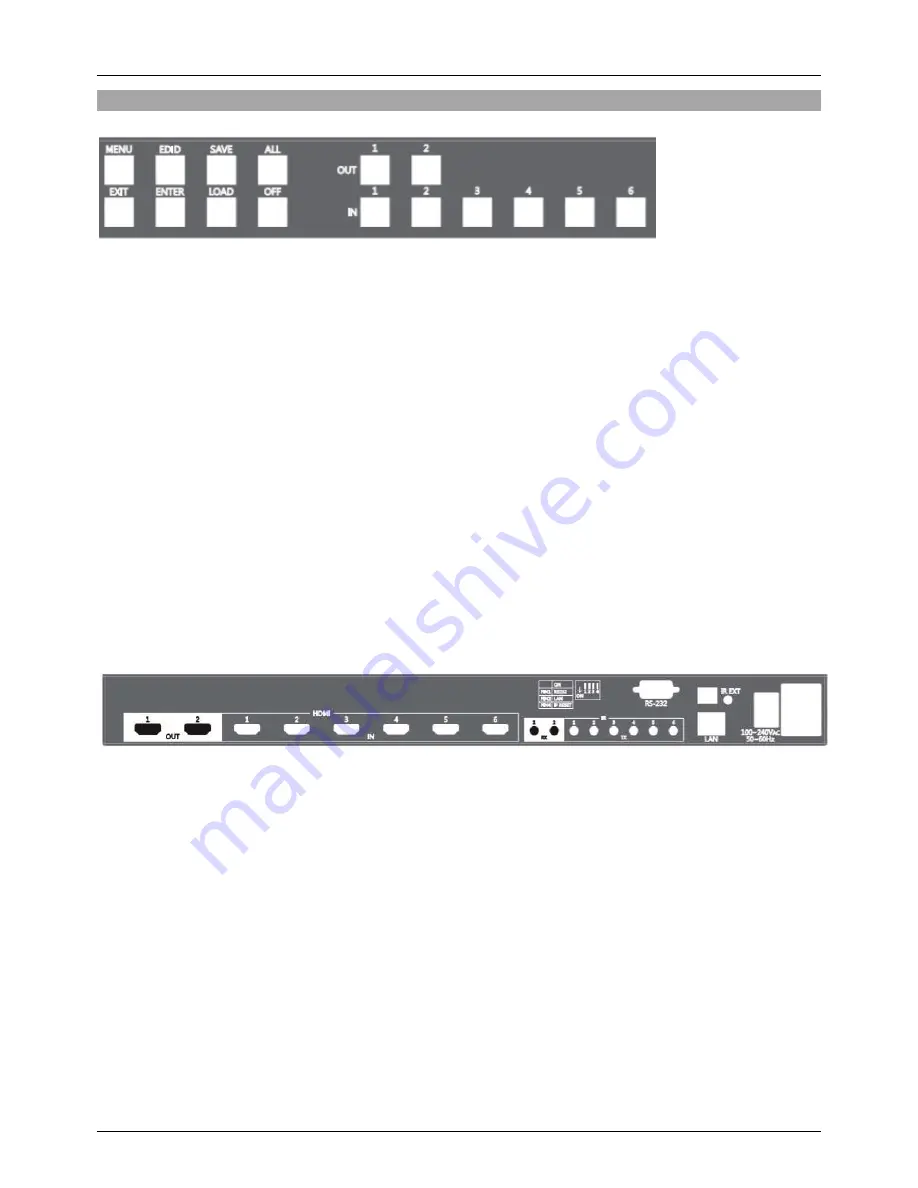
Front Panel
OUT 1-2: Select the HDMI output signal
IN 1-6: Select the HDMI input signal
MENU: Display the ID, IP Address, in/out port link and firmware version information
EDID:
UHD Mode: Set the supported resolution to Ultra HD 4K60
OUT 1 Mode: Copy output 1 EDID to all input channels
FHD Mode: Set the supported resolution to Full HD 1080p
4K30 Mode: Set the supported resolution to 4K30
SAVE: Save up to 4 sets of input/output configurations
ALL: Set a single input port to all output ports
Press the ALL key
Select an IN port
The selected IN port will be displayed on both OUT ports
To disable all the displayed settings, press ALL then OFF
OFF: Disables the LCD backlight
LOAD: Load the settings saved in the preset
ENTER: Confirms any settings
EXIT: Press to go back to the main screen
Rear Panel
POWER PORT: Connect the power cord to this port
POWER SWITCH: Power on/off
RS232 PORT: Connect to a computer with a 9 pin serial cable to control the matrix remotely
LAN PORT: Connect to a computer with an RJ45 cable to control the matrix remotely
IR EXT PORT: Connect the included IR extension cable to extend the receiver by approx. 2m
IR MATRIX PORTS: Connect the included IR extension ports to extend the distance of the IR
transmitters and receivers
HDMI IN PORTS: Connect your HDMI source devices to these ports
HDMI OUT PORTS: Connect your HDMI displays to these ports
DIP SWITCHES:
PIN1: Switch RS232 port connection
PIN 2: Switch LAN port connection
PIN 3: Reserved
PIN 4: Reset the IP address to factory default. (Default: 192.168.0.3)
1. With the matrix powered on, set Pin 1 to ON and wait 10 seconds.
2. Power the matrix off with the rear switch, and wait 10 seconds.
3. Power the matrix back on and again wait 10 seconds before setting Pin 4 to OFF.
4. The matrix will now be factory reset. (Default IP: 192.168.0.3)
Summary of Contents for 38162
Page 2: ......


