background image

Manual 


English 


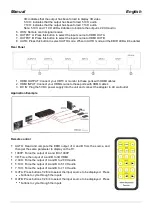
3D: indicates that the output has been forced to display 3D video 
5.1CH: indicates that the output has been forced 5.1CH audio 
7.1CH: indicates that the output has been forced 7.1CH audio 
Note: 5.1CH and 7.1CH LED will darken to indicate the output is 2.0CH audio 

5.  IR IN: Remote control signal receive 
6.  OUTPUT A: Press this button to select the input source to HDMI OUT A 
7.  OUTPUT B: Press this button to select the input source to HDMI OUT B


8.  AUTO: Press this button to select AUTO mode. When in AUTO mode, all the EDID LED will be darker


Rear Panel 


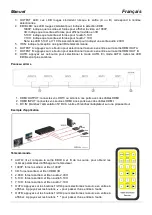
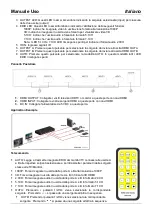
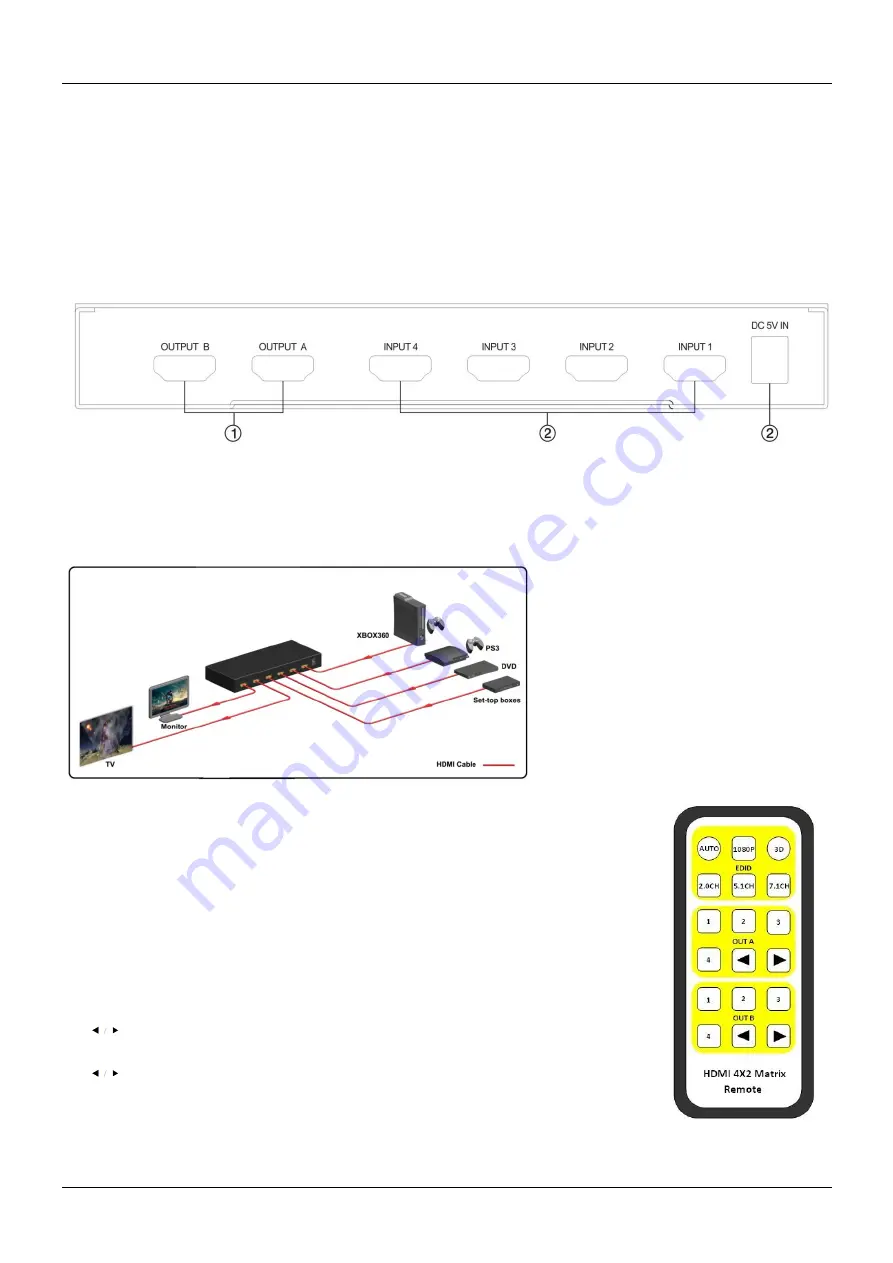
1.  HDMI OUTPUT: Connect your HDTV or monitor to these ports with HDMI cables 
2.  HDMI INPUT: Connect your HDMI source to these ports with HDMI cables 
3.  DC IN: Plug the 5V DC power supply into the unit and connect the adapter to AC wall outlet 

 
Application Example 


Remote control 


AUTO:  Read  and  compare  the  EDID  output  of  A  and  B  from  the  source,  and 
then get the same parameter to display on the TV.  


1080P: Force the output of A and B to 1080P  


3D: Force the output of A and B to 3D HDMI 


2.0CH: Force the output of A and B to 2.0CH audio 


5.1CH: Force the output of A and B to 5.1CH audio 


7.1CH: Force the output of A and B to 7.1CH audio 


OUTA: Press buttons 1\2\3\4 to select the input source to be displayed.  Press 

 buttons to cycle through the inputs 


OUTB: Press buttons 1\2\3\4 to select the input source to be displayed.  Press 

 buttons to cycle through the inputs 


Summary of Contents for 38050

Page 1: ...NDY ELECTRONICS LIMITED LINDY ELEKTRONIK GMBH FIRST EDITION November 2013 4K UHD HDMI 4x2 Matrix Manual English Benutzerhandbuch Deutsch Manuel Fran ais Manuale Uso Italiano LINDY No 38050 www lindy c...

Page 2: ......

Page 3: ...y audio data conforming to the HDMI specification 1 4 such as L PCM at up to 192kHz compressed audio IEC 61937 DSD DST DTS and HBR Full colorimetric including sYCC601 Adobe RGB Adobe YCC601 xvYCC exte...

Page 4: ...to these ports with HDMI cables 2 HDMI INPUT Connect your HDMI source to these ports with HDMI cables 3 DC IN Plug the 5V DC power supply into the unit and connect the adapter to AC wall outlet Applic...

Page 5: ...st tzt HDCP 1 4 Eingangssignale HDCP 1 4a Protokoll kompatible Ausg nge Unterst tzt Audio Formate nach HDMI 1 4 wie z B L PCM bis 192kHz Komprimierte Audioformate IEC 61937 DSD DST DTS und HBR Unterst...

Page 6: ...EDID Einstellungen Aufl sung 3D Audio automatisch zwischen HDMI Signalquelle Umschalter HDMI Display eingestellt werden sollen Im AUTO Modus leuchten alle EDID LEDs abgedunkelt Elemente an der R cksei...

Page 7: ...se en charge Deep Colour jusqu au 48 bit par pixel Prise en charge HDCP 1 4 en entr e INPUT conforme au protocole HDCP v1 4a en sortie OUTPUT Prend en charge la r ception de toute donn e audio conform...

Page 8: ...bouton pour s lectionner le mode AUTO En mode AUTO toutes les LED EDID seront plus sombres Panneau arri re 1 HDMI OUTPUT connectez vos HDTV ou crans ces ports avec des c bles HDMI 2 HDMI INPUT connec...

Page 9: ...na frequenza di 297MHz TMDS Supporta deep colour fino a 48 bit per pixel Supporta HDCP 1 4 INPUT conforme al protocollo HDCP v1 4a OUTPUT Supporta la ricezione di qualsiasi segnale Audio in conformit...

Page 10: ...angono spenti Pannello Posteriore 1 HDMI OUTPUT Collegate i vostri televisori HDTV o monitor a queste porte con cavi HDMI 2 HDMI INPUT Collegate le vostre sorgenti HDMI a queste porte con cavi HDMI 3...

Page 11: ...of all waste electrical and electronic equipment It is no longer allowable to simply throw away electrical and electronic equipment Instead these products must enter the recycling process Each individ...

Reviews: