User Manual
English
- 3 -
Installation
You can now install your LINDY KVM Switch Pro Audio by following the procedure as
described below:
Step 1. Connect your keyboard, monitor and mouse to the PS/2 and VGA ports on the KVM
switch labelled CONSOLE. Connect your speakers and microphone if required.
Step 2. Connect your computers using the cables provided. Should you wish to extend the
operating distance then you may purchase suitable cables up to 5m from LINDY. Or you
may use high quality extension cables with standard connectors. As soon as you connect
any PS/2 cables the KVM Switch will be powered on if the computer is not disconnected
from the mains. This is because modern computers also supply power over the PS/2 ports
even when they are soft switched off.
Step 3. Turn on the power to all devices and switch on the computers if not already powered.
Remark: The KVM Switch supports the hot plug and keyboard & mouse reset function. That
means you don’t have to switch off the computers when plugging and unplugging cables if
you are using modern Windows operating systems.
If your Windows operating system locks the mouse you can use the mouse reset hotkey
(see section hotkey switching commands) or press port 1 button for 2…3 seconds.
If you are using Linux computers the operating system may not fully support the hot plug
function and lock or freeze the mouse when plugging or unplugging.
KVM switching options
Computer port selection may be made by any of the following:
o
Front panel push buttons on the switch
o
Keyboard Hotkey – configurable by the user
Front panel push buttons with white LED indicator
Press the front push button to select the appropriate port/computer. During the switching
process a white LED behind the push button will flash. The LED will remain on when switching
is completed and the connections are established. Depending on the configuration only the
KVM ports (PS/2 keyboard, mouse and monitor) or KVM and audio ports are switched. You may
wish to bind or unbind audio switching if required. The white port LEDs refer to the KVM port
status and reports an active connection to the computer at this port. If the LED is flashing the
computer connected to this port may be turned off or in standby mode. To learn more about
these switching options, please refer to the table on the next page.
Keyboard Hotkey Switching
The KVM switch may also be conveniently switched and configured using keyboard hotkeys.
This process is invoked by pressing a universal hotkey on the keyboard twice within 2 seconds.
The factory default setting for this universal hotkey is the SCROLL LOCK button. The KVM
switch can be reconfigured to use a different hotkey from the following list: NUM LOCK, or
CAPS LOCK, or F12 or Escape (ESC) key.
Press the universal hotkey twice to invoke the switching function – the KVM switch will confirm
this with a short beep signal. Depending on the next key you press (within 2 seconds) you can
select any of the available switching or configuration functions of the KVM switch. Please refer
to the following table for the available options.
User Manual
English
- 4 -
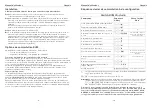
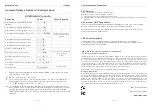
Hotkey Switching and Configuration Commands
* stands for the universal hotkey (factory default is SCROLL LOCK, configurable to new
hotkey ** NUM, CAPS, F12, or ESC key)
Fn1-Fn4 stands for the function keys F1, F2, F3, and F4
Remark 1: In case a non PnP operating system such as Windows NT or Linux locks the mouse
you may try to reset the mouse using one of the following hotkeys: * + * + M + 1/2/3
for a 2 or 3 or 5 button (wheel) mouse
Remark 2: To change the universal hotkey from the front push buttons please press the highest
port button until you hear two short confirmation beeps. Then press the chosen new
hotkey SCROLL, NUM, CAPS, F12, or ESC on your keyboard. The KVM switch will
confirm this by a short beep and the hotkey is permanently changed.
KVM Switch Pro Audio
Command
Hotkey Input
Front / Remark
Binds KVM & Audio switching (Default)
* + * + Q
Unbinds KVM & Audio switching
* + * + W
Switches directly to port 1, 2, 3 or 4
* + * + 1-4
Yes
Switches Audio devices to port 1, 2, 3 or 4
* + * + Fn1-Fn4
When binding is active PC
ports will be switched too
Switches one port up
* + * +
↓↓↓↓
Switches one port down
* + * +
↑↑↑↑
Switches to the previous port
* + * +
←
←
←
←
Switches the Beep confirmation ON / OFF
* + * + B
Mouse & keyboard reset (console)
* + * + End
Yes, press port 1 button for 3
seconds. Also see remark 1
Switches the universal Hotkey to **
* + * + H + **
Yes (see remark 2)
Switches to Autoscan
* + * + S
Switches to Autoscan with port time 10s (1)
to 100s (0)
* + * + S + 0-9
Stops Autoscan
Any key
Yes, any button


