Part Number 4607056 Rev 0 6/21
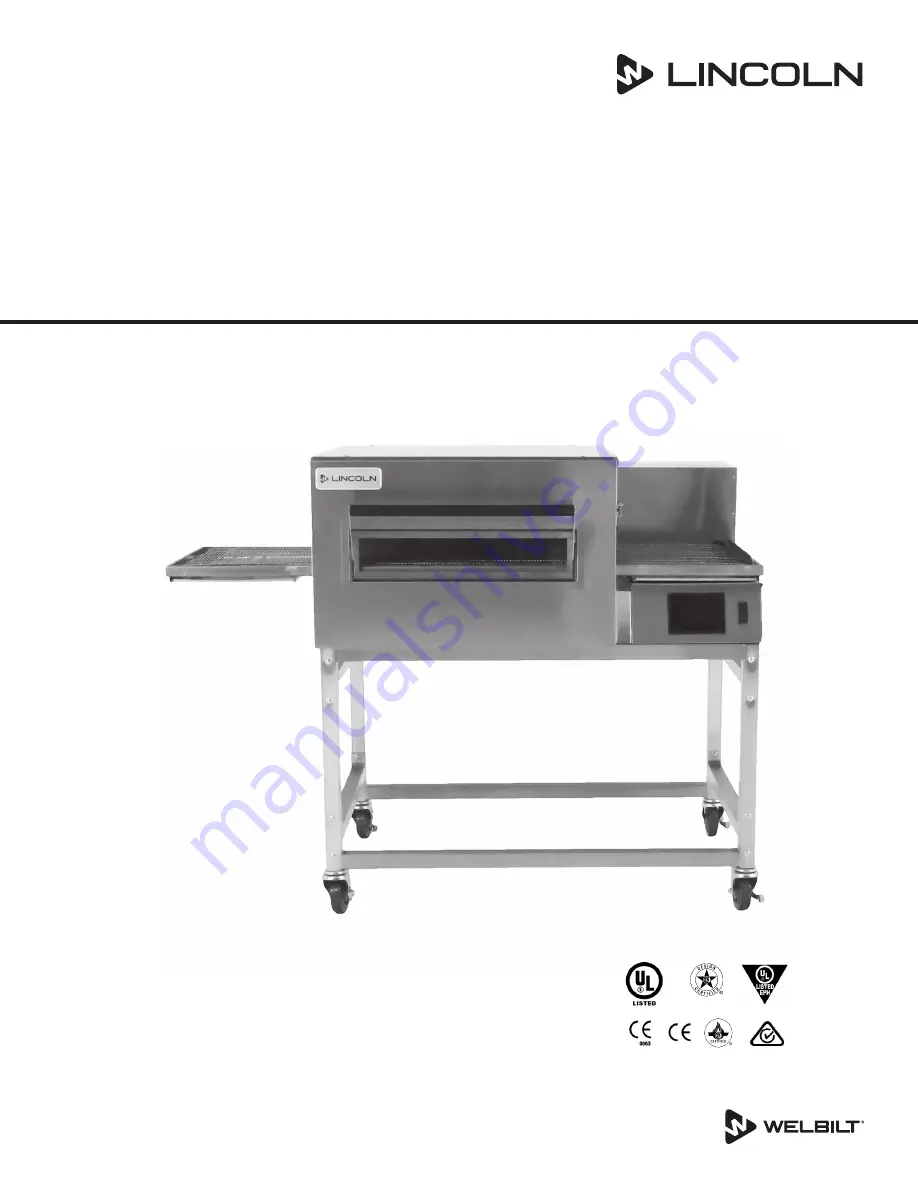
Impinger® II Conveyor Oven with
easyTouch Controls
Series 1100
Installation, Operation and Maintenance Manual
FOR 50 HZ AND 60 HZ SUPPLY
Original Instructions
Page 1: ...Part Number 4607056 Rev 0 6 21 Impinger II Conveyor Oven with easyTouch Controls Series 1100 Installation Operation and Maintenance Manual FOR 50 HZ AND 60 HZ SUPPLY Original Instructions...
Page 2: ...regulations for disconnection lock out tag out procedures for all utilities including electric gas water and steam nWarning This appliance is not intended for use by persons including children with r...
Page 3: ...ts 11 Spacing Requirements 12 Ventilation Requirements 12 Restraint Requirement Gas Oven s on Casters 13 Installation 13 Packing and Weights 13 Uncrating 13 Assembly Instruction 14 Stacking Instructio...
Page 4: ...tor Maintenance 23 Cleaning Instructions 23 Daily Cleaning 23 Weekly Cleaning 23 Conveyor Removal 24 Finger Removal 24 Preventive Maintenance 24 Section 5 Troubleshooting Before Calling for Service Ch...
Page 5: ...Obtain from your local gas provider and post in a prominent location instructions to be followed in the event gas odors are detected It is required that the oven be placed under a ventilation hood to...
Page 6: ...erman CE Germany D Italian CE Italy E Spanish CE Spain F English CE UK India Africa Hungary G Spanish Mexico Latin America H Portuguese CE Portugal I Not Used J Danish CE Denmark K Dutch French CE Bel...
Page 7: ...A Only 48 1219 mm 39 5 1003 mm 57 1448 mm 30 5 775 mm 5 75 146 mm 9 5 241 mm 13 330 mm 22 559 mm 17 432 mm 17 5 444 mm 17 5 444 mm 24 5 622 mm BODY Stainless steel Easy open front for simple cleaning...
Page 8: ...H2 O column 1117 xxx U Kxxx L P Gas 40 000 BTU 120 VAC 7 Amps 1 60 Hz 3 Wires 1 Pole N G 40 000 BTU at 11 inches H2 O column 1154 xxx E Kxxx Nat Gas HS 13 kW 230 VAC 2 Amps 1 50 Hz 3 Wires 1 Pole N G...
Page 9: ...FF Above Finished Floor NOTE The drawing shown is a typical installation and is intended to be a guideline It is not a rigid specification Hood dimensions and the positioning of the hood over the oven...
Page 10: ...ould be located as shown below If flexible services are provided they must meet code requirements for such installation 17 5 444 mm 37 940 mm 17 5 444 mm 22 559 mm 17 5 444 mm Back view of two Impinge...
Page 11: ...he installation of these appliances is to be in accordance with CSA B 149 1 latest version Natural Gas and Propane Installation Code and or local codes IN AUSTRALIA To be installed in accordance with...
Page 12: ...o cook raw animal proteins doing so may cause the appliance to exceed allowable grease laden air limits and or cause damage to the catalyst Ventless oven models can be identified by the V suffix as pa...
Page 13: ...ny visible damage by the trucker in transit and to account for the proper number of crates IF THERE IS APPARENT DAMAGE UNITED STATES AND CANADA Arrangements should be made to file a claim against the...
Page 14: ...N NUT 1 4 20 CASTER LOCKWASHER 1 4 LEG BOLT STEP 1 4 20 x 1 7 8 SCREW 1 4 20 x 2 28 5 726 mm 41 5 1054 mm Stacking Instructions FOR SINGLE OVEN Caution Do not use standoffs as a lifting means Screw 1...
Page 15: ...in front 2 in rear 3 Replace door conveyor and finger assemblies 4 Stacking is complete FOR TRIPLE OVEN Step 1 1 Remove door conveyor and finger assemblies 2 Turn unit on side as shown 3 Remove three...
Page 16: ...ven in place 3 Fasten ovens together using the four screws from Step 2 2 front 2 back 4 Replace door conveyor and fingers 5 Repeat Steps 2 5 to stack third oven Start Up Checkout You are now ready for...
Page 17: ...and immediately put the pan and candle into the center of the oven cavity on the conveyor belt Close the access window or door 5 Observe the smoke pattern coming out of the oven openings and the colle...
Page 18: ...ections been checked Has the supply voltage been tested and verified it matches the name plate voltage Has a shutoff valve been installed in the gas line ahead of the unit Has the manifold gas pressur...
Page 19: ...ure 1 NOTE The oven will not start pre heating until you have selected a recipe 2 The Home screen displays 4 buttons Press Go which takes you to the Recipes screen Manual mode the Settings screen and...
Page 20: ...is now ready for cooking Please use the proper equipment to load and unload food from the conveyor The conveyor will be hot to the touch Pans or trays exiting the oven will be VERY HOT and are a burn...
Page 21: ...e by pressing the Back button or arrow on the lower left of the screen Figure 10 Figure 11 SETTINGS MODE Settings mode allows the operator to change the oven settings such as Temperature unit of measu...
Page 22: ...information about your oven including software revisions and temperature offsets 1 Press the Diagnostics button on the Home screen to access this mode Figure 16 Figure 16 2 Press the Back button or ar...
Page 23: ...e sure that none has entered the control box area before switching on If in doubt call your service company Caution Oven must be cool Do not use power cleaning equipment steel wool or wire brushes on...
Page 24: ...g Plate Finger Housing Top Finger Assembly 5 Reassemble in reverse order Be sure finger assembly seats securely over rear openings Preventive Maintenance Although this oven has been designed to be as...
Page 25: ...t is loose Tighten drive sprocket Drive chain loose or disconnected Verify installation is correct Call for service Conveyor has stretched from use Call for service Thermal Cut Out Switch for Control...
Page 26: ...26 Part Number 4607056 Rev 0 6 21 Troubleshooting Section 5 THIS PAGE INTENTIONALLY LEFT BLANK...
Page 27: ...ed therein null and void This includes any damage costs or legal actions resulting from the installation of any Lincoln manufactured commercial cooking or warming equipment in a non commercial applica...
Page 28: ...1 Welbilt Inc except where explicitly stated otherwise All rights reserved Part Number 4607056 Rev 0 6 21 LINCOLN 11200 AIRPORT NORTH OFFICE PARK STE A B FORT WAYNE IN 46825 844 724 2273 WWW LINCOLNFP...