Limitorque
®
SMB Series/SB Series
Installation and Maintenance
Limitorque Actuation Systems
140-11000
July 2003
Page 1: ...Limitorque SMB Series SB Series Installation and Maintenance Limitorque Actuation Systems 140 11000 July 2003 ...
Page 2: ...permission from Limitorque Limitorque reserves the right to make changes without notice to this document and the products it describes Limitorque shall not be liable for technical or editorial errors or omissions made herein nor for incidental or consequential damages resulting from the furnishing performance or use of this document This manual contains information that is correct to the best of L...
Page 3: ... Limit Switch 4 3 4 4 2 Four Train Geared Limit Switch 4 6 4 5 Setting Torque Switch 4 8 4 5 1 SMB 000 Double Torque Switch 4 8 4 5 2 SMB 00 Double Torque Switch 4 11 4 5 3 SMB 0 through SMB 5 Double Torque Switch 4 13 4 6 Position Indication 4 15 4 6 1 Local Position Indicator 4 15 4 6 2 Remote Position Indicator 50 ohm or 1000 ohm Potentiometer 4 15 4 6 3 Remote Position Indicator Resistance to ...
Page 4: ...nly 7 28 7 4 1 SMB 5 and SMB 5T Disassembly 7 28 7 4 2 SMB 5 and SMB 5T Reassembly 7 30 8 SB Disassembly and Reassembly 8 1 8 1 SB 00 8 1 8 1 1 SB 00 Disassembly Stem Nut Removal 8 1 8 1 2 SB 00 Reassembly Stem Nut Installation 8 2 8 2 SB 0 8 5 8 2 1 SB 0 Disassembly Stem Nut Removal 8 5 8 2 2 SB 0 Reassembly Stem Nut Installation 8 5 8 3 SB 1 8 8 8 3 1 SB 1 Disassembly Stem Nut Removal 8 8 8 3 2 ...
Page 5: ...ough SMB 4 and 4T Parts Diagram Worm Shaft Side View 7 23 Figure 7 11 SMB 0 through SMB 4 and 4T Parts Diagram Drive Sleeve Side View 7 24 Figure 7 12 SMB 0 through SMB 4 and 4T Exploded View 7 25 Figure 7 13 SMB 5 and 5T Parts Diagram 7 34 Figure 7 14 SMB 5 and 5T Top View 7 35 Figure 7 15 SMB 5 and 5T Declutch Housing Detail 7 36 Figure 7 16 SMB 5 and 5T Exploded View 7 37 Figure 8 1 SB 00 Parts...
Page 6: ...ttempting installation operation or maintenance Failure to observe these precautions could result in serious bodily injury damage to the equipment void of the warranty or operational difficulty Safety notices are presented in this manual in three forms a a WARNING Refers to personal safety Alerts the user to potential danger Failure to follow warning notices could result in personal injury or deat...
Page 7: ... and Storage Instructions a a WARNING Read this Installation and Maintenance Manual carefully and completely before attempting to install operate disassemble or troubleshoot the actuator Be aware of the electrical hazards 2 2 Product Identification The actuator unit nameplate is located on the back of the unit opposite the limit switch compartment The nameplate contains the following information P...
Page 8: ...torage contact Limitorque for procedures and recommendations Storage less than 1 year Actuators are not weatherproof until properly installed on the valve or prepared for storage Store actuators in a clean dry protected warehouse away from excessive vibration and rapid temperature changes If the actuators must be stored outside they must be stored off the ground high enough to prevent them from be...
Page 9: ...SBD lb kg lb kg lb kg SMB 000 135 62 N A N A N A N A SMB 00 200 90 65 30 100 46 SMB 0 350 159 180 83 210 97 SMB 1 460 209 200 92 325 150 SMB 2 580 263 220 101 345 159 SMB 3 1200 553 500 230 825 380 SMB 4 4T 2020 916 795 366 1285 591 SMB 5 5T 3375 1531 N A N A N A N A SMB 5XT 5875 2665 N A N A N A N A NOTE 1 With the largest motor no integral controls and standard compartment cover 3 1 Flow Control...
Page 10: ...ors controls requiring field wiring must be wired and checked for proper operation by a qualified tradesman a WARNING For maintenance and or disassembly of the actuator while installed on the valve ensure that the actuator is not under thrust or torque load If the valve must be left in service the valve stem must be locked in such a way as to prevent any movement of the valve stem CAUTION Do not u...
Page 11: ... deep M36 4 x 64 mm deep SMB 4T 8 3 4 10 UNC x 1 63 deep M20 2 5 x 42 mm deep SMB 5 12 1 1 2 6 UNC x 3 00 deep N A SMB 5T 16 1 8 UNC x 2 00 deep N A SMB 5XT 16 1 1 16 dia thru holes N A 4 3 2 Stem Acceptance Table 4 2 Maximum Stem Acceptance Maximum Stem Acceptance Two piece nut design drive sleeve stem nut Max threaded Max bore keyway Actuator inch mm inch mm SMB 000 1 375 35 1 125 w 1 4x3 32 26 ...
Page 12: ...f the motor controller one circuit is used to control the open indicating light Second Drum Switch one circuit is used to open the close holding coil circuit of the motor controller one circuit is used to control the closed indicating light For the geared limit switches to trip at any desired position follow the setting procedure below Piece numbers refer to Figure 4 1 and Table 4 3 1 Verify all p...
Page 13: ...140 11000 July 2003 4 4 Flow Control Division Limitorque Actuation Systems Figure 4 1 Two Train Geared Limit Switch Rotor Type 9 11 6 8 7 55 4 58 45 48 53 54 61 49 50 41 51 47 43 46 44 52 1 5 10 3 2 68 69 64 66 67 65 63 62 56 63 42 01 472 0006 3 ...
Page 14: ...on Shaft 44 2 Geared Limit Frame Cover 45 8 Intermittent Gear 46 6 Intermittent Pinion 47 2 Stem Spur Pinion 48 1 Set Rod 49 2 Rotor 50 2 Groove Pin 3 32 x 3 4 Long 51 2 Cover Gasket 52 8 6 32 x 1 4 Long Fillet Head Machine Screw 53 1 O Ring 1820 3 54 1 Setting Rod Bushing 55 1 Gear Frame Gasket 56 8 Insert Rotor 57 2 O Ring For Intermittent Gear Shaft piece 42 Not shown 58 2 Groove Pin 1 8 x 1 Lo...
Page 15: ...valve and one rotor is set to trip at the full close position of the valve The other two rotors are set at some intermediate position depending on the application For the geared limit switches to trip at any desired position follow the steps in Section 4 4 1 Two Train Geared Limit Switch with the exception that the piece numbers refer to Figure 4 2 and Table 4 4 NOTE The upper Set Rod piece 48 all...
Page 16: ...5 1 O Ring 6227 11 36 4 5 8 18 x 5 8 Fillet Head Cap Screw and Lockwasher 41 2 Gear Frame 42 4 Intermittent Gear Shaft 43 4 Intermittent Pinion Shaft 44 4 Geared Limit Frame Cover 45 16 Intermittent Gear 46 12 Intermittent Pinion 47 4 Stem Spur Pinion 48 2 Set Rod 49 4 Rotor 50 4 Groove Pin 3 32 x 3 4 Long 51 4 Cover Gasket 52 16 6 32 x 1 4 Long Fillet Head Machine Screw 53 2 O Ring 1820 3 54 2 Se...
Page 17: ...p setting plate is furnished on all actuators Do not exceed this maximum setting without consulting Limitorque 4 5 1 SMB 000 Double Torque Switch NOTE Torque settings must be made with the switch mounted in the actuator Piece numbers correspond to Figure 4 3 and Table 4 5 To set the torque switch 1 Verify all electric power is OFF 2 Loosen Pan Head Screws piece 30 3 For open or close operation set...
Page 18: ... Actuation Systems Figure 4 3 SMB 000 Double Torque Switch 01 474 0056 4 1 2 3 4 5 1 2 3 4 5 ARM PC 33 SECTION A A 30 29 REF CL B B A A 27 24 25 26 25 23 22 21 43 20 28 29 30 32 31 25 22 20 17 1 16 18 33 34 35 27 25 23 21 3 2 19 37 36 44 P P 38 39 9 12 11 10 5 6 4 8 14 37 7 15 13 45 2 VIEW B B 42 42 ...
Page 19: ... Connector 18 16 AWG Type TU Pigtail 15 4 Shakeproof Lockwasher Internal Teeth 16 1 Torque Switch Mounting Bracket 17 1 O Ring 18 1 O Ring 19 2 Socket Head Cap Screw 1 4 20 x 1 2 Long 20 1 Cam 21 1 Torsion Spring 22 1 Spring Mandrel 23 1 Dial 24 1 Shaft 25 2 Striker 26 1 Torque Limiting Plate 27 1 Striker Hub 28 1 Roll Pin 1 16 x 1 2 29 1 4 Swage Nut 30 2 Pan Head Screw 8 32 x 5 16 Long Slotted 31...
Page 20: ...en or close direction torque switch loosen Machine Screw piece 35 and set Pointer piece 7 at the desired torque setting The higher the number the higher the torque output of the actuator 3 Tighten Machine Screw piece 35 4 For torque seated valves operate the valve electrically to seat the valve Ensure tight shut off by tripping the torque switch contacts Figure 4 4 SMB 00 Double Torque Switch 3 4 ...
Page 21: ... 2 Contact Finger 16 4 Terminal Stud 17 2 Compression Spring 18 2 Torsion Spring 20 1 Bearing 21 1 O Ring 22 1 O Ring 23 1 Pin 25 6 Thrust Washer 27 12 Lockwasher 10 28 1 Pin 29 8 Hex Nut 10 32 30 2 Hex Nut 6 32 31 1 Cotter Pin 3 32 dia x 3 4 Long 33 2 Pan Head Self Tapping Screw 4 40 x 1 4 Long 34 2 Hex Socket Set Screw 6 32 x 5 8 Long 35 2 Round Head Machine Screw 10 32 x 3 8 Long 36 1 Round Hea...
Page 22: ... open or close direction torque switch loosen Machine Screw piece 35 and set Pointer piece 7 at the desired torque setting The higher the number the higher the torque output of the actuator 3 Tighten Machine Screw piece 35 4 For torque seated valves operate the valve electrically to seat the valve Ensure tight shut off by tripping the torque switch contacts Figure 4 5 SMB 0 through SMB 5 Double To...
Page 23: ...Contact Finger 16 4 Terminal Stud 17 2 Compression Spring 18 2 Torsion Spring 20 1 Bearing 21 1 O Ring 22 1 O Ring 23 1 Pin 3 32 dia x 5 8 Long 25 6 Thrust Washer 27 12 Lockwasher 10 28 1 Pin 3 32 dia x 3 4 Long 29 8 Hex Nut 10 32 30 2 Hex Nut 6 32 31 1 Cotter Pin 3 32 dia x 3 4 Long 33 2 Pan Head Self Tapping Screw 4 40 x 1 4 Long 34 2 Hex Socket Set Screw 6 32 x 5 8 Long 35 2 Round Head Machine ...
Page 24: ... on the back of the potentiometer and slide the potentiometer in the direction of the idler pinion until the pinions are engaged 3 Do not force the engagement of the pinions 4 Retighten the hex nut on the back of the potentiometer 5 Do not engage the pinion until the actuator and valve positions have been set To calibrate the potentiometer 1 Position the valve at 50 of full travel 2 Read the resis...
Page 25: ...e potentiometer to the proper value loosen the set screw on the potentiometer shaft pinion and rotate the potentiometer shaft to a reading of 500 ohms 4 Tighten the set screw 5 Run the actuator to the fully CLOSED position 6 Adjust the ZERO control to an output of 4 mA 7 Run the actuator to the fully OPEN position 8 Adjust the SPAN control to an output of 20 mA 9 Repeat steps 5 through 8 to fine t...
Page 26: ...ed two ways Mounted within the actuator limit switch compartment Supplied in a separate enclosure 4 7 2 Overload Relays Overload relays de energize the holding coils of the reversing starter which open the power contacts to de energize the electric motor The relays function at a predetermined current value and can reset either automatically or manually as follows Reset automatically if mounted as ...
Page 27: ...t is shown below in Figure 4 10 Figure 4 10 Typical Wiring Diagram Built in Reversing Starter and Control Station for a Three Phase Power Supply NOTE Current design Earlier control wiring varies slightly L1 L2 L3 M1 M2 M3 OL OL OL Motor T1 T2 T3 CL2 CL2 C C C o o o H1 H3 H2 H4 CL1 CL1 CL1 CL1 60 70 7 3 SS OFF Black LOCAL REMOTE PB2 STOP CL1 Red Green CL2 CL2 OL White Yellow Blue PB1 OPEN CPT FUSE ...
Page 28: ... fit the shaft The thrust developed by the actuator is absorbed by the heavy duty Bearings piece 75 76 77 78 on the top and bottom of the main Drive Sleeve As the actuator develops greater torque when seating the valve the Worm piece 53 slides axially along the splines of the Worm Shaft piece 43 and compresses the Belleville Springs piece 56 in the torque spring pack The Belleville Springs are cal...
Page 29: ...ch in this position When the Handwheel piece 5 is rotated the Handwheel Gear piece 7 turns the Handwheel Clutch Pinion piece 42 and the Worm Shaft piece 43 placing the actuator into manual operation When the electric motor is energized the Tripper Pins piece 51 which are part of the Worm Shaft Clutch Gear piece 41 cause the Trippers to be released allowing the Worm Shaft Clutch piece 50 to be rele...
Page 30: ...g grease on surfaces of explosionproof cover flanges for protection 6 Inspect lubricant in accordance with Section 6 3 1 Lubrication Inspection Visually check shaft penetrations for indications of seal leakage If abnormal leakage is found replace the seal NOTE Slight oil weepage is not a cause for seal replacement See Section 6 2 Major Maintenance 7 Megger test the motor 1 megaohm or higher is con...
Page 31: ...ion every 36 months or 1000 cycles whichever occurs first Drive Sleeve Top Bearing Lubricate every 6 months through housing cover pressure fitting During an inspection consider the following Quantity SMB and SB actuators are built to operate on the immersion principle CAUTION Ensure there is enough lubricant so that the Worm and the Worm Gear are totally immersed in grease regardless of the positi...
Page 32: ...icant to an actuator unless it consists of the same soap base as the existing lubricant unless you have received lubricant manufacturer approval The standard lubricants used by Limitorque have been proven to be extremely reliable over the years of service Other lubricants may be used in place of the standard Limitorque does require the following lubricant qualities as a minimum The lubricant must ...
Page 33: ...ove Spring Cartridge Cap piece 2 10 Pull the Worm piece 24 and Torque Spring Assembly directly out 11 Remove Tripper Lever piece 15 assembly NOTE A hex head cap screw locates and secures the Tripper Lever piece 15 on the Declutch Shaft piece 15 end of shaft should be flush with tripper lever 12 Remove Housing Cap piece 6 and Handwheel Assembly piece 5 13 Remove Drive Sleeve Assembly completely inc...
Page 34: ...Rotate Worm Shaft Gear piece 22 to ensure actuator shifts into motor operation automatically 4 Declutch actuator again and repeat Step 3 7 1 3 To Replace the Stem Nut Only a WARNING Do not remove the Locknut piece 30 with actuator under load or with the valve under pressure CAUTION If valve must be left in service while the stem nut is replaced the valve stem must be locked in such a way as to pre...
Page 35: ... Stem Nut is seated 3 Install the Locknut 4 Stake the top threads in two 2 places 180 apart 7 1 4 Gasket Instructions All gaskets except the housing cover gasket are 1 32 thick ASTM F104 synthetic fiber The housing gaskets vary in thickness To determine the correct size proceed as follows 1 Clean the Housing Cap piece 6 and main Housing piece 1 gasket surface 2 Install the actuator Drive Sleeve As...
Page 36: ...Diagram Side View 7 4 Flow Control Division Limitorque Actuation Systems A A 5 90 86 30 3 91 56 41 9 76 6 73 69 60 68 23 50 8 33 11 10 17 34 67 66 53 85 32 1 95 CLOSE OPEN SMB 0 0 0 1 2 3 4 5 54321 15 133 75 40 93 114 134 79 28 29 113 106 51 150 82 87 132 7 111 116 115 117 D 01 403 0034 3 ...
Page 37: ...Figure 7 2 SMB 000 Parts Diagram Top View 7 5 Flow Control Division Limitorque Actuation Systems CLUTCH FORK ASS Y A A 49 118 88 63 16 78 19 108 43 42 35 41 2 62 44 24 71 250 25 39 26 46 58 20 122 105 92 123 77 22 27 37 31 4 21 70 81 111 110 112 74 59 01 403 0033 4 ...
Page 38: ...intenance Manual 140 11000 July 2003 Figure 7 3 SMB 000 Exploded View 7 6 Flow Control Division Limitorque Actuation Systems H W operation position Motor operation postion Local dial indicator Slidewire transmitter 08 403 0001 4 ...
Page 39: ...Gear 23 1 Clutch Key 24 1 Worm 25 1 Clutch Roller Pin 26 1 Tripper Adjustment Arm 27 1 Tripper Cam 28 1 Tripper 1 29 1 Tripper 2 30 1 Locknut 31 1 Cam Spacer 32 1 Seal Cap 33 1 Clutch Ring 34 1 Spacer 35 1 Torque Limit Sleeve 37 1 Cam Spacer 39 1 Clutch Roller 40 1 Declutch Shaft 41 1 Thrust Washer 42 1 Thrust Collar 43 1 Spring Cartridge Cap Cover 44 1 Worm Bearing Nut 45 1 Terminal Mounting Brac...
Page 40: ... 79 1 Roll Pin 81 1 Bushing 82 1 Bushing 85 1 Quad Ring 86 1 Quad Ring 87 1 Quad Ring 88 1 Pipe Plug 1 8 90 1 O Ring 91 1 Terminal Motor 92 1 Motor Assembly 93 1 Torque Switch 94 1 Geared Limit Switch 105 1 Key 106 1 Socket Head Cap Screw 108 1 Guide Sleeve 110 1 Key 111 1 Key 112 1 Key 113 1 Socket Head Cap Screw 114 1 Socket Head Cap Screw 115 1 Lockwasher 116 1 Round Head Machine Screw 117 1 Lo...
Page 41: ...e top mounted handwheel remove the Housing Cover piece 88 and the Handwheel piece 89 assembly 13 For the side mounted handwheel remove the Bevel Gear Housing piece 96 and the entire handwheel assembly including the Bevel Gear Cartridge piece 98 14 Remove the Drive Sleeve Assembly completely including pieces 4 7 8 12 14 28 29 30 43 64 and 66 Press off the Lower Roller Bearing Cone piece 66 Slide of...
Page 42: ...s into motor operation automatically 5 Declutch the actuator again and repeat Step 3 7 2 3 To Replace the Stem Nut Only a a WARNING Do not remove the locknut piece 30 with the actuator under load or with valve under pressure CAUTION If valve must be left in service while the stem nut is replaced the valve stem nut must be locked in such a way as to prevent any movement of the valve stem 1 Remove t...
Page 43: ...ctions All gaskets except the housing cover gasket are 1 32 thick ASTM F104 synthetic fiber The housing gaskets vary in thickness To determine the correct size proceed as follows 1 Clean the Housing Cover piece 88 and the main Housing piece 1 gasket surface 2 Install the unit Drive Sleeve Assembly including the Bearings 3 Install the Housing Cover and measure the gap between the Housing Cover and ...
Page 44: ...rts Diagram Motor End View SMB SB Installation and Maintenance Manual 140 11000 July 2003 7 12 Flow Control Division Limitorque Actuation Systems 01 403 0090 4 144 173 10 168 75 26 27 165 167 21 48 143 13 44 154 157 158 A ...
Page 45: ...3 7 13 Flow Control Division Limitorque Actuation Systems Figure 7 5 SMB 00 Parts Diagram Top View CLUTCH FORK ASSEMBLY A A 169 76 41 35 67 31 18 73 17 178 24 177 20 36 174 175 176 84 59 162 6 16 15 19 71 68 74 37 38 46 32 39 159 160 74 25 11 80 165 01 403 0090 4 ...
Page 46: ...Manual 140 11000 July 2003 7 14 Flow Control Division Limitorque Actuation Systems Figure 7 6 SMB 00 Parts Diagram Side View A A 99 6 85 90 93 88 89 95 94 30 107 63 64 12 42 43 28 7 29 66 65 51 78 4 8 22 14 1 57 2 92 148 141 01 403 0121 4 ...
Page 47: ...03 7 15 Flow Control Division Limitorque Actuation Systems Figure 7 7 SMB 00 Parts Diagram Side Mounted Handwheel Detail CLOSE OPEN 1 2 3 3 4 5 2 1 79 5 34 116 3 56 83 100 98 97 106 77 23 70 114 96 101 109 102 113 110 111 103 115 99 104 105 112 156 01 403 0121 4 ...
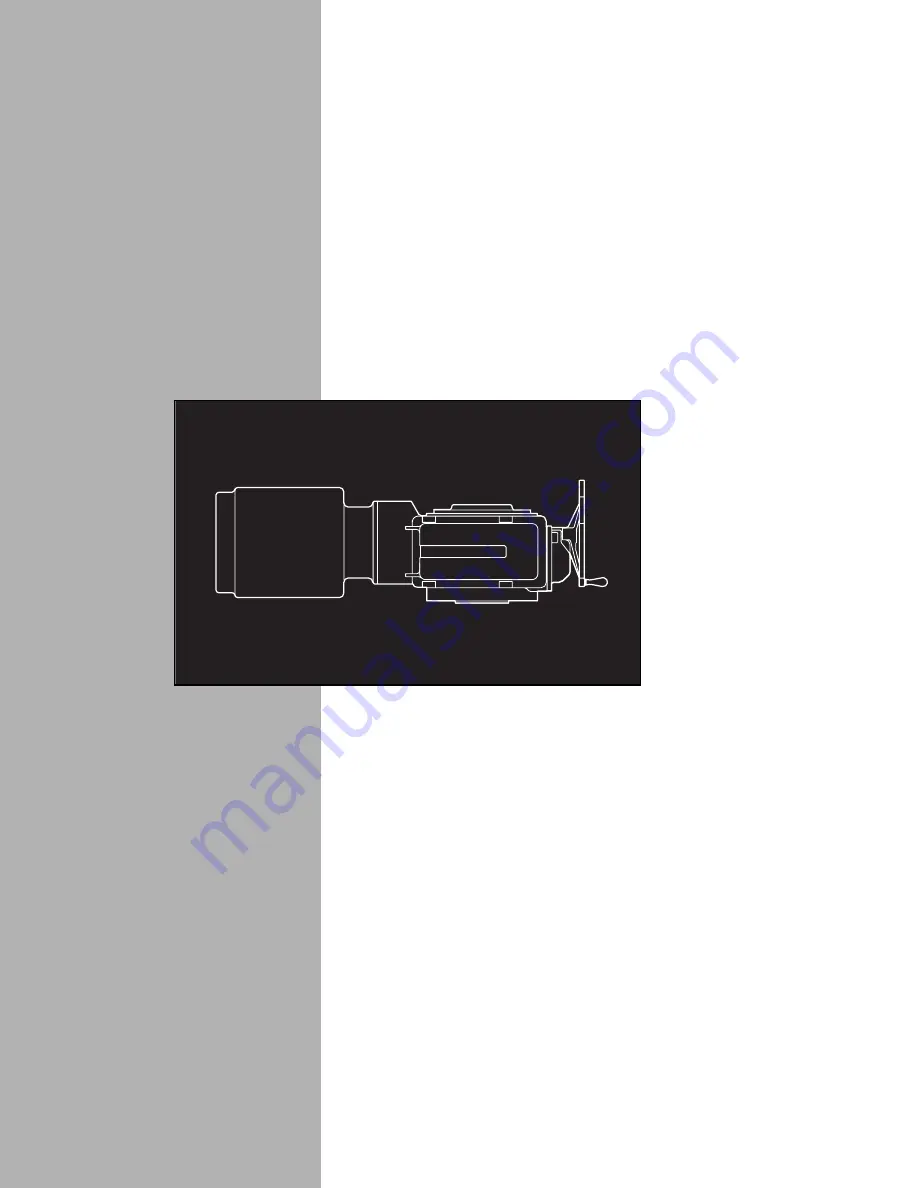
Page 48: ...tter Local dial indicator Top mounted handwheel Side mounted handwheel Motor operation position H W operation position SMB SB Installation and Maintenance Manual 140 11000 July 2003 7 16 Flow Control Division Limitorque Actuation Systems 08 403 0002 4 ...
Page 49: ...Gear 19 1 Worm 20 1 Motor Pinion 21 1 Tripper Adjustment Arm 22 1 Seal Retainer Plate 23 1 Terminal Bracket 24 1 Tripper Cam 25 1 Spring Cartridge Cap Cover 26 1 Tripper 1 27 1 Tripper 2 28 1 Clutch Ring 29 1 Worm Gear Spacer 30 1 Locknut 31 1 Bearing Spacer 32 1 Torque Limit Sleeve 34 1 Declutch Shaft 35 1 Worm Shaft Bearing Cap 36 1 Cam Spacer 37 1 Bearing Cartridge 38 1 Thrust Washer 39 1 Thrus...
Page 50: ...t Switch 88 1 Housing Cover 89 1 Handwheel 90 1 Housing Cover Gasket 92 1 Retaining Ring 93 1 Grease Fitting 94 1 Quad Ring 95 1 O Ring 96 1 Bevel Gear Housing 97 1 Bevel Pinion Cap 98 1 Bevel Gear Cartridge 99 1 Handwheel 100 1 Bevel Gear 101 1 Handwheel Bevel Pinion 102 1 Bearing Spacer 103 1 O Ring Spacer 104 1 Handle 105 1 Handle Rod 106 1 Bevel Pinion Cap Gasket 107 1 Housing Cover Gasket 109...
Page 51: ...inals 4 Remove the two screws each on the geared limit switch and the torque switch Remove the Geared Limit Switch and the Torque Switch 5 Disconnect the motor leads inside the limit switch compartment Remove the Motor piece 103 and guide the motor leads through the conduit opening NOTE The Motor Pinion piece 40 is keyed to the motor shaft and held there with a set screw and lockwire to retain the...
Page 52: ...utch Fork piece 12 Worm Shaft Clutch piece 50 will slide off Worm Shaft piece 43 17 Slide Fork Return Spring piece 58 off of Worm Shaft toward motor end Slide Declutch Link piece 9 off splined Declutch Shaft piece 24 Remove Retaining Ring piece 73 18 Remove Elastic Stop Nut piece 84 and remove Handwheel Gear piece 7 which is keyed to the Handwheel Shaft piece 25 19 Remove bolts holding Worm Shaft ...
Page 53: ...ed with the set screw lockwire between the gear teeth and the motor flange On the SMB 1 through 4 the gear teeth are between the set screw lockwire and flange 7 3 3 To Replace the Stem Nut Only a a WARNING Do not remove the Locking Nut piece 30 with the actuator under load or with valve under pressure CAUTION If valve must be left in service while the stem nut is replaced the valve stem must be lo...
Page 54: ... 22 Flow Control Division Limitorque Actuation Systems Figure 7 9 SMB 0 through SMB 4 and 4T Parts Diagram Top View 188 Declutch shaft journal SMB 0 only 194 191 190 194 52 49 196 197 72 70 71 203 183 184 10 24 185 60 140 141 37 54 95 31 73 9 38 39 105 01 408 0073 4 ...
Page 55: ... Actuation Systems Figure 7 10 SMB 0 through SMB 4 and 4T Parts Diagram Worm Shaft Side View 5 96 201 55 90 68 80 25 79 7 194 84 46 12 67 59 206 1 189 34 32 67 193 192 181 40 97 103 27 47 89 18 51 41 46 50 92 17 42 195 36 35 88 87 85 4 48 29 56 83 45 181 82 44 19 53 43 91 8 57 58 81 183 01 408 0074 4 ...
Page 56: ...al 140 11000 July 2003 7 24 Flow Control Division Limitorque Actuation Systems Figure 7 11 SMB 0 through SMB 4 and 4T Parts Diagram Drive Sleeve Side View 179 180 94 30 98 3 6 104 69 76 74 175 176 26 75 20 93 2 66 78 77 11 16 28 01 408 0013 4 ...
Page 57: ...ion Limitorque Actuation Systems Figure 7 12 SMB 0 through SMB 4 and 4T Exploded View To declutch Position indicator gearing H W operation position Motor operation position Position indicator gearing Local dial indicator Slidewire Transmitter Set screw Lockwire SMB 0 pinion 08 408 0001 4 ...
Page 58: ... 24 1 Declutch Shaft 25 1 Handwheel Shaft 26 1 Seal Retainer Plate 27 1 Split Ring Retainer 28 1 Worm Gear Spacer 29 1 Torque Limit Sleeve 30 1 Locking Nut 31 1 Motor Conduit Nipple 32 1 Clutch Tripper 1 2 34 1 Fork Pivot Pin 35 1 Handle 36 1 Handle Rod 37 1 Drum 38 1 Upper Hinge 39 1 Lower Hinge 40 1 Motor Pinion 41 1 Worm Shaft Clutch Gear 42 1 Handwheel Clutch Pinion 43 1 Worm Shaft 44 1 Bearin...
Page 59: ...e 78 1 Upper Roller Bearing Cup 79 1 Ball Bearing 80 1 Bearing 81 1 Ball Bearing 82 1 Ball Bearing 83 1 Bearing Locknut 84 1 Elastic Stop Nut 85 1 Elastic Stop Nut 86 1 Retaining Ring 87 1 Retaining Ring SMB 1 2 3 only 88 1 Retaining Ring 89 1 Retaining Ring 90 1 Retaining Ring 91 1 Retaining Ring 92 1 Retaining Ring 93 1 Quad Ring 94 1 Quad Ring 95 1 O Ring 96 1 O Ring SMB 1 2 only 97 1 Bushing 9...
Page 60: ...e sleeve locknut has left hand threads and must be rotated clockwise to remove 2 Rotate the Handwheel piece 10 to close valve causing the Stem Nut piece 127 to rise up the threaded valve stem until the stem nut splines are free of the Drive Sleeve piece 126 3 Rotate the Stem Nut piece 127 by hand for the remaining length of the valve stem and remove 4 Remove the Limit Switch Compartment Cover piec...
Page 61: ...ing the cap 8 Remove the Worm Shaft End Cap piece 7 NOTE Record the gasket thickness for Declutch Housing Cover piece 4 for reassembly 9 Remove declutch assembly as follows a Clean grease from assembly as much as possible b Scribe an alignment mark on all parts and shaft for use during reassembly c Remove the Declutch Lever Stop piece 28 Tripper Spring piece 67 Clutch Tripper 1 and 2 piece 33 and ...
Page 62: ... a Loosen two set screws on Bearing Cartridge Cap piece 44 and unscrew Bearing Cartridge Stem piece 45 22 Slide Bearing Cartridge Cap piece 44 off toward Worm piece 56 threads 23 Loosen set screw and remove Bearing Locknut piece 100 24 Press off two Bearing Cone and Cups pieces 90 and 91 NOTE Cups and cones are sets They must remain together in sets 7 4 2 SMB 5 and SMB 5T Reassembly Piece numbers ...
Page 63: ...sured at disassembly 13 Install Motor piece 115 14 Install Spirolox Ring piece 106 on the Hollow Drive Shaft piece 55 15 Install Declutch Housing piece 2 using two screws only to compress the Belleville Springs piece 58 DO NOT install gasket 16 Using two screws thread Cartridge Stem Locking Nut piece 48 on the Bearing Cartridge Stem piece 45 until the Locking Nut is snug against the Thrust Washer ...
Page 64: ...83 CAUTION Ensure that the same number of gaskets are installed as were removed during disassembly Thickness of gaskets must be sufficient to prevent the end cap from bearing on the drive shaft 36 Install the Worm Gear piece 17 37 Install Torque Drive Sleeve piece 11 and Drive Sleeve Thrust Bearing pieces 139 140 38 Apply fresh clean lubricant in the actuator Housing to 1 1 2 from top 39 Install t...
Page 65: ... 13 Handwheel piece 10 and Handwheel Washer piece 60 on the Handwheel Shaft and Pinion piece 40 4 Install valve operator on valve CAUTION The geared limit switch must be reset before energizing electrical power to the valve operator and attempting motor operation 5 Connect all external electrical leads to the actuator 6 Follow geared limit switch setting procedure to reset the Geared Limit Switch ...
Page 66: ...re 7 13 SMB 5 and 5T Parts Diagram VIEW OF DRIVE SLEEVE BUSHING AND GREASE FITTING 130 79 11 104 139 140 11 215 134 142 139 140 141 135 128 131 133 131 126 125 132 129 127 12 116 86 1 17 18 137 138 136 3 18 19 01 413 0060 4 NOTE Serial numbers through 277159 use Part 18 Serial numbers 277160 and higher use Part 139 and 140 ...
Page 67: ... Figure 7 14 SMB 5 and 5T Top View A A ALT HARD CLUTCH ASSEMBLY 15 41 96 32 39 15 41 96 24 23 25 55 22 95 115 85 43 5 84 42 37 38 64 99 95 117 200 201 44 56 20 45 58 46 62 46 48 106 8 65 93 61 6 68 21 63 107 54 51 47 76 50 97 102 35 36 74 75 73 98 7 83 52 60 10 13 108 97 31 4 82 14 40 94 2 80 100 90 91 92 01 413 0036 4 ...
Page 68: ...0 11000 July 2003 Figure 7 15 SMB 5 and 5T Declutch Housing Detail 7 36 Flow Control Division Limitorque Actuation Systems SECTION A A 010 CLEARANCE MINIMUM 71 72 28 112 49 53 59 81 101 110 33 67 70 103 30 27 57 66 70 109 34 69 105 9 01 413 0037 4 ...
Page 69: ...SMB SB Installation and Maintenance Manual 140 11000 July 2003 7 37 Flow Control Division Limitorque Actuation Systems Figure 7 16 SMB 5 and 5T Exploded View 08 408 0002 4 ...
Page 70: ...ing 20 1 Worm Bushing 21 1 Handwheel Gear Bushing 22 1 Retaining Ring 23 1 Gear Insert 24 1 Split Ring 25 1 Spirolox Ring 27 1 Declutch Shaft Drum 28 1 Declutch Lever Stop 30 1 Declutch Shaft 31 1 Tripper Bolt 32 1 Geared Limit Threaded Collar 33 1 Clutch Tripper 1 34 1 Clutch Tripper 2 35 1 Handle Rod 36 1 Handle 37 1 Upper Hinge 38 1 Lower Hinge 39 1 Motor Pinion 40 1 Handwheel Shaft and Pinion ...
Page 71: ...1 Flexible Jaw Clutch Sleeve 74 1 Flexible Jaw Clutch Collar 75 1 Nylon Insert 76 1 Clutch Sleeve Insert 79 1 Housing Cover Gasket 80 1 Declutch Housing Gasket 81 1 Declutch Cap Gasket 82 1 Declutch Cover Gasket 83 1 Worm Shaft End Cap Gasket 84 1 Motor Adapter Gasket 85 1 Motor Gasket 86 1 Limit Switch Cover Gasket 90 1 Bearing Cone 91 1 Bearing Cup 92 1 Bearing Spacer 93 1 Bearing 94 1 Handwheel...
Page 72: ...mit Switch 125 1 Thrust Adapter Housing 126 1 Thrust Drive Sleeve 127 1 Stem Nut 128 1 Thrust Bearing Cartridge 129 1 Seal Retainer Plate 130 1 Drive Sleeve Locknut 131 2 Bearing Roller Assembly 132 1 Oil Seal 133 1 Grease Fitting 134 1 O Ring 135 1 Gasket 136 1 Gasket 137 1 Threaded Flange 138 1 Sealing Washer 139 1 Bearing Cup 140 1 Bearing Cone 141 As required Bearing Shim 142 1 Bearing Spacer ...
Page 73: ...8 1 1 Remove Spring Housing Cover piece 121 2 Remove Locking Nut piece 125 Note that the Set Screw piece 126 must be loosened before the Locknut can be removed 3 Lift the Spring Cartridge piece 123 Try to keep cartridge straight to aid in its removal The Belleville Springs piece 108 Thrust Washer piece 124 and Thrust Limiter Sleeve piece 119 where applicable will come out with the Spring Cartridge...
Page 74: ...e the gap between the Bevel Gear Housing and the Housing 10 Install Bevel Gear Housing Gasket piece 107 of the same thickness as the gap measured in Step 9 NOTE Allow for the compressibility of the gasket material If the exact thickness gasket is not available use the next larger thickness 11 Install Spring Cartridge piece 123 complete with Thrust Washer piece 124 Belleville Springs piece 108 O Ri...
Page 75: ...ion Limitorque Actuation Systems Figure 8 1 SB 00 Parts Diagram 119 158 96 159 123 121 118 117 126 122 109 113 110 106 111 153 155 97 125 108 81 124 160 98 131 63 130 57 87 83 64 2 1 14 8 4 78 22 51 65 66 29 7 28 43 120 42 12 116 154 107 100 102 101 103 115 179 99 186 185 01 416 0032 4 ...
Page 76: ...Ball Bearing 83 1 Torque Switch 87 1 Geared Limit Switch 96 1 Bevel Gear Housing 97 1 Bevel Pinion Cap 98 1 Bevel Gear Cartridge 99 1 Handwheel 100 1 Bevel Gear 101 1 Handwheel Bevel Pinion 102 1 Bearing Spacer 103 1 O Ring Spacer 106 1 Bevel Pinion Cap Gasket 107 1 Bevel Gear Housing Gasket 108 1 Belleville Spring 109 1 Ball Bearing 110 1 Ball Bearing 111 1 Retaining Ring 113 1 Grease Fitting 115...
Page 77: ... Sleeve piece 107 being careful not to loosen or damage O Ring piece 94 The Bearing Cup piece 116 will come out with the Thrust Sleeve piece 107 4 Remove the Drive Sleeve piece 11 in accordance with Step 12 of Section 7 3 1 SMB 0 1 2 4 and 4T Disassembly If only the Stem Nut piece 20 is to be removed see Step 5 5 If the actuator is not on the valve the Stem Nut piece 20 is accessible If the actuat...
Page 78: ...2 5 Remove Spring Housing piece 3 Install a Gasket piece 66 between Housing and Spring Housing NOTE The Gasket thickness should be the same as the gap measured in Step 4 plus an allowance for the compressibility of the gasket material used If an exact gasket thickness can not be obtained use the next higher thickness gasket available 6 Replace the Thrust Sleeve Bearing Cartridge piece 106 along wi...
Page 79: ...over Gasket 74 1 Bearing Shim Set 75 1 Bearing Cone 76 1 Bearing Cup 77 1 Bearing Cone 78 1 Bearing Cup 93 1 Quad Ring 94 1 O Ring 98 1 Grease Fitting 104 1 Torque Switch 106 1 Thrust Sleeve Bearing Cartridge 107 1 Thrust Sleeve 108 1 Belleville Spring Shim 109 5 Belleville Springs 110 1 Indicator Dial Plate 111 1 Indicator Shaft 112 1 Indicator Lever 113 1 Indicator Spring 114 1 Indicator Pointer...
Page 80: ...the Bearing Retainer piece 155 to the housing using two 5 8 x 11 UNC x1 1 4 long bolts a Place the actuator in hand operation b Rotate the Handwheel in the direction to effect a downward movement of the stem usually the close direction The Stem Nut will climb up the stem until it clears its splines c Rotate the Stem Nut off the stem 8 3 2 SB 1 Reassembly Stem Nut Installation Piece numbers refer t...
Page 81: ...Control Division Limitorque Actuation Systems Figure 8 3 SB 1 Parts Diagram 094 A A SEC A A D 76 74 26 75 20 93 2 28 16 11 77 148 78 157 155 158 153 156 179 240 162 170 161 172 225 167 168 180 163 165 181 169 166 164 104 69 159 160 154 151 157 150 146 241 147 01 416 0028 4 ...
Page 82: ...146 1 Bearing Cup 147 1 Thrust Sleeve 148 1 O Ring 150 1 Quad Ring 151 1 Thrust Spring Bearing Cartridge 153 14 Belleville Spring 154 1 Belleville Spring Shim 155 1 Bearing Retainer 156 1 Spring Housing Adapter 157 1 Housing Cover Gasket 158 1 Adapter Gasket 159 1 Spring Housing 160 1 Seal Bushing 161 1 O Ring 162 1 O Ring 163 1 Plug for Indicator Shaft 164 1 Roll Pin 165 1 O Ring 166 1 Indicator ...
Page 83: ...80 Be careful to remove the set screws securing the Spring Retainer Cap to the Spring Cartridge before trying to remove locknut b Lift off the Thrust Washer piece 178 the Belleville Springs piece 179 and the Thrust Limit Sleeve piece 199 To reassemble the Spring Cartridge a Position the Belleville Springs piece 179 between the two Thrust Washers piece 178 as shown in Figure 8 4 b Thread Spring Ret...
Page 84: ...Quad Ring piece 194 and the O Ring piece 176 are properly installed Ensure the Thrust Sleeve engages the splines on the top of the Stem Nut the Thrust Sleeve will not rotate if engaged improperly 3 Clean the Housing piece 2 flange and mounting flange of the Spring Housing piece 163 4 Install the Spring Housing without any gasket Measure the gap between the Spring Housing piece 163 and the Housing ...
Page 85: ...ow Control Division Limitorque Actuation Systems Figure 8 4 SB 2 Parts Diagram 161 202 203 198 178 197 180 163 173 204 205 176 194 104 69 76 74 26 75 20 93 2 28 16 11 77 78 66 168 169 178 179 199 170 98 206 190 184 200 201 192 183 187 207 195 196 184 181 203 01 416 0030 4 ...
Page 86: ...orque Switch 161 1 Spring Housing Cover 163 1 Spring Housing 168 1 Thrust Sleeve 169 1 Bearing Cup 170 1 Bearing Cone 173 1 Spring Cartridge 176 1 O Ring 178 2 Thrust Washer 179 5 Belleville Spring 180 1 Spring Retainer Cap 181 2 Socket Head Set Screw 183 1 Indicator Shaft 184 1 Roll Pin 187 1 O Ring 190 1 Indicator Dial 192 1 Indicator Pointer 194 1 Quad Ring 195 1 Indicator Spring 196 1 Indicato...
Page 87: ...mit Sleeve piece 161 and Thrust Washer piece 153 To reassemble the Spring Cartridge a Position Belleville Springs piece 152 between the two Thrust Washers pieces 153 and 150 as shown in Figure 8 5 b Thread the Spring Retainer Cap piece 166 onto the Spring Cartridge piece 149 until the Spring Retainer Cap touches the Thrust Washer Add 3 4 turn c Reinstall set screws or drill and tap for new set scr...
Page 88: ... the splines on the top of the Stem Nut the Bearing Cartridge will not rotate if engaged properly 3 Replace the Centering Ring piece 167 4 Replace the Spring Cartridge piece 149 as an assembly along with the Belleville Springs piece 152 Thrust Washers pieces 150 and 153 and Spring Retainer Cap piece 166 5 Replace the Deflection Limit Sleeve piece 161 6 Verify that the O Ring piece 160 is properly ...
Page 89: ...earing Cup 77 1 Bearing Cone 78 1 Bearing Cup 93 1 Quad Ring 98 1 Grease Fitting 104 1 Torque Switch 140 1 Spring Housing 147 1 Bearing Cup 148 1 Bearing Cone 149 1 Spring Cartridge 150 1 Thrust Washer 152 10 Belleville Spring 153 1 Thrust Washer 154 1 Bearing Cartridge 155 1 Indicator Dial 156 1 Indicator Shaft 157 1 Indicator Lever 158 1 Indicator Pointer 159 1 Indicator Spring 160 1 O Ring 161 ...
Page 90: ...tor in hand operation b Rotate the Handwheel in the direction to effect a downward movement of the stem usually the close direction The Stem Nut will climb up the stem until it clears its splines c Rotate the Stem Nut off the stem 8 6 2 SB 4 Reassembly Stem Nut Installation Piece numbers refer to Figure 8 6 1 Replace the Stem Nut piece 20 a If the actuator is not on the valve the Stem Nut will dro...
Page 91: ...ual 140 11000 July 2003 8 19 Flow Control Division Limitorque Actuation Systems Figure 8 6 SB 4 Parts Diagram 2 76 182 75 28 16 20 11 77 78 175 168 155 98 169 173 170 178 176 179 178 181 163 180 200 201 93 26 74 119 66 199 198 01 416 0031 4 ...
Page 92: ...ket 74 1 Bearing Shim 75 1 Bearing Cone 76 1 Bearing Cup 77 1 Bearing Cone 78 1 Bearing Cup 93 1 Quad Ring 98 1 Grease Fitting 119 1 Housing Gasket 155 1 Housing Cover Cartridge 163 1 Spring Housing 168 1 Bearing Cartridge 169 1 Bearing Cone 170 1 Bearing Cup 173 1 Spring Cartridge 175 1 O Ring 176 1 Quad Ring 178 1 Thrust Washer 179 4 Belleville Spring 180 1 Spring Cartridge Cover 181 1 O Ring 18...
Page 93: ...t for tightness on the valve stem Loosen the stem nut on the valve stem e Inspect the valve for faulty or damaged parts Reversing starter contacts fail to close Check the line circuit breaker or fuses in the disconnect switch if installed for possible interruption of incoming line voltage The holding coil may be open circuited and if so should be replaced Pushbutton contacts not making proper Adju...
Page 94: ...d P O Box 11318 Lynchburg VA 24506 1318 Telephone 434 528 4400 Fax 434 845 9736 http www limitorque com All inquiries or orders must be accompanied by the following information 1 Actuator Size 2 Limitorque Order Number 3 Limitorque Serial Number When replacing space heaters provided in the limit switch compartment select the heater size in accordance with Table 10 1 Table 10 1 Space Heater Size pe...
Page 95: ...nity IEC 801 5 ANSI IEEE C62 41 Mains power Harmonics MIL STD 462 Method CSO1 CSO2 Manufacturer s Name Limitorque a Flowserve Company Manufacturer s Address 5114 Woodall Road Lynchburg VA 24506 Importer s Name Limitorque a Flowserve Company Importer s Address Abex Road Newbury Berkshire RG14 5EY England Type and Description of Equipment Valve Actuators Model Number SMB SB Series Note Tested with L...
Page 96: ...Flow Control Division Limitorque Actuation Systems 19 Australian Distributor for Limitorque Acrodyne Pty Ltd 14 11 Havelock Road Bayswater Victoria 3153 Australia Phone 03 8727 7800 Fax 03 9729 8699 ...