5. First Time Installation & Test
Checklist:
This section explains a few things you should know for
proper operation and easier use of the ATOM system.
Whenever transmitting commands (laser or IR) with
the LRC, it must be pointed at and in the line–of-sight
of the module’s sensors that you are sending signals to.
Make sure there is a good ground throughout,
starting at the luminaire ground and ending with the
earth ground.
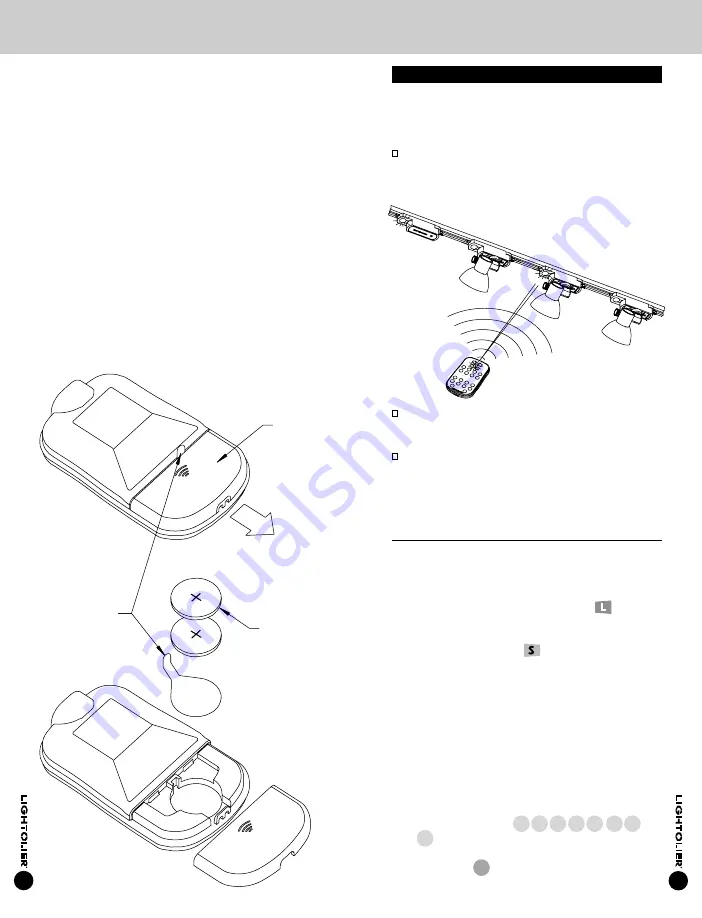
Make sure, on the remote that the protective plastic
is removed from between the batteries and contacts
as shown in Section 3, "replacing batteries" or the
remote will not work.
Testing a DM or NDM
1.
Turn off power to track.
2.
Install module into track with luminaire attached
(See Section 3 – Installation of Modules to Lytespan
Track Systems). Re-power Track.
3.
Using the LRC, press and hold the Learn
button for
2 seconds which turns on the Module’s LED so it can
be easily located.
4.
Press and hold the Laser
button and aim laser
beam at an individual modules receiver to select it
and place it in program mode. (When using multiple
modules, select them in the same manner if they
need to be programmed identically to the first
module.) The module’s LED(s) will blink at a 1/2
second rate when in program mode. The LRC’s LED
will also blink (every 1 second) to indicate the
transmitter will be transmitting program IR
commands when buttons are depressed. (After 60
seconds of inactivity, the module(s) will exit the
program mode without saving.)
5.
Press a SCENE button
A
B C
D
E
F
ON
or
OFF
If the module responds to these buttons with
changes in light levels, it’s working.
6.
Press the end
e
button to exit the program mode.
Replacing Batteries
First Time Use:
The LRC comes with a protective plastic between the
batteries and the contact on the remote to save the
battery life during storage. In order for the LRC to work,
this plastic should be removed. Remove the battery
cover, located on the back of the remote, by snapping it
off in the direction shown. Pull out the protective plastic
and make sure the batteries are pushed completely in.
Snap the cover back on. When buttons are depressed,
the LRC’s LED should light up. There is also a protective
cover on the front of the remotes’ keypad that should be
removed.
Replacing Batteries:
Remove battery cover, located on back of remote, by
snapping it off in the direction shown. Pull out the old
batteries. Replace with (2) 3V CR2025 with the positives
(+) facing up. Snap battery cover back on.
10
11
PROTECTIVE
PLASTIC
BATTERY
COVER
BATTERIES


