

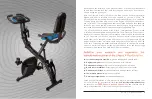

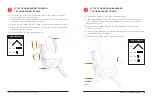
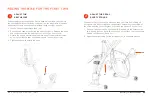
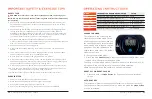


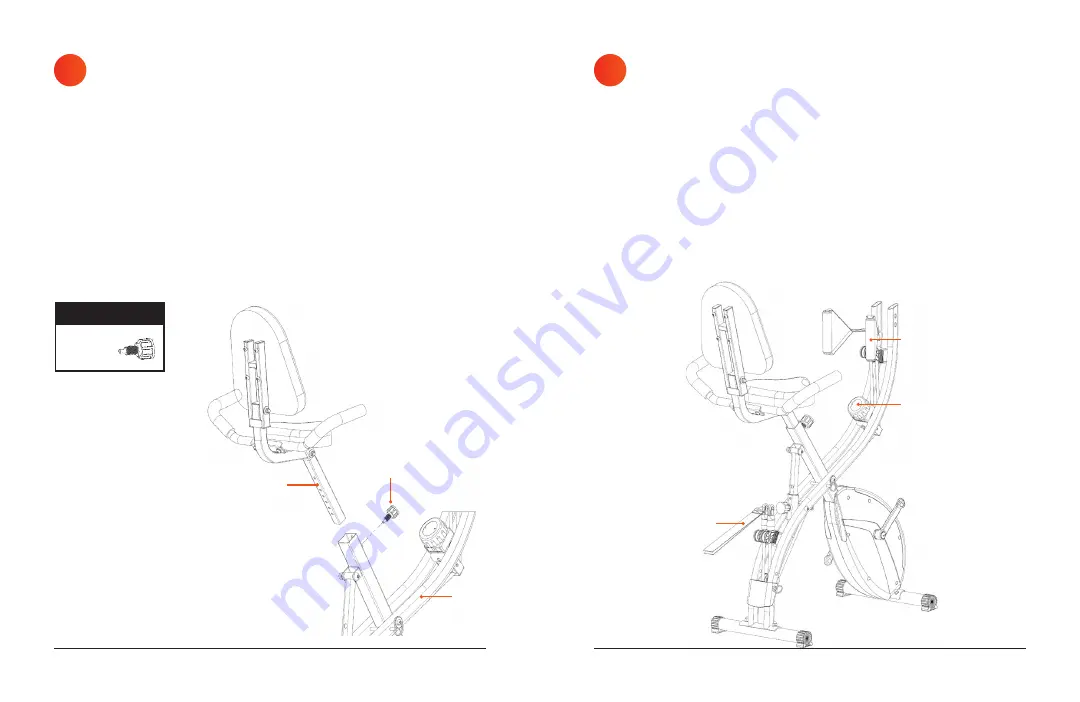
SECURE THE ASSEMBLED SEAT
TO THE BIKE BODY
1. Locate the second adjustment knob in the hardware bag.
2. Slide the seat adjustment post
(12)
into the seat post at the top of the
bike body
(1)
.
3. Screw the seat adjustment knob
(15)
into the large threaded screw
hole on the front of the seat post.
4. When the knob is partially screwed in, pull the knob head out and slide
the seat slightly up or down until you hear a click indicating that the
seat adjustment post is locked into position.
5. Tighten the knob to secure the seat post.
NOTE:
Adjust the seat to your desired height after the bike is fully
assembled. See
on page 22 for instructions.
7
Re Fitness Collection
17
16
X-FlexCycle Pro User Manual Lifepro
Re Fitness Collection
17
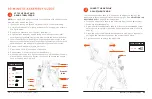
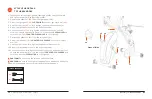
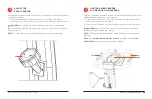
ATTACH THE RESISTANCE BAND HANDLES AND
VELCRO BAND TO THE BIKE BODY
1. The two resistance band handles
(31)
and the Velcro leg band
(32)
ship
intertwined; separate the three items.
2. Slide the metal ring at the end of each resistance band handle into one
of the two plastic resistance band clips at the front of the bike, just
above the pedal tension knob
(2)
.
3. Slide the metal ring at the end of the Velcro leg band into one of the
two plastic resistance band clips at the back of the bike.
NOTE:
See
on page 26 and
TENSION OF THE RESISTANCE BANDS
on page 27 for more information.
8
32
12
15
1
(15)
x1
TOOLS & HARDWARE
2
31


