9
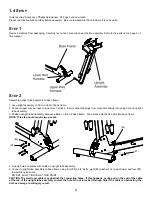
6. Insert two (#4) 1 inch bolts and two (#9) washers into
backside of connector joint on base frame. Start each bolt,
and then tighten with a 9/16 socket wrench.
7. Tighten four (#5) 3-inch bolts with a 9/16” socket wrench.
8. Push the ten (#10) black plastic cover caps
over each bolt head.
S
TEP
3
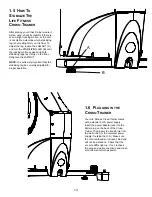
Attach Plastic Upright Cap to upright assembly:
1. Push the Plastic Upright Cap into open end of tube at the top of the upright assembly.
2. Line up hole in nose cone with hole in upright assembly and fasten with a (#3) screw.
1.4 S
ETUP
CONTINUED
(#3)
(#10)
Plastic
Upright
Cap
Upright
assembly
Summary of Contents for X3 Cross-Trainers
Page 1: ...x3 x3i CROSS TRAINER ASSEMBLY OPERATION MANUAL www lifefitness com Part 6985001 ...
Page 7: ...7 1 3 PARTS DESCRIPTION CONTINUED 6 7 8 9 10 6866601 6866701 3223310 3102807 3102802 ...
Page 28: ...www lifefitness com Part 6985001 ...
Page 29: ...X3 T O T A L B O D Y E L L I P T I C A L C R O S S T R A I N E R B A S E U S E R M A N U A L ...
Page 51: ...22 A A F C E E D D B B ...


