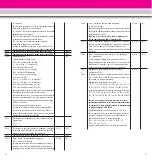
(depends on loco model, do not change, as functions can be
affected or destroyed)
CV52
Command for front lighting terminal (see CV51)
[128]
CV53
Command for rear lighting terminal (see CV51)
[64]
CV54
LGB configuration
[2]
Bit programming
Bit 1: hand-off function, 0 = off, 1 = on [0]
Bit 2: MTS Back-EMF, 0 = off, 2 = on [2]
Bit 3: analog Back-EMF, 0 = off, 4 = on [0]
Bit 4: not used [0]
Bit 5: 0 = F1 constant, 16 = F1 flashing [0]
Bit 6: 0 = F2 constant, 32 = F2 flashing [0]
Bit 7: sound function (0 or 64) [0]
Bit 8: sound function (0 or 128) [0]
To program, add the values for the individual Bits and
program the resulting function value.
The values for Bits 5-8 vary between locos. The values for
your loco can be read using the 55045 MTS PC Decoder
Programming Module.
Hand-off function on: When operating with 55015, you can
adjust direction and speed for two seconds after selecting a
moving loco without causing the loco to stop.
CV55
Reset factory pre-set values for CVs
Program:
6-55->
5-55->
CV56
Voltage for function terminal F2
(1-32)
[32]
(depends on loco model, do not change, as functions can
be affected or destroyed)
CV57
Command for function terminal F2 (see CV51)
[10]
CV58
Pause time (analog operation)
(0-255)
[0]
(0.5 seconds x function value) When the polarity of the
analog track voltage is reversed, the loco waits for the pro-
grammed time period, then accelerates in the new direction
CV60
Back-EMF: Max. adjustment factor
(1-255)
[4]
Specifies the max. increase or decrease of voltage applied
during each time interval (programmed in CV61),
255 = large steps
The factory pre-set values of CV60 and CV61 are optimized
for LGB motors.
CV61
Back-EMF: Adjustment frequency
(0-255)
[16]
Specifies how often per second the motor voltage is adjusted -
accordingly, the loco will react to curves and grades
immediately or with a short delay
0 = immediate adjustment, 255 = maximum delay
CV62
Back-EMF: Max. Adjustment
(0-255)
[255]
Limits the total adjustment in motor voltage. If there is a very
large load on the motor, the adjustment will not exceed this
value - for more realistic operations, so that locos will slow a
bit on grades. 0 = no adjustment, 255 = maximum adjustment
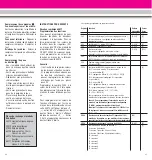
You can program the following registers:
Register Function
Available Factory
values
pre-set
CV1
Loco address
(00-22)
[3]
CV2
Starting voltage
(0-255)
[2]
voltage for speed setting 1 - if loco starts only a higher
speed setting, increase value.
CV3
Acceleration (1 = fast, 255 = slow)
(1-255)
[3]
CV4
Braking (1 = fast, 255 = slow)
(1-255)
[3]
CV5
Max. voltage
(1-255)
[255]
Voltage for highest speed step - if a lower top speed is
desired, decrease value.
CV5
after input of CV6 (when programming with older 55015)
function value for CV to be programmed
CV6
CV to be programmed (when programming with older 55015)
CV29
NMRA configuration
[4]
Bit programming
Bit 1: direction, 0 = normal, 1 = reversed [0]
Bit 2: speed steps, 0 = 14 (LGB), 2 = 28 [0]
Bit 3: analog operation, 0 = not possible, 4 = possible [4]
Bit 4: not used [0]
Bit 5: speed steps, 0 = factory-programmed,
16 = user-programmed [0]
Bit 6: address area, 0 = 0-127 (LGB), 32 = 128-10239 [0]
To program, add the values for the individual Bits and
program the resulting function value.
Hint: To program a loco to reversed direction of travel (for
example, F7 A-B-A combination), program function value 5.
Attention! Loco addresses 128-10239 and 28 speed steps
cannot be used with LGB MTS).
CV49
Voltage for function terminal F1
(1-32)
[32]
(depends on loco model, do not change, as functions can
be affected or destroyed)
CV50
Voltage for lighting terminals (see CV49)
(1-32)
[5]
CV51
Command for function terminal F1
[1]
0 = lighting button 9
1 = button 1 (buttons 2-8 not used)
9 = button 1 (buttons 2-8 used as well)
10 = button 2
11 = button 3
12 = button 4
13 = button 5
14 = button 6
15 = button 7
16 = button 8
64 = lighting button 9 (on only when loco is reversing)
65 = button 1 (on only when loco is reversing)
128 = lighting button 9 (on only when loco is moving forward)
129 = button 1 (on only when loco is moving forward)
15
14

