background image

14

  TERMS AND TIPS

 Unit   

The LG HDD/DVD Recorder

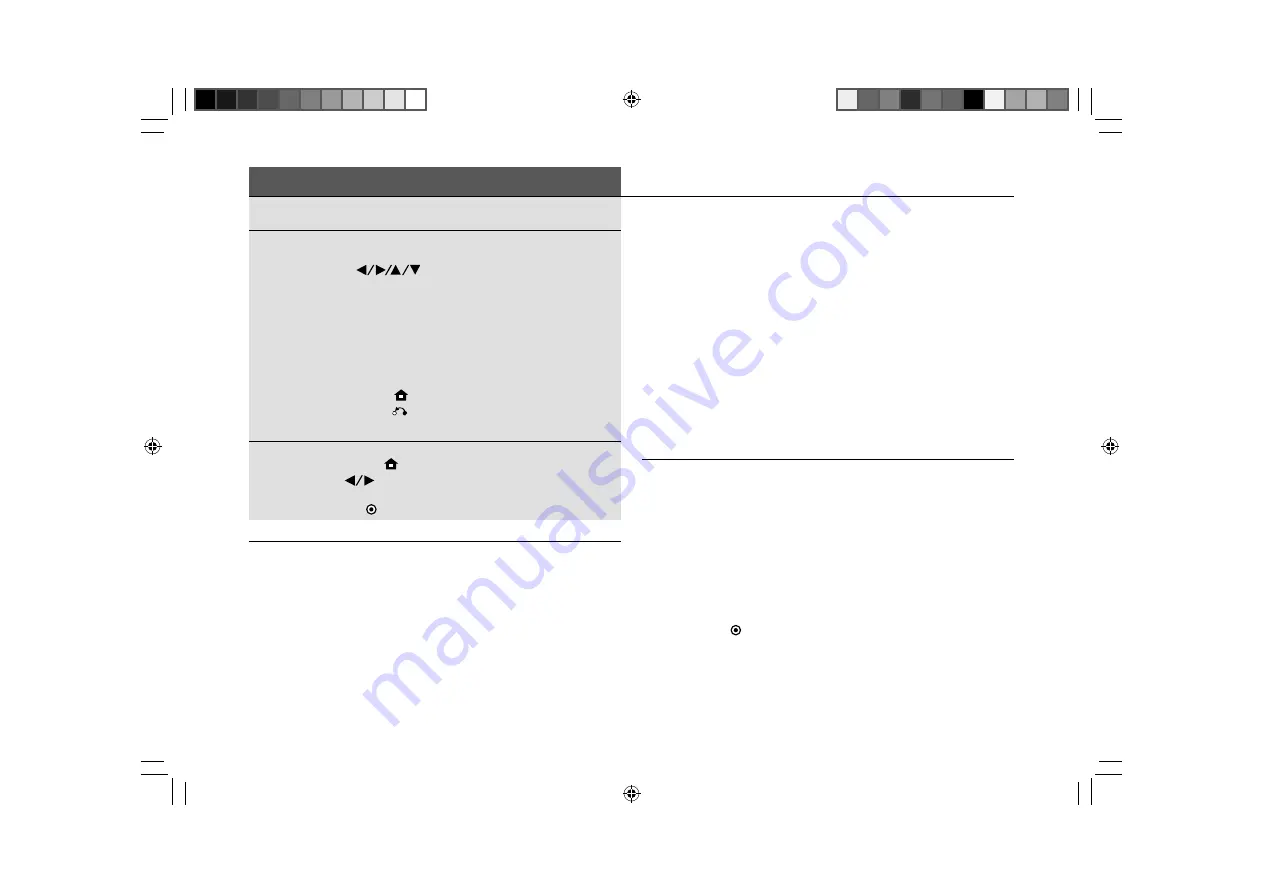
 Press  

Press a [named] button on Unit’s remote control

 Select  

Press [ 

 ] buttons freely on remote 

      control 

to 

highlight 

an 

option

 Set   

Follow instructions for currently displayed menu to 

      choose 

an 

option

 Enter  

Press buttons on remote control to provide a code, 

      name 

or 

password

 Panel  

Part of the display screen. Many screens have left, 

      middle 

and 

right 

panels

 Accessing 

menus

      Press 

HOME 

[

 ] on remote control to display 

fi

 rst menu

      Press 

BACK 

[   ] from any menu to exit menu displays

  DISPLAYING SET UP MENU

  Displaying Set Up Menu
    a)   Press HOME [

 ]. First menu is displayed.

    b)   Press [

] until Easy Menu is displayed

    c)   Select SETUP 
    d)   Press OK [


] to display set up menu

HDMI CONNECTION

HDMI cables provide optimal connection that produces better picture 

& sound quality than a SCART connection and gives you access to 

the HD upscaling features of this unit. You can alter the resolution for 

the HDMI output by pressing the RES button on the front of the unit 

repeatedly (576i, 576p, 720p, 1080i, 1080p).
To connect a High De

fi

 nition television or other HDMI enabled device:

  a)  Check device is compatible with 720(1440)x576i, 720x576p,  

    1280x720p, 1920x1080i or 1920x1080p video input.
    If TV can’t handle 96 kHz sampling frequency: 
      i  Display set up menu (see Displaying Set Up Menu). 
      ii  Select audio options icon in left panel.

      iii  Select Sampling Freq. from middle panel.
      iv Select 48 kHz from right panel.
      v  Press [OK] to con

fi

 rm.

    If TV isn’t equipped with Dolby Digital and MPEG decoder: 
      •  Set Dolby Digital and MPEG options to PCM.
    If TV isn’t equipped with DTS decoder: 
      •  Set DTS to OFF.
  b)  Use an HDMI cable (not supplied) to connect HDMI Output port 

    on Unit to HDMI Input port on TV.
  c)  Set resolution using RES. button on front panel of Unit.
  d)  Check device is switched off.
  e)  Switch off Unit.
  f)  Switch on device.
  g)  Wait 30 seconds.
  h)  Switch on Unit.

COAXIAL ANTENNA FEED 5V

To supply power to connected antenna:
  a)  If antenna is indoor:
    •  Ensure signal ampli

fi

 er rate is DC 5V, 100mA

  b)  Display set up menu (see Displaying Set Up Menu)
  c)  Auto Programming is highlighted. Select Antenna Feed 5V from  

   middle 

panel

  d)  Select option in right panel:
    •  If antenna is indoor:
    • Select 

ON

    •  If antenna is outdoor:
      •  Select ON or OFF
  e)  Press OK [


] to con

fi

 rm

CONNECTING YOUR LG RECORDER

LG RHT49X instructions.indd   Sec1:14

LG RHT49X instructions.indd   Sec1:14

2009-03-04     3:50:15

2009-03-04     3:50:15

Summary of Contents for RHT599H

Page 1: ...Freeview DVD Recorder with HDD USER MANUAL RHT599H LG RHT49X instructions indd 1 LG RHT49X instructions indd 1 2009 03 04 3 50 12 2009 03 04 3 50 12 ...

Page 2: ...or other similar surface WARNING To reduce the risk of the unit over heating ensure the surrounding area is clear and well ventilated WARNING Cigarette smoke can damage this unit DO NOT smoke around this unit WARNING DO NOT install this unit in a confined space such as a book case rack or similar unit Ensure the area is well ventilated WARNING DO NOT install this unit on an uneven surface or area ...

Page 3: ...r license from Dolby Laboratories Dolby and the D symbol are trademarks of Dolby Laboratories REGIONAL CODES Most DVD discs have a globe with one or more numbers in it clearly visible on the cover This number must match your unit s regional code or the disc cannot play If you try to play a DVD with a different regional code from the unit the message Incorrect region code Can t play back appears on...

Page 4: ...DING FORMAT Sampling frequency 48kHz Compression format Dolby Digital Frequency response DVD PCM 48 kHz 8 Hz to 22 kHz CD 8 Hz to 20 kHz DVD PCM 96 kHz 8 Hz to 44 kHz Signal to noise ratio More than 90 dB AUDIO OUT connector Harmonic distortion Less than 0 02 AUDIO OUT connector AUDIO RECORDING FORMAT PLAYBACK Antenna in Antenna input 75 ohms Video in 1 0 Vp p 75 ohms sync negative RCA jack x 1 SC...

Page 5: ...JPEG MP3 or WMA files RECORDABLE AND PLAYABLE DISCS This unit can play and record all widely used DVD types The table below shows some specific compatability differences depending on the disc types The table below shows the file formats and media types that this unit can playback LG RHT49X instructions indd Sec1 5 LG RHT49X instructions indd Sec1 5 2009 03 04 3 50 13 2009 03 04 3 50 13 ...

Page 6: ...arantee require a receipted account as evidence of the date of purchase D We respectfully point out that your dealer is not obligated to replace batteries if they become exhausted or worn in use E Aerial alignment and consumer control adjustments are not covered by this guarantee TECHNOLOGY WITH THE HUMAN TOUCH PLEASE NOTE This guarantee does not affect your statutory rights REQUIREMENTS TO MAINTA...

Page 7: ...is unit operates on a mains supply of 200 240V 50 60Hz WARNING This unit is supplied with a BSI 1363 approved 13 amp mains plug fused at 5 amp When replacing the fuse always use a 5 amp BS 1362 BSI or ASTA approved type Never use this plug with the fuse cover omitted To obtain a replacement fuse cover contact your dealer If the type of plug supplied is not suitable for the mains sockets in your ho...

Page 8: ...Up 1 I POWER Switches the unit ON or OFF 2 Disc Tray Insert a disc here 3 OPEN CLOSE Opens or closes the disc tray 4 Display Window Shows the current status of the unit T S Indicates the timeshift mode REC The unit is recording HDD The unit is in HDD mode DVD The unit is in DVD mode HDD DVD The unit is dubbing Indicates when the unit is in timer recording or a timer recording is programmed Indicat...

Page 9: ...ich you can operate the picture and sound from the unit INTRODUCING YOUR LG REMOTE CONTROL 2 2 3 3 3 4 4 REMOTE CONTROL BATTERY INSTALLATION Remove the battery cover on the rear of the Remote Control and insert one AAA size battery with and matched correctly POWER Switches the unit ON or OFF DVD Selects DVD mode HDD Selects HDD mode OPEN CLOSE Operates the DVD disc tray 0 9 Numerical Buttons Selec...

Page 10: ...one with a signal amplifier rated at 5v 100mA and set Antenna Feed 5V to ON in the set up menu SCART CABLE DO NOT connect or disconnect SCART cable whilst unit or TV is switched on SCART cable connections are quick simple to connect Take the SCRAT cable and connect to AV1 SCART port on the unit Then connect to an available SCART port on TV Connect cable to ANTENNA OUT port on the unit and to ANTEN...

Page 11: ...rks or registered trademarks of HDMI licensing LLC COMPONENT Y PB PR CABLE A HD connection can also be obtained by using a Component cable Connect to COMPONENT OUTPUT port on the unit and to COMPONENT INPUT port on your TV Also connect audio cables Red White to analogue AUDIO OUTPUT port on the unit and to AUDIO INPUT port on TV Component cable sold separately S VIDEO CABLES Connect to S VIDEO OUT...

Page 12: ...ally and you will notice Read in the display window d To stop playback press the button e To restart play back press the Button f To scan or skip chapters on the disc press the scan or skip buttons ACCESSING FREEVIEW THE DIGITAL EPG Electronic Program Guide The DIGITAL EPG provides access to scheduled FREEVIEW TV programs and also contains detailed information about individual programs Please note...

Page 13: ...es etc To stop recording Press STOP Recording from the EPG Never miss your favorite FREEVIEW TV program Simply record to Hard Disk using following easy steps To set timer from EPG a Press GUIDE EPG Menu is displayed b Press Yellow to change EPG to 8 Days menu c Press to select program and date d Press Red Recording options are displayed e Select option f Press OK to confirm Timer icon is displayed...

Page 14: ...evice a Check device is compatible with 720 1440 x576i 720x576p 1280x720p 1920x1080i or 1920x1080p video input If TV can t handle 96 kHz sampling frequency i Display set up menu see Displaying Set Up Menu ii Select audio options icon in left panel iii Select Sampling Freq from middle panel iv Select 48 kHz from right panel v Press OK to confirm If TV isn t equipped with Dolby Digital and MPEG deco...

Page 15: ...ng OK a second time turns option OFF h Press BACK to exit AV2 Connection To connect a decoder or other device to AV2 Decoder port on rear panel of Unit a Display set up menu see Displaying Set Up Menu b Auto Programming is highlighted Select AV2 Connection from middle panel c Select option in right panel Decoder to connect a PAY TV decoder to AV2 Decoder port on Unit Others to connect a VCR or sim...

Page 16: ...tal Audio Output port on Unit to corresponding port on amplifier For DTS Multi channel Surround Connect Unit to a DTS compatible receiver via Unit s Digital Audio Output To choose digital audio signal when using a Digital Audio Output port a Press HOME First menu is displayed b Press until Easy Menu is displayed c Select SETUP d Press OK to display set up menu e Select audio options icon in left p...

Page 17: ...ces are connected via a HDMI cable the SIMPLINK system can control some of the functions such as play pause scan and power on For more information please refer to your LG TV manual MAIN GUIDE LG RHT49X instructions indd Sec1 17 LG RHT49X instructions indd Sec1 17 2009 03 04 3 50 16 2009 03 04 3 50 16 ...

Page 18: ...s of channel manually PR Indicate channel position Seek Search for a channel automatically Searching stops when Unit tunes into a channel Ch Change channel number MFT Fine tune channel for clearer picture CANAL Set channel for decoder to watch or record PAY TV Canal plus programs NICAM Set channel for NICAM broadcast h Press OK to confirm settings PROGRESSIVE SCAN For high definition and compatibl...

Page 19: ...your TV with Unit remote control If your TV is listed in table below a Press and hold TV POWER c Enter TV manufacturer code as follows Manufacturer Code number LG GoldStar 1 Default 2 Zenith 1 3 4 Samsung 6 7 Sony 8 9 Hitachi 4 d Release TV POWER button e Switch TV back on if necessary After replacing batteries in remote control repeat steps a to c TV ASPECT To select aspects ratio of connected TV...

Page 20: ...not available when timer recording set Power Save mode will not work while receiving encoded signals INITIALIZATION To reset Unit to original factory settings except for Rating Password and Area Code and to format HDD a Display set up menu see Displaying Set Up Menu b Auto Programming is highlighted Select Initialization from middle panel c Select option in right panel Factory Set Auto Setup menu ...

Page 21: ...s e Press OK to confirm DTV AUDIO To set default audio language for viewing digital TV if provided by broadcaster a Display set up menu see Displaying Set Up Menu b Select language icon in left panel second one down c Select DTV Audio from middle panel d Refer to language code list below e Enter chosen code Press CLEAR to delete invalid entries f Press OK to confirm DTV SUBTITLE To set a default s...

Page 22: ...2 Croatian 7282 Czech 6783 Danish 6865 Dutch 7876 English 6978 Esperanto 6979 Estonian 6984 Faroese 7079 Fiji 7074 Finnish 7073 French 7082 Frisian 7089 Galician 7176 Georgian 7565 German 6869 Greek 6976 Greenlandic 7576 Guarani 7178 Gujarati 7185 Hausa 7265 Hebrew 7387 Hindi 7273 Hungarian 7285 Icelandic 7383 Indonesian 7378 Interlingua 7365 Irish 7165 Italian 7384 Javanese 7487 Kannada 7578 Kash...

Page 23: ...ystem icon in left panel c Select DVD Rating from middle panel d Press to move to right panel e Enter password Press CLEAR to delete invalid entries f Press OK to confirm g Select a DVD rating or No Limit to disable DVD Rating h Press OK to confirm DTV RATING To restrict viewing of Digital TV transmissions by age group a Display set up menu see Displaying Set Up Menu b Select lock system icon in l...

Page 24: ...bia CO Congo CG Costa Rica CR Croatia HR Czech Republic CZ Denmark DK Ecuador EC Egypt EG El Salvador SV Ethiopia ET Fiji FJ Finland FI France FR Germany DE Great Britain GB Greece GR Greenland GL Hong Kong HK Hungary HU India IN Indonesia ID Israel IL Italy IT Jamaica JM Japan JP Kenya KE Kuwait KW Libya LY Luxembourg LU Malaysia MY Area Code Maldives MV Mexico MX Monaco MC Mongolia MN Morocco MA...

Page 25: ...ss OK AUTO CHAPTER MARKING To specify marker insertion interval a Display set up menu see Displaying Set Up Menu b Select recording icon from left panel c Select Auto Chapter Mark from middle panel d Select interval from right panel 5 mins 10 mins 15 mins e Press OK AV2 RECORDING Setting must be compatible with video input signal for clear picture To select a method of inputting video signals for ...

Page 26: ...t panel d Select Finalise from middle panel e Press OK to confirm Finalisation starts Time taken depends on disc condition recording length and number of titles To unfinalise a disc a Load disc in drive b Display set up menu see Displaying Set Up Menu c Auto Programming is highlighted Select Disc Format option from left panel d Select Unfinalise from middle panel e Press OK to confirm LABELLING To...

Page 27: ...pdate software ii Freq Select update interval iii Start Update software immediately e Enter information if required and press OK SYSTEM INFORMATION To display system information a Display set up menu see Displaying Set Up Menu b Select network icon at bottom of left panel c Select System Information from middle panel System information is displayed in right panel DTV DIAGNOSTICS To view diagnostic...

Page 28: ...ram contains subtitles Wide icon current program is in wide picture format Digital Text Service Icon digital text service available SWITCHING PROGRAM LIST To switch channel list to Digital TV Analog TV or Radio a Press PR LIST TV channel list is displayed b Press to move to title of list c Press to select Digital TV Analog TV or Radio Chosen list is displayed DISPLAYING FAVORITE PROGRAM LIST To di...

Page 29: ...hoose HDD or DVD CH PR Choose a program number or other source to record Date Choose a date up to 1 month ahead Start Time Set start time End Time Set end time Repeat Choose a desired repeat Once Daily Mon Fri or Weekly Press REC on remote control repeatedly to change recording mode XP SP LP EP or MLP Press OK to set recording CANCELLING A TIMER RECORDING To cancel a timer recording before timer s...

Page 30: ...ve Do not remove whilst in use Remove carefully when not in use TO PLAY DIVX MOVIE FILES a Load DivX disc b Press HOME Movie menu is displayed c Select DivX d Press OK DivX movie list is displayed e Select file to play f Press INFO to show file information To play multiple files i Press MARKER ii Select and mark further files as required To select all files and folders list i Select any file folde...

Page 31: ...OK f Select Slide Show option on left side of screen g Press OK Slide Show menu is displayed h Select Speed option i Press OK j Select speed required k Press OK To view all photo files Select All To view only selected files i Select file ii Press MARKER iii Select and mark further files as required iv Select Object option l Select START m Press OK Slide show begins LISTENING TO MUSIC DURING SLIDE ...

Page 32: ...with disc used To view disc menu a Load DVD b Press HOME button on remote control c Select DVD option d Press OK Title list is displayed To play a DVD title chapter i Select title chapter ii Press OK to start playback iii Press TITLE or MENU LIST to return to menu screen Press SKIP to move to next chapter track file Press SKIP once to return to beginning of current chapter track file Press SKIP tw...

Page 33: ...To resume normal speed Press PLAY DISPLAY DVD TITLE MENU a Press TITLE If current DVD title has no title menu disc menu may appear PLAYING REPEATEDLY DURING PLAYBACK To play back current title chapter folder or track repeatedly Press REPEAT repeatedly To return to normal playback Press REPEAT repeatedly to select OFF REPEATING A SPECIFIC PORTION MINIMUM 3 SECONDS DURING PLAYBACK a Press REPEAT to ...

Page 34: ...rch box shows elapsed playing time b Select the time search box c Enter required start time in hours minutes and seconds Eg to start at 2 hours 10 minutes and 20 seconds enter 21020 To correct errors i Press to move underscore _ to number needing correction ii Enter correct numbers d Press OK SELECTING A SUBTITLE LANGUAGE a Press INFO twice during playback Playback menu is displayed b Select subti...

Page 35: ...nu f Select Delete option from menu on left panel g Press OK If item was on Playlist it is deleted from Playlist but not from Original If item was on Original recording it is deleted both from Original and from Playlist h Press OK to confirm CREATING ADDING TO A PLAYLIST RW VR RAM A Playlist allows you to edit or re edit a title or chapter without changing the Original recording a To add an Origin...

Page 36: ... selected title with another title a Ensure playback stopped b Press HDD c Press MENU LIST d Select title to merge e Press OK to display editing menu f Select Edit option to display editing menu g Select Combine from menu in left panel h Press OK i Select a title to combine with current title j Press OK to confirm HIDING A CHAPTER OR TITLE To skip past a chapter or title without viewing during pla...

Page 37: ...K to confirm DELETING A PART To delete part of title a Ensure playback stopped b Press DVD or HDD c Press MENU LIST d Select title e Press OK f Select Edit option to display editing menu g Select Delete Part from editing menu in left panel h Press OK to display delete part menu i Use PLAY SCAN and PAUSE STEP buttons to locate start end points Start Point Select start point of deletion End Point Se...

Page 38: ...cted Chapters to be combined are created by deleting part of Original title Chapters to be combined are created from different titles One of Playlist chapters to be combined has been moved USING THE DISC MENU To use disc setting functions without entering set up menu a Press DVD on remote control to select DVD mode b Press MENU LIST c Select Disc option d Press OK to display further options Disc F...

Page 39: ...f Press OK to show sub options g Select Move option Move menu is displayed h Press OK i Select folder to move to j Select Move option k Press OK to begin moving NAMING A FILE OR FOLDER ON HDD a Press HDD b Press MENU LIST c Select file or folder d Press OK e Select Edit from menu in left panel f Press OK g Select Rename option h Press OK i Use to navigate keyboard and press OK on remote control to...

Page 40: ...is not available for edited HDD titles and Clip Recording titles When dubbing an edited title from VR mode DVD RW or DVD RAM to HDD the Fast mode is not available h Press OK i Select START j Press OK to start dubbing DUB A CURRENTLY PLAYING TITLE Works only for DVD finalized with video formatted DVD RW or for DVD ROM without copy protection To copy a title to HDD during DVD playback a Press HOME F...

Page 41: ...41 MAIN GUIDE NOTES LG RHT49X instructions indd Sec1 41 LG RHT49X instructions indd Sec1 41 2009 03 04 3 50 19 2009 03 04 3 50 19 ...

Page 42: ...t Check there are now obstacles in the way of the sensor Reset the remote control to work with your connected TV page 19 Replace the batteries in the remote control page 9 PROBLEM SOLUTION The unit does not playback Check the disc format is compatible with this unit Check the disc region code is compatible with this unit Ensure the disc is placed in the unit the correct way Check the disc for sign...

Page 43: ...r signs of damage PROBLEM SOLUTION HDMI device does not display a picture Try disconnecting then re connecting the HDMI cable Switch the mains power off and back on Check the Video input for the connected device is set correctly Check the HDMI cable is fitted correctly Check the HDMI cable for damage Not all HDCP devices are compatible with this unit Connected HDMI device does not output sound Not...

Page 44: ...LG RHT49X instructions indd Sec1 44 LG RHT49X instructions indd Sec1 44 2009 03 04 3 50 19 2009 03 04 3 50 19 ...

Reviews: