background image

Installation Instructions

7

nstallation Instructions

Stacking Kit

In order to stack this dryer an LG stacking kit is
required.

This dryer may only be stacked on top of an LG wash-
er. DO NOT attempt to stack this dryer on any other
washer, as product damage, injury or property 
damage could result.
To stack this dryer, the support holder included with
the stacking kit must be used.

Installation Procedure

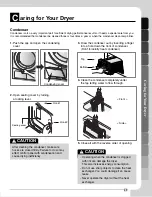
1. Place the LG dryer on the LG Washing machine.
2. Remove two screws at the bottom of the rear cover

on each side as shown below.

3. Assemble the stacking kit as following.

• Peel the protective film from the double-sided tape on

the bracket for your size washer.

• Attaching the support holder.
• Align the stacking kit holes and the rear cover holes

and then firmly attach the bracket to the side of the
washer in that position.

23.6 inch(600 mm)

21.7 inch(550 mm)

4. Assemble a stacking kit as following.

• Screw 2 screws which were removed earlier to

assemble dryer and stacking kit. 

• Use accessory screws [1.2inch (30mm)] to assem-

ble washer rear cover and stacking kit. 

,

• The procedure for the opposite side will be the

same.

WARNING

• Incorrect installation can cause serious acci-

dents. 

• The weight of the dryer and the height of instal-

lation makes the stacking procedure too risky
for one person. This procedure should be per-
formed by 2 or more experienced service per-
sonnel.

• The dryer is not suitable for a built-in installa-

tion. Please do not install as a built-in.

• Do not operate if the dryer is disassembled.

Shape

21.7 inch

(550mm)

Washer Top plate size

23.6 inch

(600mm)

Support

Holder

550

Dryer

Washer

Support Holder

Summary of Contents for RC8011A

Page 1: ... to use Keep it for future reference Write down model name and serial number of your product Have all these details ready when you call for servicing RC8011A RC8011B RC8011C RC8011D TD C800E TD C809E RC8011A1 RC8011B1 RC8011C1 RC8011D1 TD C803E P NO MFL32312591 ...

Page 2: ...ficient air flow mechanism and optimised heater on this LG Dryer Reduced noise levels We have reduced the operating noise of this LG Dryer by using innovative sound absorbing and noise screening technologies making it much quieter than conventional dryers Easy to Use The wide electronically controlled LED display on this machine is very easy to use Simply select the programme you require and your ...

Page 3: ...emble the top plate when installing the dryer It may cause breakdowns a fire or an electric shock Keep the dryer away from any external heat source such as heaters ovens lit candles etc It may cause melting of some parts or a fire Do not kink twist crush or place heavy objects on power cord Doing so may damage power cord The damaged power cord may cause a fire or an electric shock Do not grasp pow...

Page 4: ...eaned in washed in soaked in or spotted with combustible or explosive substances such as wax oil paint gasoline degreasers dry cleaning solvents kerosene etc It may cause an explosion or a fire Do not place flammable items near the dryer It may cause toxic gas parts damage an explosion or a fire Unplug the power cord when cleaning or not using the dryer Water or dirt may cause an electric shock Do...

Page 5: ... petrol gasoline dry cleaning solvents or other flammable or explosive substances should not be used in a tumble dryer It may cause an explosion and a fire by spontaneous combustion Items made of foam rubber plastic or other heat sensitive fabrics such as bathroom rugs nonslip mats or raincoats should not be dried in a tumble dryer on a heat setting Items such as foam rubber latex foam shower caps...

Page 6: ...have an experienced installer check the kit The following instructions will guide you through the initial steps of setting up your dryer Please note that every section of this manual provides important information regarding the preparation and use of your dryer and it is important that you review this entire manual before proceeding with any installation or use Be sure to observe all listed warnin...

Page 7: ...stacking kit holes and the rear cover holes and then firmly attach the bracket to the side of the washer in that position 23 6 inch 600 mm 21 7 inch 550 mm 4 Assemble a stacking kit as following Screw 2 screws which were removed earlier to assemble dryer and stacking kit Use accessory screws 1 2inch 30mm to assem ble washer rear cover and stacking kit The procedure for the opposite side will be th...

Page 8: ...e placed upon a dedicated circuit that is a single outlet circuit which powers only that appliance and has no additional outlets or branch circuits Check the specification page of this owner s manual to be certain Do not overload wall outlets Overloaded wall outlets loose or damaged wall outlets extension cords frayed power cords or damaged or cracked wire insulation are dangerous Any of these con...

Page 9: ...er is not properly level adjust the front leveling legs up and down as necessary Turn them clockwise to raise and counterclockwise to lower until the dryer is not wobbling both front to back and side to side Diagonal Check When pushing down the edges of the machine the machine should not move up and down at all Please check both of two directions If machine rocks when pushing the machine top plate...

Page 10: ...A RC8011B RC8011C RC8011D TD C800E TD C809E RC8011A1 RC8011B1 RC8011C1 RC8011D1 TD C803E Water Container Control Panel Condenser Cover Air Ventilation Grill Water Container Control Panel Condenser Cover Air Ventilation Grill Opaque Door Glass Door ...

Page 11: ... Time Display Indicator Lamps Left Time Additional Function Buttons Drying Level Iron Light Standard Very Extra More Time Less Time Option Buzzer Time Delay Favourite Anti Crease Hand Iron RC8011A RC8011B RC8011C RC8011D TD C800E RC8011A1 RC8011B1 RC8011C1 RC8011D1 TD C803E Program Selector LED Display Time Display Indicator Lamps Left Time Additional Function Buttons Drying Level Iron Light Stand...

Page 12: ...nded laundry load when you use the special fabric programme Refer to the page 21 Otherwise your clothes may be damaged Mixed Cycles Note Select the gentle cycle by pressing the option button for heat sensitive items Bed linen table linen tracksuits anorak blankets For thick and quilted fabrics which do not need to be ironed Very Sweater Delicate Fabrics Sport shoes For the Fabrics you do not want ...

Page 13: ...ht above the button will become illuminated indicating that the machine is all set to run 2 Open the door 3 Check the lint filter is clean container and condenser The lint filter near the door should be emptied after or before drying operation Open the door and check if lint filter is cleaned If not please clean it referring to page 18 Also check if water container or condenser need to be emptied ...

Page 14: ...lean the lint filters and empty water container The lint filter should be cleaned after each load 10 Turn off the dryer Press the Power button Select the desired cycle Take out the laundry Clean the door lint filter Be careful not to trap laundry in between the loading door and rubber seal CAUTION Be careful of the fact that filter should not be torn when using a vacuum cleaner If there is a littl...

Page 15: ...Additional Functions 15 A dditional Functions RC8011A RC8011B RC8011C RC8011D TD C800E RC8011A1 RC8011B1 RC8011C1 RC8011D1 TD C803E TD C809E ...

Page 16: ...d Drying before you push Start Pause button Note This function is available only with Cotton Iron and Mixed Iron cycles Favourite If there is some cycle you would like to make based on your own drying habit use Favourite Once favourite cycle is stored you can repeatedly use next time before changing the stored setting For instance you turn power on and select Extra Dry in Cotton Cycle and Low temp...

Page 17: ... the Damp Dry Beep when you select iron drying level Crease Care This is a function to reduce wrinkles This is a function to set up automatically when you only select the Mixed Fabrics cycle but cancellation is impossible Child Lock For the safety of your children press More Time and Less Time buttons at the same time for about 3 seconds You can see sign on LED window Note For off press More Time ...

Page 18: ...in improper drying performance If water container is full Empty Water Lamp glows and a buzzer sounds while the dryer is operating In this case water container must be emptied in 1 hour 2 Pull the filter out 1 Open the door 3 Clean the filter by using a vacuum cleaner or rinsing under the tap 1 Draw water container out 2 Empty water container to sink 4 Replace the filter Push the filter all the way...

Page 19: ...ugh 3 Draw the condenser out by inserting a finger into a hole down the front of condenser Don t forcefully treat condenser Sealing cover Front Side Top Bottom 5 Close all with the reverse order of opening CAUTION Operating when the condenser is clogged with lint can damage the dryer This also increases energy consumption Do not use sharp objects to clean the heat exchanger You could damage it an ...

Page 20: ...sors inside drum Shown in the picture 2 Separate water container hose from the kit 3 Connect drain hose to the kit Condensed Water Drain out Normally condensed water is pumped up to water container where water is collected until emptied The water container is not the only method water can be drained out directly to drain hose especially when dryer is stacked on top of washing machine With connecti...

Page 21: ...Aprons Bibs and Chair Covers b Curtains and Table Clothes c Bathmats Fiber Glass Do not dry fiberglass articles in your dryer Glass particles left in the dryer could be picked up by your clothes the next time you use the dryer and irritate your skin Fabric Care Labels Clothes have its own wash care labels so drying according to wash care labels is recommended Not only that the laundry must be sort...

Page 22: ...he dryer is to be disposed safely Service Contact If there is something wrong with your dryer first you must go through the troubleshooting table If you are unable to resolve the issue using the guide please contact the service center A service person may ask you the following questions please have the information available 1 Your name address and postcode 2 Your phone number 3 Description of trou...

Page 23: ...thes are not excessively wet 7 Check the correct program is selected 8 Check dryer is not overloaded Clean Filter lamp flashes 1 Check filter is cleaned 2 Check condenser unit is clogged Clothes are covered in Fluff 1 Check lint filter is empty 2 Check dryer has only clean items 3 Check laundry is properly sorted in the drum 4 Check laundry is not overloaded 5 Check if there is any paper tissue or...

Page 24: ...or Mode LED displays in case of the door open The door must be closed and start Button must be pressed for re operation Drum light does not work Call customer service If display errors continue to occur unplug the power cords and then call the Service Center T ...

Page 25: ...quirement Volts Hertz Watts 240 V Australia New Zealand 50 Hz 2250 W Alcove or Under Counter Closet Sides 1 inch 2 5cm 1 inch 2 5cm Top 0mm 0mm Rear 5 inch 12 7cm 5 inch 12 7cm Ensure air flow of 112 cu ft min through dryer Closet door must have 2 louvered openings each having a mini mum area of 60 sq inches 387 sq cm located 3 inches 8 cm from bottom and top of door Alcove or under counter Closet...

Page 26: ...le leveling the product adjustment of drain Normal maintenance recommended by the owner s manual Removal of foreign objects substances from the machine including the pump and inlet hose filter for example grit nails bra wires and buttons etc Replace fuses correct wiring or plumbing within the house Correction of unauthorized repairs Incidental or consequential damage to personal property caused by...

Page 27: ...27 emo M ...

Page 28: ......

Reviews: