


- 9 -
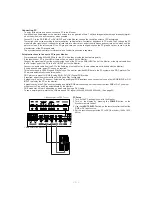
Connecting PC
- To enjoy vivid picture and sound, connect a PC to the Monitor.
- Avoid keeping a fixed image on the monitor’s screen for a long period of time. The fixed image may become permanently imprint-
ed on the screen; use a screen saver when possible.
- Connect PC to the RGB INPUT or DVI INPUT port of the Monitor; change the resolution output of PC accordingly.
- There might be a noise according to some resolution, vertical pattern, contrast or brightness in PC mode. Then change the PC
mode into other resolution or change the refresh rate into other rate or adjust the brightness and contrast on the menu until the
picture is clean. If the refresh rate of the PC graphic card can not be changed, change the PC graphic card or consult it to the
manufacturer of the PC graphic card.
- The synchronization input form for Horizontal and Vertical frequencies is separate.
Setup Instructions to Connect a PC to your Monitor
- We recommend using 640x480, 60Hz for the PC mode, they provide the best picture quality.
- If the resolution of PC is over UXGA, there will be no picture on the Monitor.
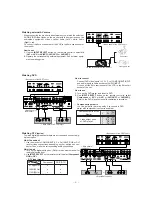
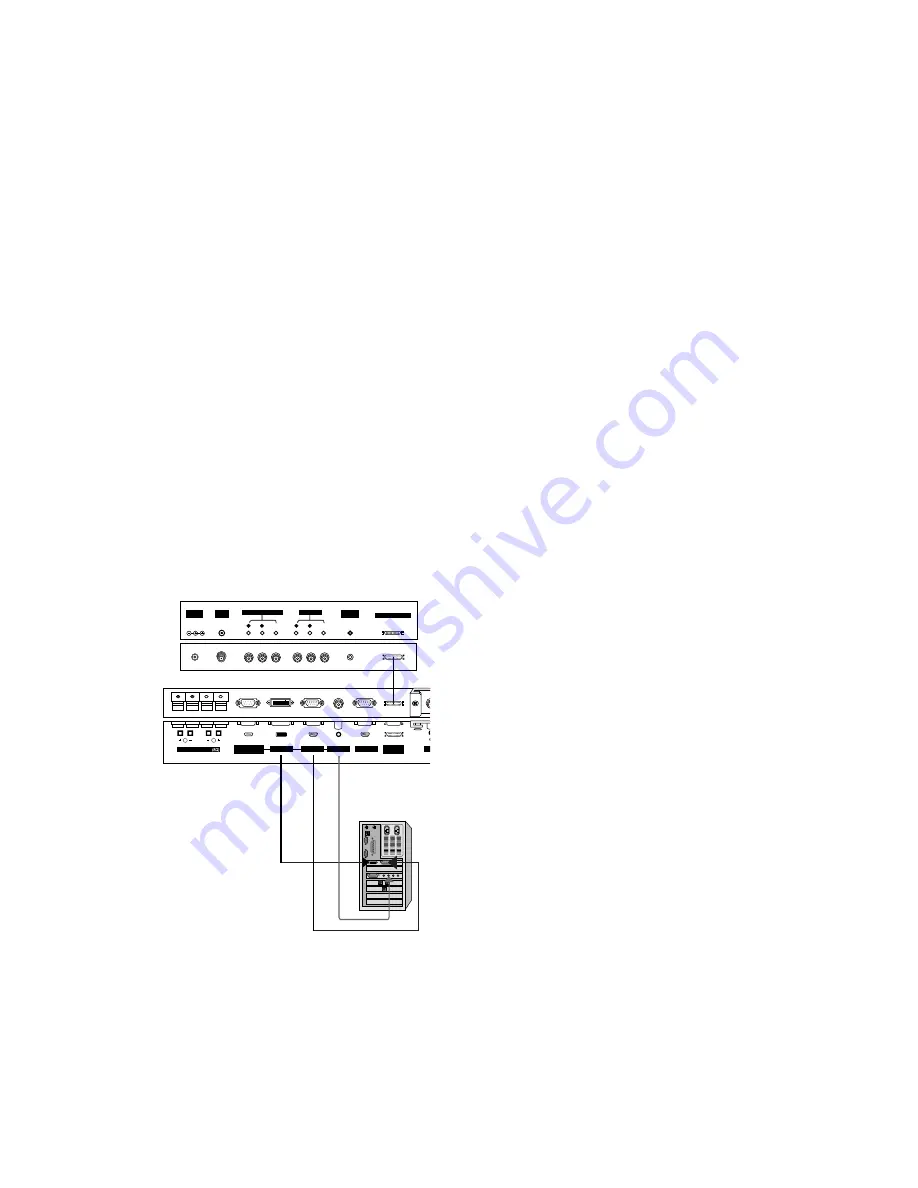
- Connect the signal cable from the monitor output port of the PC to the RGB INPUT port of the Monitor or the signal cable from
the DVI output port of the PC to the DVI INPUT port on the Monitor.
- Connect the audio cable from the PC to the Audio input on the Monitor. (Audio cables are not included with the Monitor).
- If using a sound card, adjust PC sound as required.
- This monitor apply a VESA Plug and Play Solution. The monitor provides EDID data to the PC system with a DDC protocol. The
PC adjusts automatically to use this monitor.
- DDC protocol is preset for RGB (Analog RGB), DVI (DVI, Digital RGB) mode.
- If required, adjust the monitor settings for Plug and Play functionally.
- If graphic card on the PC does not output analog and digital RGB simultaneously, connect only one of both RGB INPUT or DVI
INPUT to display the PC on the monitor.
If graphic card on the PC does output analog and digital RGB simultaneously, set the monitor to either RGB or DVI; (the other
mode is set to Plug and Play automatically by the monitor.)
- DOS mode may not work depending on video card if using a DVI-I cable.
- To see a normal picture, match the VGA mode and DVI signal (640x480, 848x480, 852x480). (See page 28)
(MONO)
R
AUDIO
VIDEO
L
AV(EXPANDED) INPUT
R
AUDIO
VIDEO
L
AV OUTPUT
EXPANDED OUTPUT
REMOTE
CONTROL
ANT IN
DC IN
(DC 12V)
+
75
Ω
( )
( ) R
( )
( ) L
RS-232C INPUT
(CONTROL/SERVICE)
EXPANDED
INPUT
EXTERNAL SPEAKER
AU
AUDIO INPUT
RGB OUTPUT
RGB INPUT
DVI INPUT
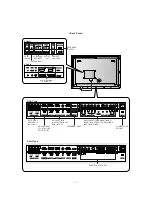
< Back panel of the PDP Tuner >
< Back panel of the Monitor >
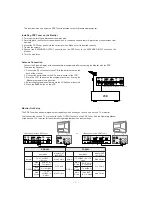
PC Setup
1. Turn on the PC and apply power to the Monitor.
2. Turn on the display by pressing the POWER button on the
Monitor’s remote control.
3. Use the INPUT SELECT button on the remote control to select the
RGB or DVI input source.
4. Set the resolution output of the PC to SXGA or under (1280 x 1024,
60Hz).
Summary of Contents for MT-42PZ44
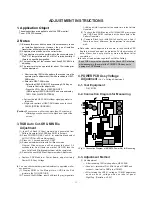
Page 25: ... 25 MAIN TOP PRINTED CIRCUIT BOARD ...
Page 26: ... 26 MAIN BOTTOM ...
Page 27: ... 27 AV BOARD TOP AV BOARD BOTTOM AV FIX BOARD TOP AV FIX BOARD BOTTOM ...
Page 28: ... 28 CONTROL BOARD TOP CONTROL BOARD BOTTOM POWER SWITCH SPEAKER TOP SPEAKER BOTTOM ...
Page 29: ...MEMO 29 ...
Page 43: ......
Page 44: ......
Page 45: ......
Page 46: ......
Page 47: ......
Page 48: ......
Page 49: ......
Page 50: ......
Page 51: ......
Page 52: ......
Page 53: ... ÆFor europe ...
Page 54: ... ÆFor asia ...
Page 55: ...SVC SHEET 3854V A0133A S1 SVC SHEET 3854V A0133A S2 SVC SHEET ...


