background image

8

This cooktop is designed to operate at a pressure of 

5” of water column on natural gas or 10” of water 

column on LP, propane or butane gas.

Make sure you are supplying your cooktop with the 
type of gas for which it is designed.

This cooktop is convertible for use on natural or 
propane gas. When using this cooktop on LP gas, 

conversion must be made by a qualified LP installer 

before attempting to operate the cooktop on that gas.

For correct operation, the pressure of natural gas 

supplied to the regulator should be between 5” and 

13” of water column.

For LP gas, the pressure supplied must be between 

10” and 13” of water column.

When checking for correct operation of the regulator, 

the inlet pressure must be at least 1” more than the 

operating -manifold- pressure as given above.

The pressure regulator located at the inlet of the 
cooktop manifold must remain in the supply line 
regardless of whether natural or LP gas is being 
used.

A flexible metal appliance connector used to connect 

the cooktop to the gas supply line must have an I.D. 

of 5/8” and can be 3 feet max. in length for easy 

installation. In Canada, flexible connectors should be 

single wall metal connectors less than 6 feet in 
length.

1. PROVIDE ADEQUATE GAS SUPPLY

I N S TA L L AT I O N   I N S T R U C T I O N S

Shut off the main gas supply valve before removing 
the old cooktop and leave it off until the new hook-up 
has been completed. Don’t forget to relight the pilot on 
other gas appliances when you turn the gas back on.

Because hard piping restricts movement of the 
cooktop, the use of a CSA International-certified 

flexible metal appliance connector is recommended 

unless local codes require a hard-piped connection.

Never reuse an old connector when installing a new 
cooktop. If the hard piping method is used, you must 
carefully align the pipe; the cooktop cannot be 
moved after the connection is made.

To prevent gas leaks, put pipe joint compound on, all 

male -external- pipe threads.

1

  Install a manual gas line shut-off valve in the gas 

line in an easily accessed location outside of the 
cooktop. Be sure everyone operating the cooktop 
knows where and how to shut off the gas supply 
to the cooktop.

2


 Install male 1/2” flare union adapter to the 1/2” 

NPT internal thread at inlet of pressure regulator. 
Use a backup wrench on the pressure regulator 
fitting to prevent damage.

3


 Install male 1/2” or 3/4” flare union adapter to the 

NPT internal thread of the manual shut-off valve, 
taking care to back-up the shut-off valve to keep 
it from turning.

4


 Connect a flexible metal connector to the adapter 

on the cooktop. Position the cooktop to permit 
connection at the shut-off valve.

5

  When all connections have been made, be sure 

all cooktop controls are in the off position and 
turn on the main gas supply valve. 
Check for gas leaks by using manometer.  
If a manometer is not available, turn the gas 

supply on to the cooktop on and use a liquid leak 

detector at all joints and connections to check for 
leaks.  
Tighten all connections, if necessary, to prevent 
gas leakage in the cooktop or supply line.

 WARNING!:


DO NOT USE A FLAME TO CHECK FOR GAS LEAKS.

Disconnect the cooktop and its individual shut-off 
valve from the gas supply piping system during any 
pressure testing of that system at test pressures 

more than 1/2 psig(3.5kPa).

Isolate the cooktop from the gas supply piping 
system by closing its individual shut-off valve during 
any pressure testing of the gas supply system at test 

pressures equal to or less than 1/2 psig(3.5kPa)

2. CONNECT THE COOKTOP TO GAS

Summary of Contents for LSCG306 Series

Page 1: ...TION MANUAL GAS COOKTOP LSCG366 LSCG306 LSCG367 LSCG307 Please read this guide thoroughly before installation www lg com ENGLISH ESPAÑOL MFL62725504_06 Copyright 2012 2018 LG Electronics Inc All Rights Reserved ...

Page 2: ...ou will find these precautions in the lmportant Safety Information section in your User s Guide Read them carefully IMPORTANT Save these instructions for local electrical inspector s use IMPORTANT Observe all governing codes and ordinances Note to Installer Leave these instructions with the appliance after installation is completed Note to Consumer Keep the User s Guide and Installation Instructio...

Page 3: ...ighbor s phone Follow the gas supplier instructions If you cannot contact your gas supplier call the fire department Installation and service must be performed by a qualified installer service agency or the gas supplier TOOLS YOU WILL NEED MATERIALS YOU MAY NEED MATERIALS YOU MAY NEED Gas line shut off valve To reduce the possibility of gas leaks apply teflon tape or a thread compound approved for...

Page 4: ...S This is the safety alert symbol This symbol alerts you to potential hazards that can kill or hurt you and others All safety messages will follow the safety alert symbol and either the word WARNING or CAUTION BEFORE YOU BEGIN Remove all tape and packing materials before using the cooktop Dispose all plastic bags after unpacking the cooktop Never allow children to play with packing materials IMPOR...

Page 5: ... the cabinets above the cooktop with not less than 1 4 insulating millboard covered with sheet metal not less than 0 0122 thick Clearance between the cooking surface and protected cabinets MUST NEVER BE LESS THAN 24 INCHES The vertical distance from the plane of the cooking surface to the bottom of adjacent overhead cabinets extending closer than 1 to the plane of the cooktop sides must not be les...

Page 6: ...MIN clearance from cutout to side wall on the right of the unit 18 MIN height from countertop to nearest cabinet on either side of unit 30 MIN clearance from countertop to unprotected overhead surface A MIN clearance from cutout to side wall on the left of unit L MIN Between cutout and the wall behind the cooktop K MIN From front edge of cutout and front edge of countertop Recommended gas supply l...

Page 7: ...y to the cooktop Install the electrical outlet 12 below the countertop 3 LOCATE RETAINER BRACKETS Remove the retainer brackets from the literature package NEVER RE USE OLD FLEX CONNECTORS Install a manual shut off valve in the gas line in an easily accessible location outside the cooktop Be sure you know how and where to shut off the gas supply to the cooktop Install the electrical outlet 12 below...

Page 8: ...ped connection Never reuse an old connector when installing a new cooktop If the hard piping method is used you must carefully align the pipe the cooktop cannot be moved after the connection is made To prevent gas leaks put pipe joint compound on all male external pipe threads 1 Install a manual gas line shut off valve in the gas line in an easily accessed location outside of the cooktop Be sure e...

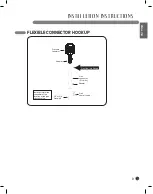
Page 9: ...STRUCTIONS FLEXIBLE CONNECTOR HOOKUP Pressure regulator Installer Inform the consumer of the location of the gas shut off valve 1 2 or 3 4 Gas pipe Flex connector 6 ft max Gas Flow into Range Adapter Gas shut off valve Adapter ...

Page 10: ...he personal responsibility and obligation of the customer to have it replaced with a properly grounded three prong wall receptacle DO NOT UNDER ANY CIRCUMSTANCES CUT OR REMOVE THE THIRD GROUND PRONG FROM THE POWER CORD A word about Ground Fault Circuit Interrupters Ground Fault Circuit Interrupters are not required or recommended for gas range receptacles Ground Fault Circuit Interrupters are devi...

Page 11: ... home installation should conform with the Manufactured Home Construction and Safety Standard Title 24 CFR Part 3280 formerly the Federal Standard for Mobile Home Construction and Safety Title 24 HUD Part 280 or when such standard is not applicable the Standard for Manufactured Home Installations latest edition Manufactured Home Sites Communities and Set Ups ANSI A225 1 latest edition or with loca...

Page 12: ... top burner knob push down and then turn counterclockwise to the LITE position You can hear a clicking sound indicating proper operation of the spark module Once the air has been purged from the supply lines burner should ignite within 4 seconds After burner ignites rotate knob out of the LITE position Try each burner in succession until all burners have been checked ELECTRIC IGNITION The combusti...

Page 13: ...roperly 6 Replace the cooktop and secure the screws of the cooktop 7 Position center burner head center burner cap center grate and center knob 8 Connect power to the appliance 9 Light center burner 10 Turn the knob on the burner being adjusted to LO LOW 11 Remove knob 12 Using a small flat bladed screwdriver insert into the hole next to the valve stem to adjust the outer flame as shown in Fig 3 1...

Page 14: ...RUCTIONS This cooktop leaves the factory set for use with natural gas When converting to LP gas the conversion must be performed by a qualified LP gas installer The conversion instructions and LP orifices are supplied with your cooktop Keep these instructions and the orifices in case you want to convert back to natural gas CONVERTING TO LP GAS OR CONVERTING BACK TO NATURAL GAS FROM LP ...

Page 15: ...ACIÓN COCINA DE GAS Por favor lea esta guía completamente antes de la instalación P No MFL62725504 www lg com ESPAÑOL LSCG366 LSCG306 LSCG367 LSCG307 Copyright 2012 2018 LG Electronics Inc Todos los Derechos Reservados ...

Page 16: ...2 INSTRUCCIONES DE INSTALACIÓN INSTRUCCIONES DE SEGURIDAD DURANTE LA INSTALACIÓN ANTES DE COMENZAR ...

Page 17: ...su distribuidor de gas llame a los bomberos La instalación y mantenimiento deben realizarlas un instalador cualificado empresa de servicios o el distribuidor de gas HERRAMIENTAS QUE NECESITARÁ MATERIALES QUE PODRÍA NECESITAR MATERIALES QUE PODRÍA NECESITAR Válvula de cierre de la toma de gas Para reducir la posibilidad de que se produzca un escape de gas aplique cinta de teflón o un compuesto para...

Page 18: ...otenciales que podrían provocar lesiones personales o a terceros e incluso la muerte Todos los mensajes de seguridad están precedidos por un símbolo de advertencia además de la palabra ADVERTENCIA o PRECAUCIÓN Estas palabras significan ANTES DE COMENZAR Retire todas las cintas y materiales de embalaje antes de usar el horno Deseche todas las bolsas de plástico tras desembalar la cocina Nunca permi...

Page 19: ...a cocina mediante no menos de 1 4 de cartón de aislamiento cubierto con lámina metálica con un espesor no inferior a 0 0122 El espacio libre entre la superficie de la cocina y los armarios protegidos NUNCA DEBE SER INFERIOR A 24 PULGADAS La distancia vertical desde el plano de la superficie de cocción hasta la base de los armarios superiores contiguos que se extiendan menos de 1 del plano de los l...

Page 20: ...cio libre desde el corte a la pared lateral situada a la derecha de la unidad Mín 182 de altura desde la encimera al armario más cercano a ambos lados de la unidad Mín 30 de espacio libre desde la encimera hasta la superficie superior sin protección Mín A de espacio libre desde el corte a la pared lateral situada a la izquierda de la unidad Mín L Entre el corte y la pared posterior de la cocina Mí...

Page 21: ...inal de que se cumplen todos los espacios libres exigidos 3 LOCALICE LOS SOPORTES DE RETENCIÓN Retire los soportes de retención del paquete que contiene los documentos NUNCA USE VIEJOS CONECTORES AL INSTALAR ESTA UNIDAD Instale una válvula de corte manual en la toma de gas en un lugar fácilmente accesible por fuera de la cocina Asegúrese de que sabe cómo y dónde cortar el suministro de gas a la co...

Page 22: ...ar una nueva cocina Si se usa el método de la canalización rígida debe alinear cuidadosamente la tubería la cocina no puede moverse una vez realizada la conexión Para prevenir fugas de gas aplique compuesto para empalmes de tubería o envuelva con cinta de teflón todas las roscas macho externas de las tuberías 1 Instale una válvula de corte manual en la toma de gas en un lugar fácilmente accesible ...

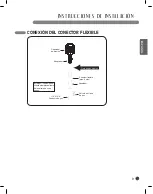
Page 23: ...ÓN DEL CONECTOR FLEXIBLE Regulador de presión Instalador comunique al cliente el emplazamiento de la válvula de corte de gas 1 2 or 3 4 Conducto de gas Conector flexible máx 6 pies Flujo de gas al horno Adaptador Válvula de cierre de gas Adaptador ...

Page 24: ...amente contara con un toma corriente estándar de dos clavijas será responsabilidad y obligación del cliente reemplazarlo por otro de tres clavijas con una conexión a tierra adecuada NO CORTE NI DESMONTE BAJO NINGUNA CIRCUNSTANCIA LA TERCERA CLAVIJA DE CONEXIÓN A TIERRA DEL TOMA CORRIENTE DEL CABLE DE ALI MENTACIÓN Acerca de los GFCI s los GFCI s no son necesarios ni se recomiendan para tomas de pa...

Page 25: ...en viviendas móviles debe cumplir con el Manufactured Home Construction and Safety Standard título 24 CFR sección 3280 antiguamente denominado Federal Standard for Mobile Home Construction and Safety título 24 HUD sección 280 o cuando dicho estándar no sea aplicable con el Standard for Manufactured Home Installations edición más reciente Manufactured Home Sites Communities and Set Ups ANSI A225 1 ...

Page 26: ...ja el mando de un quemador y presiónelo y gírelo simultáneamente a la posición LITE Podrá oír el clic indicativo de un correcto funcionamiento del módulo generador de chispas Una vez purgado el aire de las tomas de suministro el quemador deberá prenderse en 4 segundos Tras prender el quemador gire el mando de la posición LITE Pruebe sucesivamente cada quemador hasta chequearlos todos CALIDAD DE LA...

Page 27: ...llos 7 Coloque el quemador central y la funda del quemador la rejilla del centro y el mando central 8 Conecte la alimentación del aparato 9 Encienda el quemador central 10 Gire el mando del quemador que desea ajustar hasta la posición LO BAJA 11 Extraiga el mando 12 Introduzca un destornillador pequeño de cabeza plana en el agujero que hay junto al vástago de la válvula para ajustar la llama exter...

Page 28: ...ocina viene ajustada de fábrica para su uso con gas natural Si desea adaptarla para usar gas LP la conversión debe llevarla a cabo un instalador de gas LP cualificado Las instrucciones y orificios LP de adaptación están incluidos en su cocina Conserve estas instrucciones y los orificios por si desea readaptar su cocina en el futuro para que use gas natural ADAPTACIÓN A GAS LP O READAPTACIÓN A GAS ...

Page 29: ...MEMO ...

Page 30: ...MEMO ...

Page 31: ...MEMO ...

Page 32: ...Printed in Korea ...

Reviews: