LG Network Client Program
61
5
LG Ne
tw
ork Clien
t P
rogr
am
Using the E-Map function
This function gives a visual overview of the cameras in your
surveillance environment.
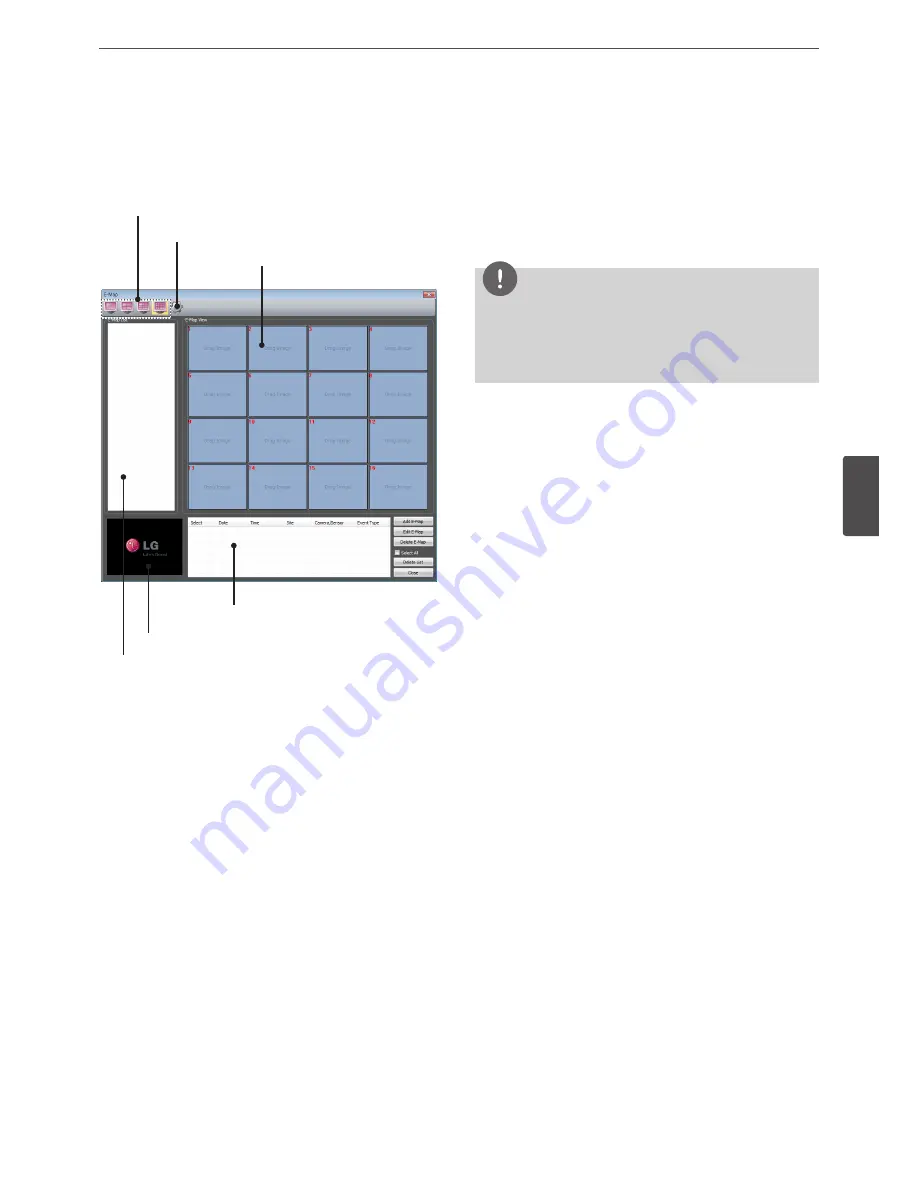
E-Map Overview
Map View Division Mode selection icons
E-Map setup icon
E-Map View window
Event list
Current event live view window
E-Map List
• Map View Division Mode selection icons: When the icon is
clicked, the screen will be changed to split mode. Choose the
Map View division mode.
• E-Map setup icon: Click to set the operation time.
• E-Map List: Displays the imported E-Maps.
• E-Map View window: Use the map of the E-Map list to register
each channel. If you click the camera or sensor of the displayed
on the map, you can view the image of the camera or sensor.
Add the Map
1. Click the [Add E-Map] button. The Add E-Map window is
displayed.
2. Click the [...] button in the [E-Map path] option.
3. Find and open the map image file. If you want to change the
E-Map name, select the [E-Map Name] option and overwrite the
existing name with a new name.
4. Drag-and-drop camera channel or sensor on the Map.
NOTE
To delete the registered camera or sensor, follow these steps:
4.1 Select the camera or sensor.
4.2 Click right mouse button on the selected camera or sensor.
4.3 Select [Delete] option to delete it.
5. Click the [OK] button to save settings and close the window.
6. Repeat steps 1 to 5 to add the other E-Maps up to 16.
Activate the Map
1. Select the required E-Map from the E-Map List.
2. Drag and drop the E-Map on the required position of the E-Map
View window.
3. Repeat steps 1 to 2 to activate the other E-Maps.
Edit the Map
1. Select the required E-Map from the E-Map View window.
2. Click the [Edit E-Map] button. The E-Map View window is
displayed.
3. Edit the camera position or E-Map name, or delete the camera.
4. Click the [OK] button to save E-Map and exit the window.
Delete the Map
1. Select the required E-Map from the E-Map List.
2. Click the [Delete E-Map] button. The selected E-Map is deleted.
Delete the event
1. Select the event in the event list.
2. Click the [Delete List] button to delete the event.
If you select the [Select All] option, all events are deleted.
Summary of Contents for LRN8240D Series
Page 78: ...AB28 ...


