background image

2

Safety Precautions

This lightning flash with arrowhead symbol within an
equilateral triangle is intended to alert the user to
the presence of uninsulated dangerous voltage
within the product’s enclosure that may be of 
sufficient magnitude to constitute a risk of electric
shock to persons. 

The exclamation point within an equilateral triangle
is intended to alert the user to the presence of
important operating and maintenance (servicing)
instructions in the literature accompanying the 
appliance.

CAUTION: 

Do not block any ventilation openings. Install in

accordance with the manufacturer's instructions.

Slots and openings in the cabinet are provided for ventilation
and to ensure reliable operation of the product and to protect it
from over heating. 
The openings should be never be blocked by placing the prod-
uct on a bed, sofa, rug or other similar surface. This product
should not be placed in a built-in installation such as a book-
case or rack unless proper ventilation is provided or the manu-
facturer's instruction have been adhered to.

CAUTION:

This Product employs a Laser System.

To ensure proper use of this product, please read this owner’s
manual carefully and retain for future reference, should the unit
require maintenance, contact an authorized service location-
see service procedure.

Use of controls, adjustments or the performance of procedures
other than those specified herein may result in hazardous 
radiation exposure.

To prevent direct exposure to laser beam, do not try to open
the enclosure. Visible laser radiation when open. DO NOT
STARE INTO BEAM.

CAUTION:

The apparatus shall not be exposed to water, 

dripping or splashing and that no objects filled with liquids,
such as vases, shall be placed on the apparatus.

CAUTION: 

VISIBLE AND INVISIBLE LASER RADIATION WHEN OPEN
AND INTERLOCKS DEFEATED

CAUTION concerning the Power Cord

Most appliances recommend they be placed upon a dedi-
cated circuit;

That is, a single outlet circuit which powers only that appliance
and has no additional outlets or branch circuits. Check the
specification page of this owner's manual to be certain.

Do not overload wall outlets. Overloaded wall outlets, loose or
damaged wall outlets, extension cords, frayed power cords, or
damaged or cracked wire insulation are dangerous. Any of
these conditions could result in electric shock or fire.
Periodically examine the cord of your appliance, and if its
appearance indicates damage or deterioration, unplug it, dis-
continue use of the appliance, and have the cord replaced with
an exact replacement part by an authorized servicer.

Protect the power cord from physical or mechanical abuse,
such as being twisted, kinked, pinched, closed in a door, or
walked upon. Pay particular attention to plugs, wall outlets, and
the point where the cord exits the appliance.

Disposal of your old appliance

1. When this crossed-out wheeled bin symbol is

attached to a product it means the product is
covered by the European Directive 2002/96/EC.

2. All electrical and electronic products should be

disposed of separately from the municipal waste
stream via designated collection facilities
appointed by the government or the local
authorities.

3. The correct disposal of your old appliance will

help prevent potential negative consequences
for the environment and human health.

4. For more detailed information about disposal of

your old appliance, please contact your city
office, waste disposal service or the shop where
you purchased the product.

CAUTION

RISK OF ELECTRIC SHOCK 

DO NOT OPEN

WARNING: 

TO REDUCE THE RISK 

OF ELECTRIC SHOCK

DO NOT REMOVE COVER (OR BACK)

NO USER-SERVICEABLE PARTS INSIDE

REFER SERVICING TO QUALIFIED SERVICE

PERSONNEL.

WARNING:

TO REDUCE THE RISK OF FIRE OR ELEC-

TRIC SHOCK, DO NOT EXPOSE THIS PRODUCT TO
RAIN OR MOISTURE.

Power Save Mode

You can set up the unit into an economic power save
mode.
In power-on status, press and hold POWER 
(

STANDBY/ON) button for about 3 seconds.

- Nothing is displayed in the display window when the

unit is turned off.

To cancel, press 

POWER (

STANDBY/ON), CLOCK,

TIMER or DEMO.

Summary of Contents for LMS-K6960C

Page 1: ... improvement The working life of this product is 7 years since the date of purchase MOSCOW_LM K7960 K6960 K6961_ENG_MFL39518830 R CD R RW KARAOKE MINI HOME THEATER OWNER S MANUAL MODEL LM K7960Q LM K7960 LMS K7960V LMS K7960C LMS K7960S LMS K7960W LM K6960Q LM K6960 LMS K6960V LMS K6960C LMS K6960S LM KW6960Q LM KW6960 LMS KW6960V LMS KW6960C LMS KW6960S USB ...

Page 2: ... That is a single outlet circuit which powers only that appliance and has no additional outlets or branch circuits Check the specification page of this owner s manual to be certain Do not overload wall outlets Overloaded wall outlets loose or damaged wall outlets extension cords frayed power cords or damaged or cracked wire insulation are dangerous Any of these conditions could result in electric ...

Page 3: ...m disc Audio CD 8 cm 12 cm disc In addition this unit can play a DVD R DVD RW and CD R or CD RW that contains audio titles MP3 WMA JPEG or DivX files Notes Depending on the conditions of the recording equip ment or the CD R RW or DVD R RW disc itself some CD R RW or DVD R RW discs cannot be played on the unit Do not attach any seal or label to either side the labeled side or the recorded side of a...

Page 4: ...DEMO button Pr Pb Y S VIDEO OUT OPTICAL IN EURO AV TO TV REAR R 8 REAR L 8 CENTER 8 WOOFER 3 FRONT R 4 FRONT L 4 AUX IN COMPONENT PROGRESSIVE SCAN VIDEO OUT 1 3 4 5 6 7 8 9 10 11 12 13 2 18 16 23 24 14 15 17 REAR R 8 REAR L 8 CENTER 8 FRONT R 4 FRONT L 4 WOOFER PRE OUT AUX IN 19 22 13 OPEN CLOSE ZOP CL button DISC SELECT buttons DISC1 DISC2 DISC3 14 DISC DOOR 15 EURO AV TO TV connector VIDEO OUT S...

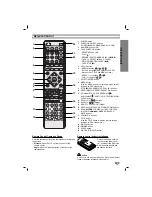
Page 5: ...and MENU screen PRESET buttons TUN buttons 7 SELECT ENTER button 8 MENU button Use the MENU button to display the menu screen included on DVD video discs 9 STOP x PAUSE STEP PLAY G buttons 10 PROG MEMO REPEAT REPEAT A B buttons 11 EQ master XTS Pro SOUND FEMALE AUDIO MALE SUBTITLE S TITLE SHADOW CLEAR buttons 12 ECHO VOL buttons 13 MIC VOL buttons 14 RDS PTY buttons OPTIONAL 15 XDSS plus VIRTUAL E...

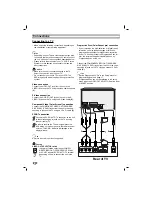
Page 6: ...eive the TV audio signal press the AUX button on the front panel or the remote control until the TV AUDIO indicator is displayed in the display window ote A picture via scart input is not supported Caution VIDEO OUT SELECTOR switch In power off status select either COMPO NENT VIDEO OUT PROGRESSIVE SCAN or SCART signal of EURO AV TO TV terminal depending on how to connect the unit to the TV Progres...

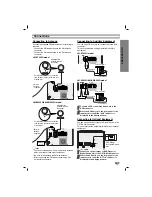
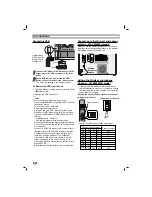
Page 7: ...onnecting to Auxiliary Equipment You can use VCR or other unit connected to the AUX connector This unit receives the analog signal from auxiliary equipment REAR R 8 REAR L 8 CENTER 8 WOOFER 3 FRONT R 4 FRONT L 4 AUX IN VIDEO OUT IN AUDIO L AUDIO R 1 Connect a VCR or auxiliary device etc to the AUX connector 2 2 Press the AUX button on the front panel or the remote control until the AUX indicator i...

Page 8: ...f there is an extention partition it is not supported If the drive of USB device is two or more a drive folder is displayed on the screen If you want to move to the previous menu after you select a folder press RETURN Digital camera and mobile phone are not supported USB Memory MP3 Player or Memory Card Reader etc Connecting to the Wireless microphone antenna LM KW6960Q model When you use the wire...

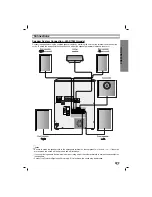
Page 9: ...ill be distorted and will lack base If you use front speakers with low maximum input rating adjust the volume carefully to avoid excessive output on the speakers Connect the Front Left Right speaker correctly If it is reversed the sound may be distorted Speaker System Connection LM K7960Q model Connect the speakers using the supplied speaker cables by matching the colors of the terminals and those...

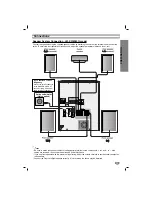
Page 10: ...eakers with low maximum input rating adjust the volume carefully to avoid excessive output on the speakers Connect the Front Left Right speaker correctly If it is reversed the sound may be distorted Speaker System Connection LM K6960Q model Connect the speakers using the supplied speaker cables by matching the colors of the terminals and those of the cords To obtain the best possible surround soun...

Page 11: ... you use front speakers with low maximum input rating adjust the volume carefully to avoid excessive output on the speakers Connect the Front Left Right speaker correctly If it is reversed the sound may be distorted Speaker System Connection LM KW6960Q model Connect the speakers using the supplied speaker cables by matching the colors of the terminals and those of the cords To obtain the best poss...

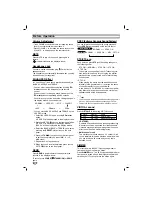
Page 12: ...indow To cancel press POWER STANDBY ON or DEMO again XDSS Extreme Dynamic Sound System You can improve the sound quality during playback Press XDSS plus repeatedly on the remote contol NORMAL y XDSS ON NORMAL XDSS ON MP3 OPT ON XTS XTS pro Each time you press XTS pro the setting changes in the following order XTS ON NORMAL XTS P ON XTS ON XTS P ON The unique sound quality of the LG Technology cre ...

Page 13: ...setting If you wish to stop the function press the SLEEP button repeatedly until SLEEP 10 appears and then press SLEEP once again after SLEEP 10 shows on the display Using Microphone You can sing to a music source by connecting a microphone to the unit 1 Connect your microphone to the MIC socket will be shown in the display window 2 2 Play the music you want 3 3 Sing along with the accompaniment A...

Page 14: ...conds in the display window and then disappears 5 Set the hour to switch on by pressing b bb b B BB B on the front panel 6 Press SET CD to confirm the turn on hour time 7 Set the minute to switch on by pressing b bb b B BB B on the front panel 8 Press SET CD to confirm the turn on minutes time OFF TIME indicator appears for about 0 5 seconds in the display window and then disappears 9 Set the hour...

Page 15: ...hanced soundfield directionality that approaches the quality of discrete 5 1 channel sound MUSIC mode The Music mode is for use with any stereo music recordings MATRIX mode The Matrix mode is the same as the Music mode except that the directional enhancement logic is turned off It may be used to enhance mono signals by making them seem larger The Matrix mode may also find use in auto systems where...

Page 16: ... some func tions press SELECT ENTER to execute the set ting Temporary Feedback Field Icons Repeat title Repeat sequence Resume play from this point Action prohibited or not available Notes Some discs may not provide all of the features on the on screen display example shown below If no button is pressed for 10 seconds the on screen display disappears A B Title Items Title Number Chapter Number Tim...

Page 17: ...16 9 wide TV is connected Display Mode Display Mode setting works only when the TV Aspect mode is set to 4 3 Letterbox Displays a wide picture with bands on the upper and lower portions of the screen Panscan Automatically displays the wide picture on the entire screen and cuts off the portions that do not fit Progressive Scan Progressive Scan Video provides higher quality pictures with less flicke...

Page 18: ...e selected speaker 5dB 5dB Distance If you have connected speakers to your DVD Player setting the Distance lets the speakers know how far the sound has to travel to reach your set listening point This allows the sound from each speaker to reach the listener at the same time Press to adjust the Distance of the selected speaker Center Rear L and Rear R Test Select All to test the signals of each spe...

Page 19: ... rated scenes are not played unless an alternate scene is available on the disc The alternative must have the same rating or a lower one If no suitable alternative is found playback stops You must enter the 4 digit password or change the rating level in order to play the disc 4 Press SELECT ENTER to confirm your rating selection then press SETUP to exit the menu Password Security Code You can ente...

Page 20: ...pear instead If a menu screen is displayed The menu screen may be displayed first after loading a DVD which contains a menu Use the buttons to select the title chapter you want to view then press SELECT ENTER to start Press TITLE or MENU to return to the menu screen Notes If parental control is set and the disc is not within the rating settings you must input the password See LOCK on page 19 DVDs ...

Page 21: ...DivX the Search speed changes mX2 mX4 mX8 mX16 backward or MX2 MX4 MX8 MX16 forward Still Picture and Frame by frame playback 1 Press PAUSE STEP on the remote control during playback The player will now go into PAUSE mode 2 You can advance the picture frame by frame by pressing PAUSE STEP repeatedly on the remote con trol 3 To exit still motion mode press PLAY Slow Motion 1 Press PAUSE STEP on the...

Page 22: ...icon will appear on the TV screen briefly 2 Repeat step 1 to enter up to nine Marker points on a disc To Recall a Marked Scene 1 During disc playback press SEARCH The MARKER SEARCH menu will appear on the screen 2 Within 10 seconds press to select a Marker number that you want to recall 3 Press SELECT ENTER Playback will start from the Marked scene 4 To remove the MARKER SEARCH menu press SEARCH T...

Page 23: ...L TV DVD DivX DVD DivX DVD Operation with Audio CD and MP3 WMA Disc Playing an Audio CD and MP3 WMA file The unit can play audio CD and MP3 WMA Audio CD Once you insert an audio CD a menu appears on the TV screen Press to select a track then press PLAY or SELECT ENTER and playback starts MP3 WMA 1 Press to select a folder and press SELECT ENTER to see the folder contents 2 Press to select a track ...

Page 24: ... always be sought from the copyright owner Operation with Audio CD and MP3 WMA Disc Programmed Playback WMA MP3 CD The Program function enables you to store your favorite tracks from any disc in the player memory A program can contain 300 tracks Audio CD MP3 WMA 1 1 Insert a disc Audio CD and MP3 WMA Discs Audio CD or MP3 WMA menu appears as below Audio CD Menu MP3 WMA Menu 2 2 Select a track on t...

Page 25: ...re 1 Press PAUSE STEP during slide show The player will now go into PAUSE mode 2 To return to the slide show press PLAY or press PAUSE STEP again To rotate picture Press during showing a picture to rotate the picture clockwise or counter clockwise Zoom The Zoom function allows you to enlarge or reduce the video image 1 Press ZOOM repeatedly Zoom on y Zoom off 2 Use the buttons on the Zoom on mode ...

Page 26: ...during playback press and hold S TITLE about 3 seconds then press S TITLE to select another language code until the subtitle is displayed properly List 0 00 00 MOVIE 1 12 Movie Folder 1 Movie Folder 2 Movie Folder 3 Movie Folder 4 Movie Folder 5 Movie Folder 6 Movie Folder 7 Movie Folder 8 DivX disc compatibility with this player is limited as follows Available resolution size of the DivX file is ...

Page 27: ... preset number will flash To change the preset number follow the steps 4 5 To recall preset numbers Press and hold on the remote control until the desired preset number appears or press the button repeatedly Listening to the radio 1 Press TUNER BAND on the remote control to show either FM or AM in the display window Or Press TUNER on the front panel The last received station is tuned in 2 2 Press ...

Page 28: ... sequence FREQUENCY PTY RT CT PS PTY Programme type recognition The programme type is shown in the display window RT Radio text recognition The radio station s name is displayed in the display window CT Time controlled by the channel Enable the unit to receive the actual time and show it on the display window PS Programme Service name The programme title is displayed in the display window ote Some...

Page 29: ...o record except tape function 2 2 Open the cassette deck TAPE 2 and insert a blank cassette into the cassette compartment Set the recording direction Press PLAY MODE repeatedly to set the recording direction Recording from Radio CD or Auxiliary source 1 Press zREC on the front panel or z on the remote control REC flashes and holds the cassette in pause mode 2 2 Press G or F The recording begins To...

Page 30: ...e control to increase the echo volume or decrease it MIN 1 14 MAX steps Reserving the Songs When you want to make a reservation of next melody you can enjoy the most 8 melodies reservation Without waiting 1 Press the NUMERIC buttons to reserve melody number you want in the karaoke disc play mode Melody number appears on the TV screen 2 2 Press PROG MEMO The melody number is made a reservation 3 3 ...

Page 31: ...ON OFF When singing by selection of melody song chorus is heard a sound To cancel it select the ote To move to the main menu press MENU MUSIC LIST LOCAL SONG and POP SONG 1 Select by pressing the on the main menu The LOCAL SONG POP SONG and CLASSIC menu will be shown on the TV screen 2 2 Select or by pressing the and press SELECT ENTER SONG LIST and SINGER LIST menu will be shown on the TV screen ...

Page 32: ...n CLASSIC LIST 1 Select and select the initial of the song title you want by pressing the then press SELECT ENTER 2 Select the song title you want by pressing the and press SELECT ENTER COMPOSER LIST 1 Select and select the initial of the composer you want by pressing the in the CLASSIC LIST and COMPOSER LIST menu and press SELECT ENTER 1 5 7 A F H M R 140 ìÑA 0871 ÅEá TEÅü 2431 BAì BA 1078 áA ÑàC...

Page 33: ...Select by pressing and select one of 60 70 80 or 90 by pressing to select success score then press SELECT ENTER 4 Select by pressing then press SELECT ENTER It appears as below 5 Select number you want by pressing and press SELECT ENTER Sing along with the accompaniment 6 Repeat step 4 5 Change the team of red team or blue team alternately 7 When reaching the targeted winning number the will be sh...

Page 34: ...sensor of the unit The remote control is too far from the unit There is an obstacle in the path of the remote control and the unit The batteries in the remote control are exhausted The DVD CD function is not selected Correction Plug the power cord into the wall outlet securely Insert a disc Check that the DVD or audio CD indicator in the DVD display is lit Select the appropriate video input mode o...

Page 35: ... 8376 Somali 8379 Spanish 6983 Sudanese 8385 Swahili 8387 Swedish 8386 Tagalog 8476 Tajik 8471 Tamil 8465 Tatar 8484 Telugu 8469 Thai 8472 Tibetan 6679 Tigrinya 8473 Tonga 8479 Turkish 8482 Turkmen 8475 Twi 8487 Ukrainian 8575 Urdu 8582 Uzbek 8590 Vietnamese 8673 Volapük 8679 Welsh 6789 Wolof 8779 Xhosa 8872 Yiddish 7473 Yoruba 8979 Zulu 9085 Use this list to input your desired language for the fo...

Page 36: ...ideo output Y 1 0 V p p 75 Ω C 0 3 V p p 75 Ω Component Video output Y 1 0 V p p 75 Ω Pb Pr 0 7 V p p 75 Ω Speakers Speaker Name Front Speaker L R Center Speaker Type Bass Reflex 2Way 3Speaker Bass Reflex 2Way 3Speaker Impedance 4 Ω 8 Ω Frequency Response 55 20000 Hz 130 20000 Hz Sound Pressure Level 86 dB W 1m 84 dB W 1m Rated Input Power 130 W 60 W Max Input Power 260 W 120 W Net Dimensions W x ...

Reviews: