background image

A6

Control Panel Functions

Control

Direct Access Function

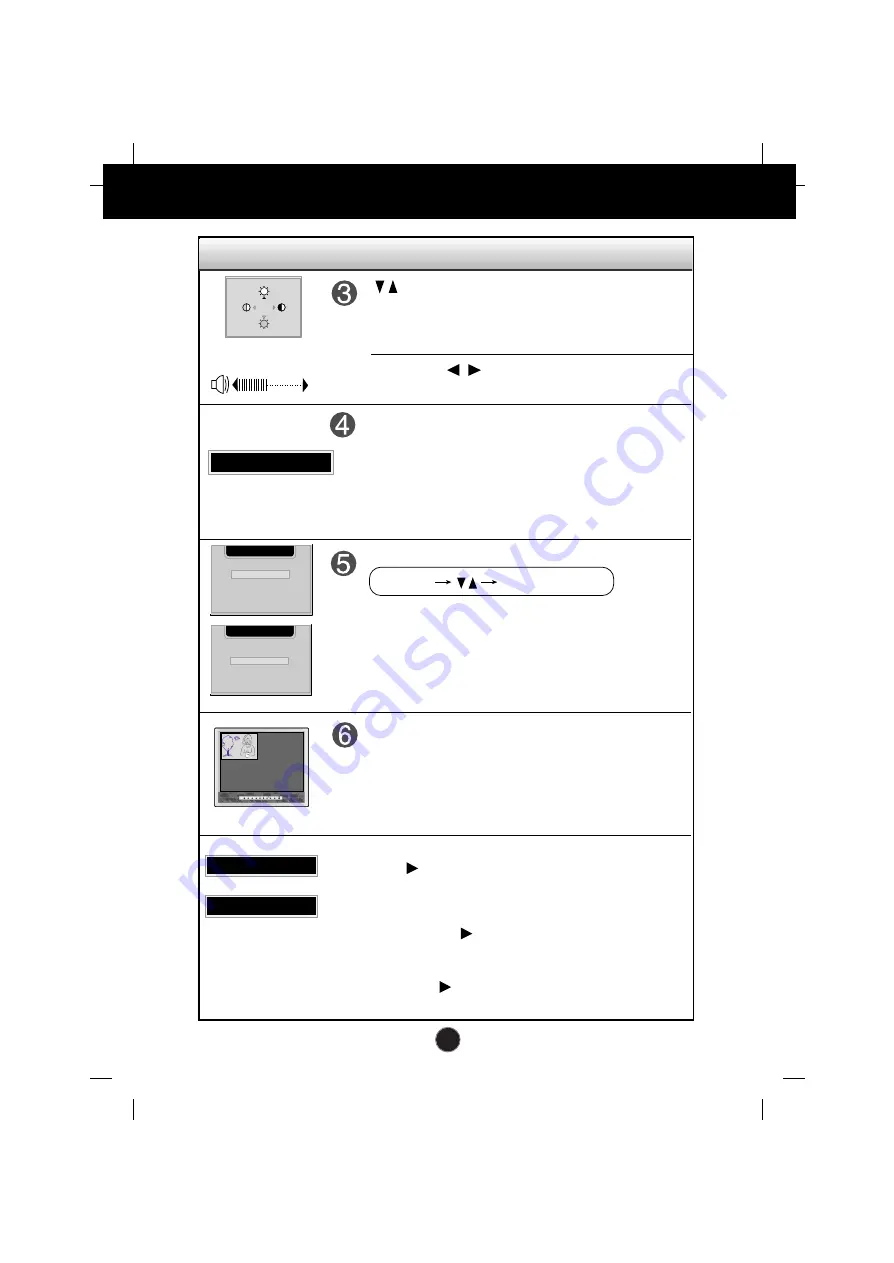
• Bring up Contrast and Brightness adjustment. 

• Use these buttons to go up and down the channel

when the TV source is available.

100

100

AUTO IN PROGRESS

When adjusting your display settings, always press the

AUTO/SELECT

button before entering the On Screen

Display(OSD). This will automatically adjust your display
image to the ideal settings for the current screen
resolution size (display mode).

The best display mode is 

1280x1024

.

This function allows you to secure the current control settings,
so that they cannot be inadvertently changed. Press and hold
the MENU button and       button for 3 seconds: the message

“CONTROLS LOCKED”

appears.

You can unlock the OSD controls at any time by pushing the
MENU button and       button for 3 seconds:
the message 

“CONTROLS UNLOCKED” 

will appear.

AUTO adjustment function

CONTROLS LOCKED/UNLOCKED :

MENU and 

Use these buttons to decrease or increase the volume level.

VOLUME: 

37

INPUT SELECT

DVI DIGITAL

V1 (AV)
V2 (S)

HDTV

DSUB ANALOG

Use this button to select an input signal.

• DVI DIGITAL: DVI digital signal
• DSUB ANALOG: 15-pin D-sub analog signal
• TV: TV
• V1 (AV): Composite video
• V2 (S): S video
• HDTV: HDTV

Source Selection:

INPUT SELECT

DVI DIGITAL

V1 (AV)
V2 (S)

HDTV

DSUB ANALOG

TV

CONTROLS LOCKED

CONTROLS UNLOCKED

AUTO/SELECT

SOURCE

This PIP (Picture-in-Picture) function allows the image
from the TV (HDTV), VCR or DVD to be displayed on a
sub-screen while you are using a computer.
The sub-screen is changed in the order shown below.
: SMALL -> LARGE -> OFF

PIP (Picture in Picture) function

INPUT MENU

AUTO/SELECT

PIP

* When the TV source is available.

Summary of Contents for LM805L

Page 1: ...APPENDIX G FCC ID BEJLM805L USER S MANUAL ...

Page 2: ...e what type of power supply you have in your home consult with your dealer Overloaded AC outlets and extension cords are dangerous So are frayed power cords and broken plugs They may result in a shock or fire hazard Call your service technician for replacement Do not Open the Display There are no user serviceable components inside There are Dangerous High Voltages inside even when the power is OFF...

Page 3: ... Active Matrix LCD with anything hard as this may scratch mar or damage the Active Matrix LCD permanently Do not press the LCD screen with your finger for a long time as this may cause some afterimages Some dot defects may appear as Red Green or Blue spots on the screen However this will have no impact or effect on the display performance If possible use the recommended resolution to obtain the be...

Page 4: ...AC NOTE This is a simplified representation of the rear view Thisrearviewrepresentsageneralmodel yourdisplaymaydifferfromtheviewasshown LINE OUT A terminal used to connect to the speaker including a built in amplifier Amp Make sure that the connecting terminal of the PC sound card is checked before connecting If the Audio Out of PC sound card has only Speaker Out reduce the PC volume If the Audio ...

Page 5: ...A4 Connecting the Display Side Jack Headphone Earphone Input Automatically mutes the speaker volume when the headphones are plugged in Display ...

Page 6: ...Screen Display Use this button to turn the display on or off This Indicator lights up green when the display operates normally If the display is in DPM Energy Saving mode this indicator color changes to amber Power Button Power DPMS Indicator Use this button to enter a selection in the On Screen Display AUTO SELECT Button Remote Control Sensor SOURCE CH VOL MENU AUTO SELECT PIP Control Function L1...

Page 7: ...ock the OSD controls at any time by pushing the MENU button and button for 3 seconds the message CONTROLS UNLOCKED will appear AUTO adjustment function CONTROLS LOCKED UNLOCKED MENU and Use these buttons to decrease or increase the volume level VOLUME 37 INPUT SELECT DVI DIGITAL V1 AV V2 S HDTV DSUB ANALOG Use this button to select an input signal DVI DIGITAL DVI digital signal DSUB ANALOG 15 pin ...

Page 8: ...and selections you can make using the OSD To make adjustments in the On Screen Display follow these steps Press the MENU Button then the main menu of the OSD appears To access a control use the or Buttons When the icon you want becomes highlighted press the AUTO SELECT Button Use the Buttons to adjust the item to the desired level Accept the changes by pressing the AUTO SELECT Button Exit the OSD ...

Page 9: ...E POSITION TRACKING SETUP PIP Main menu Sub menu A D Reference PRESET 9300K 6500K R G B User Color To adjust the position of the screen To customize the color of the screen To customize the screen status for a user s operating environment To improve the clarity and stability of the screen Adjustable A Analog Input D Digital Input BRIGHTNESS CONTRAST V POSITION H POSITION AUTO CLOCK PHASE LANGUAGE ...

Page 10: ...e screen status for a user s operating environment To improve the clarity and stability of the screen LANGUAGE IMAGE SIZE OSD POSITION TRANSPARENCY To adjust the audio function VOLUME BASS TREBLE MUTE SOUND CHANNEL ADD DELL CH AUTO CHANNEL SELECT FINE TUNE To select the TV channel settings and adjust the channel quality Using the VCR DVD TV HDTV Adjustable V VCR DVD T TV HDTV ...

Page 11: ...rightness of the screen CONTRAST To adjust the contrast of the screen To adjust the brightness and contrast of the screen CONTRAST BRIGHTNESS CONTRAST 100 BRIGHTNESS 99 R G B PIP COLOR ADJUSTMENT USER 9300K 6500K R G B PIP RED 50 50 50 GREEN BLUE USER 9300K 6500K RED GREEN BLUE Set your own color levels Select the screen color 9300K Slightly bluish white 6500K Slightly reddish white To customize t...

Page 12: ...log signal input only This button is for the automatic adjustment of the screen position clock and phase To minimize any vertical bars or stripes visible on the screen background The horizontal screen size will also change To adjust the focus of the display This item allows you to remove any horizontal noise and clear or sharpen the image of characters AUTO CLOCK PHASE To improve the clarity and s...

Page 13: ...LCD panel To adjust position of the OSD window on the screen Press the AUTO SELECT button to display the submenu for OSD POSITION To adjust the transparency of the OSD menu screen To adjust horizontal and vertical image size simultaneously If you want to move the zooming point use the H V POSITION function in the sub menu However if the monitor turns off when zooming in and out the screen the moni...

Page 14: ... are using a computer PIPON OFF PIP SOURCE PIPSIZE PIP POSITION PIP IMAGE PIP SOUND PIP R G B PIP PIP IMAGE PIP BRIGHTNESS PIP SHARPNESS 50 50 PIP COLOR PIP TINT 50 50 PIP CONTRAST 50 PIPCONTRAST Toadjustthecontrastofthescreen PIPBRIGHTNESS Toadjustthebrightnessofthescreen PIP SHARPNESS Toadjusttheclearnessofthescreen PIPCOLOR Toadjustthecolortodesiredlevel PIPTINT Toadjustthetinttodesiredlevel Th...

Page 15: ...E TUNE To adjust the screen when using the VCR DVD TV To improve the clarity and stability of the screen OSD Adjust Description To adjust the contrast of the screen To adjust the brightness of the screen To adjust the clearness of the screen To adjust the color to desired level To adjust the tint to desired level This function is available only in NTSC broadcasting mode CONTRAST BRIGHTNESS SHARPNE...

Page 16: ...en To adjust the audio function OSD Adjust Description To decrease or increase volume level To decrease or increase bass level To decrease or increase treble level Used to select mute on means sound off and mute off means sound on To select the audio mode MONO STEREO VOLUME BASS TREBLE MUTE SOUND AUDIO VOLUME BASS MUTE 50 50 50 TREBLE SOUND OFF STEREO SETUP LANGUAGE IMAGE SIZE TRANSPARENCY TV AIR ...

Page 17: ... OSD controls at any time by pushing the MENU button and button for 3 seconds the message CONTROLS UNLOCKED will appear Check and see if the power cord is connected properly to the power outlet Press the Power button Adjust the brightness and the contrast If the display is in power saving mode try moving the mouse or pressing any key on the keyboard to bring up the screen Make sure if the power is...

Page 18: ...al setting If the results are unsatisfactory decrease the vertical bars or stripes using the CLOCK icon in the on screen display Press the AUTO SELECT button to automatically adjust your display image to the ideal setting If the results are unsatisfactory decrease the horizontal bars using the PHASE icon in the on screen display Check Control Panel Display Settings and adjust the display to the re...

Page 19: ...USB cable is correctly connected Check if the PC and OS are USB compliant For verification of USB support consult the manufacturer of each system IMAGE SIZE function on OSD menu does not work Have you installed the display driver Have you installed the display driver Do you see an Unrecognized monitor Plug Play VESA DDC monitor found message Be sure to install the display driver from the display d...

Page 20: ...arch the available channels Check and see if the TV adapter is properly connected between your display and antenna cable Audio function Check if the audio cable is correctly connected Check the volume level Adjust the TREBLE to an appropriate level Adjust the BASS to an appropriate level Check the volume level No sound Sound is too high pitched or too low piched Sound level is too low ...

Page 21: ...l Input Form RGB Analog 0 7Vp p 75ohm Digital Max Digital VESA 1280 x 1024 60Hz Analog VESA 1280 x 1024 75Hz Recommend VESA 1280 x 1024 60Hz Input PC 700mVrms TV 100 modulation Video 400mVrms Audiooutputanditsratio 1W 1W left right 10 Speaker Impedance 8Ω DDC 2B Input AC 100 240V 50 60Hz 2 0A Output DC 12V 5 0A Normal 65W Stand by Suspend 5W Power Off 5W Width 40 6 cm 15 98 inches Height 43 1 cm 1...

Page 22: ...tached Detached O Wall outlet type or PC outlet type TCO99 Environmental Conditions Tilt Swivel Stand Signal cable Power cord Regulations VESA wall mounting Connected to another object stand type and wall mounted type This monitor accepts a VESA compliant mounting interface pad Kensington Security Slot optional Connected to a locking cable that can be purchased separately at most computer stores ...

Page 23: ... x 600 800 x 600 800 x 600 832 x 624 1024 x 768 1024 x 768 1024 x 768 1152 x 870 1152 x 900 1280 x 1024 1280 x 1024 31 469 31 468 31 469 37 500 43 269 37 879 46 875 53 674 49 725 48 363 60 123 68 677 68 681 61 805 63 981 79 976 70 70 60 75 85 60 75 85 75 60 75 85 75 65 60 75 VGA VGA VGA VESA VESA VESA VESA VESA MAC VESA VESA VESA MAC VESA VESA VESA Display Modes Resolution ...

Page 24: ...DC Data Analog Vertical Sync T M D S Data1 T M D S Data1 T M D S Data1 3 Shield T M D S Data3 T M D S Data3 5V Power Ground return for 5V H Sync and V Sync Pin Signal DVI D 16 17 18 19 20 21 22 23 24 Hot Plug Detect T M D S Data0 T M D S Data0 T M D S Data0 5 Shield T M D S Data5 T M D S Data5 T M D S Clock Shield T M D S Clock T M D S Clock T M D S Transition Minimized Differential Signaling DVI ...

Page 25: ...gnal inputs only MUTE Button To select mute on or off DOWN UP Buttons VCR Buttons These buttons are available for LG VCR remote controls only Refer to the Owner s Manual for your VCR Power Button TV AV Button PIP Button The sub screen is changed in the order shown below SMALL LARGE OFF Number buttons This function optimizes the brightness contrast or color value to the surrounding conditions and s...

Page 26: ...ch direction of the front of the remote sensor Do not expose the sensor of remote control in the monitor to a strong light source such as direct sunlight or illumination If so may not be able to operate the monitor with the remote control SOURCE MENU PIP 30 30 POWER Note Do not drop the remote control or handle it roughly Do not leave the remote control in extremely hot or humid conditions Do not ...

Page 27: ...own on the Display If you connect the S Video input port to external equipment you can have an improved definition image 2 Select an input signal Press the INPUT button on the front panel of the display to select an input V1 AV Composite video V2 S S video INPUT SELECT DVI DIGITAL V2 S HDTV DSUB ANALOG TV V1 AV S Video cable RCA cable AUTO SELECT SOURCE Red White Yellow ...

Page 28: ... L R 2 Connect the plug from the AC adapter into the back of the monitor 3 Connect the power cord into a proper power outlet that is easily accessible and close to the display 4 Select an input signal Press the INPUT button on the front panel of the display to select an input TV TV HDTV HDTV INPUT SELECT DVI DIGITAL V1 AV V2 S HDTV DSUB ANALOG TV AUTO SELECT SOURCE Bottom Antenna Optional HDTVcabl...

Page 29: ...her USB devices to be attached it USB connection 1 Connect the upstream port of the display to the downstream port of the USB compliant PC or another hub using the USB cable Computer must have a USB port 2 Connect the USB compliant peripherals to the downstream ports of the display NOTE To activate the USB hub function the display must be connected to a USB compliant PC OS or another hub with the ...

Page 30: ... USB Universal Serial Bus Rev 1 0 complied Self powered hub 500mA for each MAX 12 Mbps full 1 5 Mbps low 1 Upstream port 2 Downstream ports USBstandard Downstreampowersupply Communicationspeed USBport USB Specifications ...

Page 31: ...Reference Guide for Precaution Service Warranty and Diskette Install English Deutsch Français Italiano Español Nederlands Português ...

Page 32: ...ale Dati del Monitor 6 Modello Conforme alla Normativa sul Risparmio Energetico 6 Manutenzione 6 Español Precauciones Importantes 7 DDC Canal de despliegue de información 7 Diseño de Ahorro de Energía 8 Servicio 8 Nederlands Belangrijke voorzorgsmaatregelen 8 DDC Display Data Channel 9 Energiebesparingssysteem 9 Onderhoud 9 Português Precauções Importantes 10 DDC Display Data Channel 10 Sistema de...

Page 33: ... magnetic devices such as magnets or motors near the picture tube On Installation Do not allow anything to rest upon or roll over the power cord and do not place the monitor where the power cord is subject to damage Do not use this monitor near water such as near a bathtub washbowl kitchen sink laundry tub in a wet basement or near a swimming pool Monitors are provided with ventilation openings in...

Page 34: ...edoch bei Inbetriebnahme und Benutzung des Gerätes die nachfolgenden Sicherheitshinweise genau beachten Beachten Sie ausserdem die am Monitorgehäuse angebrachten warnhinweise und Anweisungen Zur Sicherheit Benutzen Sie ausschliesslich das mitgelieferte abgeschirmte Netzkabel Falls Sie ein anderes als das vom Hersteller gelieferte Netzkabel verwenden achten Sie darauf daß es der nationalen Norm ent...

Page 35: ... über weiche Sie von lhrem Monitor automatisch über das verbundene System PC und seine Fähigkeiten informiert werden DDC Protokoll DDC1 DDC2B Ein unidirektionaler Kommunikationskanal DDC 2AB DDC2B DDC2Bi Ein bidirektionaler Kommunikationskanal Anmerkung Der PC muß für DDC Funktionen eingerichtet sein Energieversorgung Dieser Monitor entspricht den Richtlinien des EPA Energy Star Program Er beinhal...

Page 36: ...tiques tels que des aimants ou des moteurs électriques à proximité du tube image Consignes D installation Ne placez aucun objet sur le cordon d alimentation et ne placez pas le moniteur à un endroit où le cordon d alimentation risque d être endommagé Ne placez pas le moniteur à proximité d endroits humides par exemple baignoire lavabo évier de cuisine machine à laver dans un sous sol humide ou à p...

Page 37: ...bbe comunque provocare una scarica elettrica o un incendio Al fine di non alterare i dispositivi di sicurezza incorporati nel monitor osservare le seguenti norme basilari per l istallazione l uso e la manutenzione Seguire inoltre tutte le avvertenze e le istruzioni riportate direttamente sul monitor Per la Sicurezza Utilizzare unicamente il cavo d alimentazione fornito insieme all unità Se si util...

Page 38: ...le di comunicazione attraverso il quale il monitor informa automaticamente il sistema ospite PC circa le proprie capacità Protocollo DDC DDC1 DDC2B Un canale di comunicazione uni direzionale DDC 2AB DDC2B DDC2Bi Un canale di comunicazione bi direzionale Nota Per fare questo il PC deve supportare le funzioni DDC ModelloConformeallaNormativasul RisparmioEnergetico Questo monitor è conforme al progra...

Page 39: ... desconéctelo del tomacorriente motores cerca del tubo de imagen No coloque dispositivos magnéticos tales como imanes o motores cerca del tubo de imagen Sobre la Instalación No permita que nada descanse encima o ruede sobre el cable y no coloque el monitor donde el cable de energía pueda causar daño No use este monitor cerca del agua o cerca de una bañera lavamanos fregador de cocina fregador de r...

Page 40: ... of brand Als u onderstaande basisregels voor het installeren gebruiken en onderhouden van de monitor in acht neemt blijven de veiligheidsvoorzieningen van deze monitor goed functioneren Neem ook alle waarschuwingen en aanwijzingen die rechtstreeks op uw monitor verschijnen in acht Veiligheid Gebruik het netsnoer dat bij dit apparaat is meegeleverd Mocht u een ander netsnoer gebruiken dat niet doo...

Page 41: ...t over zijn mogelijkheden DDC protocol DDC1 DDC2B Een unidirectioneel communicatiekanaal DDC 2AB DDC2B DDC2Bi Een bidirectioneel communicatiekanaal OPMERKING Dit kan alleen als de PC DDC ondersteunt Energiebesparingssysteem Deze monitor voldoet aan het Energy Star programma van EPA Dit programma is bedoeld om fabrikanten van computerapparatuur zo ver te krijgen elektronica in hun producten op te n...

Page 42: ...antes motores imãs etc próximos do tubo do monitor Na Instalação Não deixe nenhum objeto sobre o cabo de força e nem coloque o monitor em locais onde o cabo de força possa ser danificado Não use o monitor em locais próximos a água tais como banheiras aquários pias ou em locais úmidos Os monitores possuem frestas para ventilação Se estas frestas são bloqueadas o calor gerado pelo monitor pode causa...

Page 43: ...ualificado para execução de serviços de manutenção FCC Compliance Statement This equipment has been tested and found to comply within the limits of a Class B digital device pursuant to Part 15 of the FCC Rules These limits are designed to provide reasonable protection against harmful interference in a residential installation This equipment generates uses and can radiate radio frequency energy and...

Page 44: ...ntal labelling of personal computers The labelling scheme was developed as a joint effort by the TCO The Swedish Confederation of Professional Employees Naturckyddsföreningen The Swedish Society for Nature Conservation and NUTEK The National Board for Industrial and Technical Development in Sweden and SEMKO AB an international certification agency The requirements cover a wide range of issues envi...

Page 45: ...ctronics products Why do we have environmentally labelled computers In many countries environmental labelling has become an established method for encouraging the adaptation of goods and services to the environment The main problem as far as computers and other electronics equipment are concerned is that environmentally harmful substances are used both in the products and during their manufacture ...

Page 46: ...tardants are allowed in the printed circuit boards since no substitutes are available Cadmium Cadmium is present in rechargeable batteries and in the colour generating layers of certain computer displays Cadmium damages the nervous system and is toxic in high doses The relevant TCO 99 requirement states that batteries the colour generating layers of display screens and the electrical or electronic...

Page 47: ...d you may also have other rights which vary from state to state or province to province THE ABOVE WARRANTY DOES NOT APPLY To damages or problems which result from delivery or improper installation To damages or problems which result from misuse abuse accident alteration or incorrect electrical current or voltage To service calls which do not involve defective workmanship or material such as explai...

Page 48: ...t alteration or incorrect electrical current or voltage To service calls which do not involve defective workmanship or material such as explaining the operation of the unit Therefore these costs are paid by the consumer CUSTOMER ASSISTANCE NUMBERS FOR SERVICE You must call Product Assistance to confirm the product needs servicing and to obtain Return Authorization RA 1 800 243 0000 Mon Fri 7AM to1...

Page 49: ...y not applying except to the servicing within Australia of products purchased in Australia 6 LG shall not be liable for the loss of use of product inconvenience loss or any other damages direct or consequential arising out of the use or the inability to use this product during the terms and conditions of the warranty period If any legislation whether Federal or State to applies to this transaction...

Page 50: ...L DE COMPRA DESTE PRODUTO LGElectronicsdeSãoPauloLtda Central LG de Atendimento ao Consumidor Ligue 0800 171514 LIGAÇÃO GRATUITA TERMO DE GARANTIA A LG Electronics de São Paulo Ltda garante este produto pelo período de 90 dias mais 2 anos e nove meses contados a partir da data de emissão da Nota Fiscal de compra desde que o mesmo tenha sido instalado conforme orientações descritas neste manual de ...

Page 51: ... SEÑALADAS C DAÑOS OCASIONADOS POR FENOMENOS NATURALES COMO INCENDIO INUNDACION TEMBLORES RAYOS DESCARGAS ELECTRICAS D DAÑOS POR GOLPES RASPADURAS ROTURAS EN EL PRODUCTO Y EN SUS ACCESORIOS E SI EL PRODUCTO HA TRATADO DE SER REPARADO POR PERSONAS NO AUTORIZADAS POR LG Electronics México S A de C V PRODUCTO MONITORS MODELO SERIE DISTRIBUIDOR DIRECCION COLONIA CIUDAD EDO FECHA DE ENTREGA CENTRO DE S...

Page 52: ...ra Michoacan multis cerse com mx 351 554 16 E LB Merida Yucatan mixers prodigy net mx 99 27 30 79 IRAC Cd Juarez Chihuahua servitecjrz hotmail com 16 16 38 83 LB México D F laagsi correoweb com 5 797 61 48 E MM Guasave Sinaloa zynkoleo debtel com mx 687 223 31 E Ciudad Domicilio Telefono Fax Mexico Estado de México Sor Juana Ines de la Cruz No 555 5 321 19 00 5 321 19 18 Col San Lorenzo LADA S COS...

Page 53: ... 2 years collect for repair The Backlight in these units is warranted for 1 year only Replacements are chargeable 6 LG Electronics reserves the right to collect repairs and return any monitor which has cabinet defilement including security marking We may also collect units for repair where no suitable replacement is immediately available 7 The END USER will be liable for all costs associated with ...

Page 54: ...Close to save the settings Restart the system to activate the setting USB Install Guide The following guide is only for the USB Monitor software support Monitor INSTALL Before Setting up the USB Program Connect the monitor to PC with the USB signal cable Insert the Monitor Installation Disk into the floppy disk drive Select the MNT_USB folder and double click the setup USB Monitor window is displa...

Page 55: ...html Brazil only LG Electronics de São Paulo LTDA C G C NO 011666 372 0001 55 AV D Pedro 1 W 7777 Jardim Silvia Maria Taubate SP Mexico only LG Electronics México S A de C V Sor Juana Inés de la Cruz No 555 Col San Lorenzo Tlalnepantla Edo de México C P 54033 Tel 321 19 00 fax 565 75 49 Lada sin costo 01 800 50 481 00 Printed in Korea 3828TUL100D ...

Reviews: