background image

15

Fast forward or fast reverse  

Press SCAN (

m

or 

M

) to play fast forward or fast reverse during playback.

You can change the playback speed by pressing SCAN (

m

or 

M

) repeated-

ly. Press PLAY (

B

) to continue play at normal speed.

Selecting a subtitle language  

During playback, press S-TITLE (

) repeatedly to select a desired subtitle lan-

guage.

Slow down the playing speed  

While playback is paused, press SCAN (

bb

or 

BB

) to slow down, go forward

or reverse playback. You can change the various playback speed by pressing
SCAN (

m

or 

M

) repeatedly. Press PLAY (

B

) to continue play at normal

speed. 

Watch and listen 1.5 times faster  

Press PLAY when a DVD is already playing to watch and listen to a DVD 1.5
times faster than normal playback speed. 

B

x1.5 will appear in the top right cor-

ner of the screen. Press PLAY again to return to normal playback speed.

Viewing the Title menu  

Press TITLE to display the disc's title menu, if available.

Viewing the DVD MENU  

Press MENU to display the disc menu, if available.

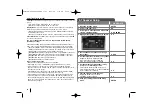
Starting play from selected time 

Searches for the starting point of entered time code. Press DISPLAY during
playback and select the time clock icon. Input the required start time in hours,
minutes, and seconds and press ENTER. If you enter the wrong number, press
CLEAR to enter again.

Last Scene Memory  

This unit memorizes the last scene from the last disc that is viewed. The last
scene remains in memory even if you remove the disc from the player or switch
off(Stand-by mode) the unit. If you load a disc that has the scene memorized,
the scene is automatically recalled.

Mixed disc or USB Flash Drive – DivX, MP3/WMA and JPEG

When playing a disc or USB Flash Drive containing DivX, MP3/WMA and JPEG
files together, you can select which menu of files you would like to play by
pressing TITLE

Changing the character set to display DivX® subtitle correctly  

If the subtitle does not display properly during playback, press and hold S-
TITLE for about 3 seconds then press S-TITLE to select another language code
until the subtitle is displayed properly

DivX file requirement

DivX disc compatibility with this player is limited as follows:
• Available resolution size: 800x600 (W x H) pixel
• The file name of the DivX subtitle is available by 45 characters.
• If the code is impossible code to express in the DivX file, it may be displayed

as " _ " mark on the display.

• If the number of the screen frame is over 30 per 1 second, this unit may not

operate normally.

• If the video and audio structure of recorded files are not interleaved, either

video or audio is outputted.

• If the name of movie file is different from that of the subtitle file,during play-

back of a DivX file, subtitle may not be displayed.

• MPEG4 file extensions: “.avi”, “.mpg”, “.mpeg”
• Playable DivX subtitle: SubRip(*.srt/*.txt), SAMI(*.smi), SubStation

Alpha(*.ssa/*.txt) MicroDVD(*.sub/*.txt) SubViewer 2.0(*.sub/*.txt)
TMPlayer(.txt), DVD Subtitle System(.txt) (Files (VobSub(.sub)) included with
USB device is not supported)

• Playable Codec format: “DIVX3.xx”, “DIVX4.xx “, “DIVX5.xx”, “MP43”, “3IVX”
• Playable Audio format: “AC3”, “DTS”, “PCM”, “MP3”, “WMA”
• Sampling frequency: within 32 - 48 kHz (MP3), within 24 - 48kHz (WMA)
• Bit rate: within 32 - 320kbps (MP3), 40 - 192kbps (WMA)
• CD-R/RW, DVD±R/RW Format: ISO 9660 
• Maximum Files/Disc: Less than 999 (total number of files and folders)

DivX

DivX

DVD

DivX

DVD

DVD

DVD

WMA

MP3

ACD

DVD

DVD

DivX

DVD

ALL

HT963PA-AP_DCANLLK_ENG_1109  6/23/08  7:31 PM  Page 15

Summary of Contents for HT963PA

Page 1: ... to page 18 Full HD up scaling 1080p View Full HD picture quality with simple setup Go to page 12 Portable In Listen to music from your portable device MP3 Notebook etc Go to page 17 Made for iPod Enjoy music from iPod with simple connection Go to page 19 http www lg ca P NO MFL56941109 HT963PA AP_DCANLLK_ENG_1109 6 23 08 7 31 PM Page 1 ...

Page 2: ...s adjustments or the performance of procedures other than those specified herein may result in hazardous radiation exposure To prevent direct exposure to laser beam do not try to open the enclosure Visible laser radi ation when open DO NOT STARE INTO BEAM FCC WARNING This equipment may generate or use radio frequency energy Changes or modifications to this equipment may cause harmful interference ...

Page 3: ...e personnel Servicing is required when the apparatus has been damaged in any way such as power supply cord or plug is damaged liquid has been spilled or objects have fallen into the apparatus the apparatus has been exposed to rain or moisture does not operate normally or has been dropped Copyrights It is forbidden by law to copy broadcast show broadcast via cable play in public or rent copyrighted...

Page 4: ... dripping or splashing and no objects filled with liquids such as vases should be placed on the apparatus CAUTION concerning the Power Cord Most appliances should be placed on a dedicated circuit That is a single outlet circuit which powers only that appliance and has no additional outlets or branch circuits Check the specification page of this owner s manual to be certain Do not overload wall out...

Page 5: ...r coded by a band near each end and wires one of the six speakers to the DVD receiver b b Connect the wires to the DVD receiver Match each wire s colored band to the same colored connection terminal on the reverse of the DVD receiver To connect the cable to the DVD receiver press each plastic finger pad to open the connection terminal Insert the wire and release the finger pad Grey Blue Green Oran...

Page 6: ...bove or below the television Rear speakers Place left and right behind the listening area These speakers recreate sound motion and atmosphere required for surround sound playback For best results do not install the rear speakers too far behind the listening position and install them at or above the level of the listener s ears It is also effective to direct the rear speakers towards a wall or ceil...

Page 7: ...nit AM FM connection AM Connect the AM loop aerial to the DVD receiver FM Connect the FM aerial The reception will be its best when the two loose ends of the aerial are in a straight and horizontal line Video Out connection Connect the VIDEO OUT PUT MONITOR jack on the unit to the corresponding input jacks on your TV using a Video cable Component Video connection Connect the COMPONENT VIDEO PROGRE...

Page 8: ...he screen Please read owner s manual for TV and then set the resolution that your TV can accept Use the HDMI cable within 5 meters If the volume bar is not displayed on TV screen restart the unit Enjoying audio from an external source You can enjoy audio from an external source through your unit Press INPUT repeatedly to select the desired input source AUX AUX OPT PORTABLE USB OSD IPOD IPOD Digita...

Page 9: ...ects an audio language DVD or an audio channel CD This button is not available d RETURN O Press to move backwards in the menu SETUP Accesses or removes setup menu MENU Accesses the menu on a DVD disc DISPLAY Accesses On Screen Display CLEAR Removes a track number on the Program List b B v V left right up down Used to navigate on screen displays ENTER Acknowledges menu selection PRESET Selects prog...

Page 10: ...olume Control the volume when using any function Open Close DVD CD Disc Drawer PORT IN port The PORT In port means you can connect a audio device to play trough the surround sound speakers Power Turn the unit on and off USB port The USB port allows you can connect a memory device to your DVD player Main Unit HT963PA AP_DCANLLK_ENG_1109 6 23 08 7 31 PM Page 10 ...

Page 11: ...el v v V V 3 Move to second level B B 4 Select a desired option on the second level v v V V 5 Move to third level B B 6 Change the setting v v V V ENTER OSD Initial language settings 1 Turn the power on Appear the language list display window POWER 2 Select the language vV b B 3 Press ENTER 4 To confirm press b B and ENTER Before using the unit for the first time you have to adjust OSD initial lan...

Page 12: ...ution Only resolutions supported by the TV are available Depending on your TV certain HDMI output resolutions may not work If your TV does not accept your resolution setting an abnormal picture appears on the screen Please read TV s owner s manual then set the resolu tion that your TV can accept If the HDMI jack is connected for TVs providing display information EDID you can not select resolutions...

Page 13: ... vod Press ENTER when Select icon is highlighted and you can view the registra tion code of the unit Setting the sound mode VSM VIRTUAL SOUND MATRIX and Dolby Pro Logic II You can select the Dolby Pro Logic II or Virtual sound Press VSM to set the virtual sound or to change sound mode repeatedly BYPASS mode Software with multichannel surround audio signals is played according to the way it was rec...

Page 14: ...eginning of the current chapter track Press SKIP twice briefly to step back to the previous chapter track Pause playback Press PAUSE STEP X to pause playback Press PLAY B to continue play back Frame by Frame playback Press PAUSE STEP X repeatedly to play title Frame by Frame Playing repeatedly Press REPEAT repeatedly to select an item to be repeated The current title chapter or track will be playe...

Page 15: ...or USB Flash Drive DivX MP3 WMA and JPEG When playing a disc or USB Flash Drive containing DivX MP3 WMA and JPEG files together you can select which menu of files you would like to play by pressing TITLE Changing the character set to display DivX subtitle correctly If the subtitle does not display properly during playback press and hold S TITLE for about 3 seconds then press S TITLE to select anot...

Page 16: ...op mode for about five minutes Repeating a specific portion A B Press REPEAT A B at the beginning of the portion you wish to repeat and again at the end of the portion Your selected portion will be repeated continually To return to normal playback press REPEAT A B to select OFF Hearing a different audio During playback press AUDIO repeatedly to switch between the available audio languages or encod...

Page 17: ... This will change the tuner from stereo to mono and usually improve the reception Listening to the radio 1 Turn the power on POWER 2 Select either FM or AM FUNCTION 3 Select a radio station TUN 4 To save a radio station A preset number will show in the display PROG MEMO 5 To select a saved station input the preset number Up to 50 radio stations can be saved PRESET 6 To confirm press PROG MEMO Be s...

Page 18: ...the screen If you want to move to the previous menu after you select a folder press RETURN 5 1ch ez Set up 1 Connect the unit s OPTICAL IN jack to jack on optical out of your TV or Digital Device etc 2 Select the AUX OPT To select the AUX OPT directly TVt tHT SPK 3 Listen sound with 5 1ch speaker 4 To escape from AUX OPT FUNCTION or INPUT Listen to sound from TV DVD and Digital Device with vivid 5...

Page 19: ...ontrol your iPod from the unit We recommend installing the latest software version When you use iPod look out for the following Interference may happen depending on iPod devices The video or photo file is not displayed OSD iPod mode OSD iPod mode iPod mode OSD iPod mode iPod mode OSD iPod mode iPod mode OSD iPod mode Listening to music from your iPod 1 Connect the iPod by plugging the unit into iP...

Page 20: ...IC 03 10 11 13 37 44 GRADIENTE 01 56 57 63 67 HITACHI 09 14 15 43 JC PENNEY 01 08 10 27 35 JVC 20 21 63 67 KIOTE 43 KMC 09 KTV 01 08 09 31 LG GOLDSTAR 01 07 08 09 35 39 40 LODGENET 33 LOGIK 33 LXI 09 24 25 26 27 28 29 MAGNAVOX 01 02 04 05 06 07 08 09 20 34 35 43 51 61 62 65 MAJESTIC 33 MARANTZ 01 32 MEMOREX 33 MGA MITSUBISHI 01 08 32 34 Manufacturer Code Number MONTGOMERY 01 06 08 09 WARD 23 24 32...

Page 21: ... 8377 Sanskrit 8365 Scots Gaelic 7168 Serbian 8382 Serbo Croatian 8372 Shona 8378 Sindhi 8368 Singhalese 8373 Slovak 8375 Slovenian 8376 Spanish 6983 Sudanese 8385 Swahili 8387 Swedish 8386 Tagalog 8476 Language Code Tajik 8471 Tamil 8465 Telugu 8469 Thai 8472 Tonga 8479 Turkish 8482 Turkmen 8475 Twi 8487 Ukrainian 8575 Urdu 8582 Uzbek 8590 Vietnamese 8673 Volapük 8679 Welsh 6789 Wolof 8779 Xhosa ...

Page 22: ...ceiver There is an obstacle in the path of the remote control and the unit The batteries in the remote control are flat Plug the power cord into the wall outlet securely Select the appropriate video input mode on the TV so the pic ture from the DVD Receiver appears on the TV screen Connect the video cables securely to both the TV and DVD Receiver Select the correct input mode of the audio receiver...

Page 23: ...YED IN THE PICTURE IN CASE OF 525 OR 625 PROGRESSIVE SCAN PICTURE PROBLEMS IT IS RECOMMEND ED THAT THE USER SWITCH THE CONNECTION TO THE STANDARD DEFINITION OUTPUT IF THERE ARE QUESTIONS REGARDING OUR TV SET COMPATIBILITY WITH THIS MODEL 525p AND 625p UNIT PLEASE CONTACT OUR CUSTOMER SERVICE CENTER You have to set the disc format option to Mastered in order to make the discs compatible with the LG...

Page 24: ...HD 10 Surround mode Front 155 W 155 W THD10 Center 155 W Surround 155 W 155 W 4Ω at 1 kHz THD 10 Subwoofer 225 W 3Ω at 30 Hz THD 10 Designs and specifications are subject to change without prior notice Specifications Specifications Speakers Front Rear Speaker speaker Type 2 Way 3 Speaker 1 Way 1 Speaker Impedance 4 Ω 4 Ω Rated Input Power 155 W 155 W Max Input Power 310 W 310 W NetDimensions WxHxD...

Reviews: