background image

Recording 

using VIDEO Plus+

VIDEO Plus+

simplifies the process of recording television programmes. It works by entering codes that contain all the 

necessary information for recording. These are called PlusCodes and can be found in most television listings magazines. 
You must tune and store channels as set out on page 5 and set the clock to the correct time before using 

VIDEO Plus+.

VIDEO Plus+ and PlusCode are registered trademarks of Gemstar Development Corporation.
The VIDEO Plus+ system is manufactured under license from Gemstar Development Corporation.

10

VIDEO Plus+

VIDEO Plus+

will only work if all the

channels have been tuned and
stored. The clock must also be set to
the correct time, see page 11.

1

Turn on your Video Recorder and
your television. Insert a recordable
video tape.

2

Press the 

VIDEO Plus+

button on

the Remote Control.

3

Use the 

or 

buttons to select

the recording type:

ONCE

will be a single recording

event. 

DAILY

will record each week day

at the same time.

WEEKLY

will record on the same

channel at the same time each
week.

4

Use the numbered buttons to
enter the PlusCode of the 
television programme you wish to
record. If you make a mistake
press the 

1

button and re-enter

the correct numbers.

5

Press 

OK

and the recording

details of your programme will be
displayed. If 

PLEASE CHECK

is

displayed  check that you have
entered the right PlusCode. 
If the number has been entered 
correctly but does not work, it
may have been printed incorrectly
in the television listings guide.
If ‘- -’ is displayed on the “PR” you
will have to enter the programme
number that you want to record
from. This will only happen once
for each channel, once done it will
be stored in the Video Recorder’s
memory. If you wish to record from
the scart socket or RCA socket on
the front press 

AV

6

Use the 

2

button to move to the

PDC section. Use 

or 

to

switch PDC off or on. If you are
recording from a television station
which does not broadcast 

PDC

this option should be turned off.

Use the 

2

button to move to the

selecting the speed section. 

7

Use the 

or 

buttons to

choose among Standard Play,
Intelligent Play and Long Play, as
described on page 8.
IP mode determines how much
tape is left and switches speed
from SP to LP, if necessary, to
complete recording the 
programme. 
IP mode is not applicable when
PDC is on.

8

Check the details are correct and
press 

to save your settings.

If 

PLEASE CHECK

is displayed

check that the details are correct.
If you wish to set other 

VIDEO

Plus+

recordings repeat steps 2-7.

Press 

again to remove the

menu.

9

Turn off the Video Recorder,

TIMER

will be illuminated on the

Display panel.

10

Press 

STOP 

9

to end recording.

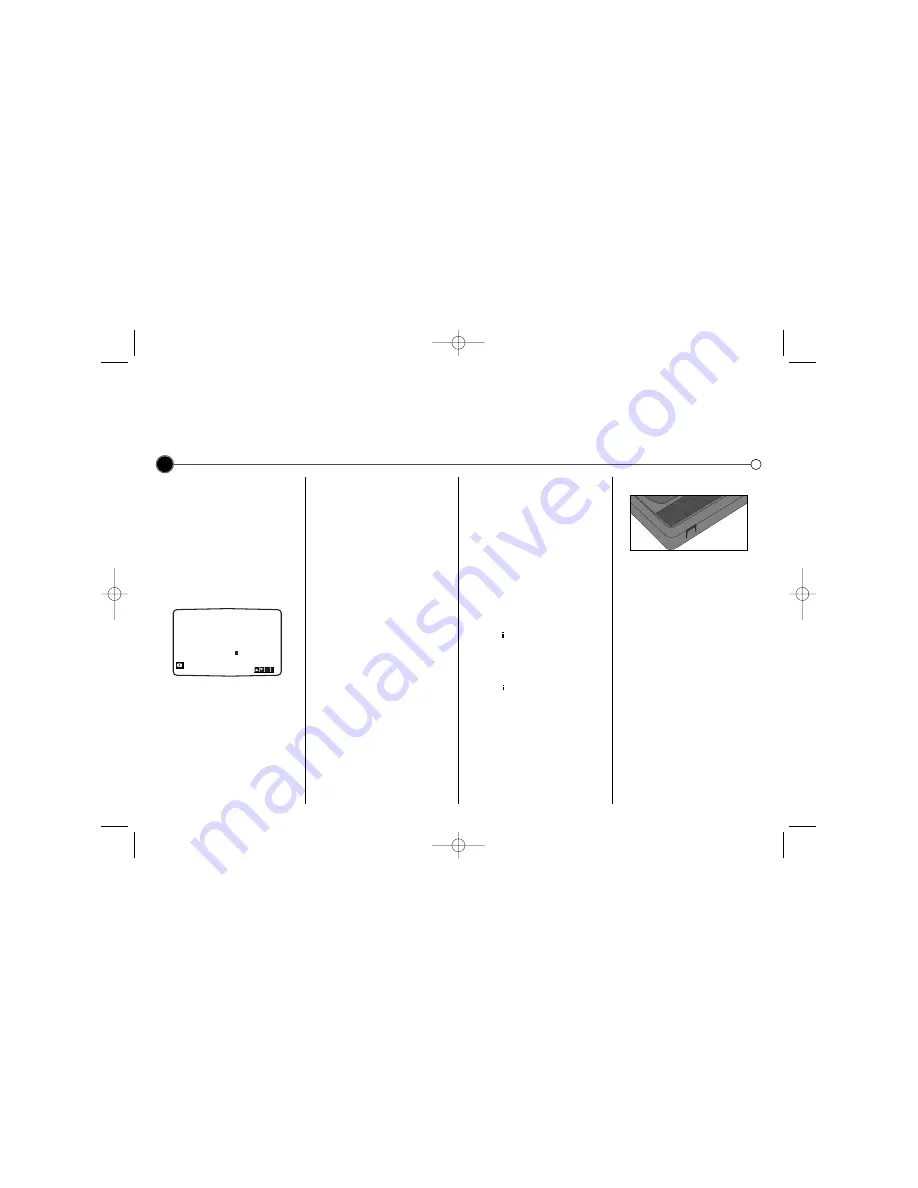
Protect your recordings

To stop a recording you have made
being recorded over, break off the 
protection tab on the rear of the video
tape. To record on a tape that has
had its protection strip removed,
cover the hole with adhesive tape.

Recording tape to tape

You will need a second Video
Recorder for tape to tape copying.
Connect using a SCART cable from
the back of your Video Recorder or
using the AV sockets on the front. 
Select audio/video mode on the
recording Video Recorder by 
pressing the 

AV

button on the

Remote Control. To monitor the
recording, connect the recording
Video Recorder to your TV using the
standard coaxial aerial cable. 

ONCE

OK

i

0~9,

VIDEO PLUS+ CODE NO.

 - - - - - - - -

 -

REC

GC985/967NP1 NA4ULL-ENG  3/17/04  9:00 AM  Page 10

(LV890 Only)

Summary of Contents for GC967NP1

Page 1: ...e read this user guide carefully Thank you FOR THE GUARANTEE TERMS CONDITIONS PLEASE REFER TO BACK COVER OF THIS MANUAL Model No GC985NP1 GC967NP1 Part No 3834RV0007R user guide Video Recorder Model LV880 LV890 PAL GC985 967NP1 NA4ULL ENG 3 17 04 9 00 AM Page 1 ...

Page 2: ...ired by anyone except qualified service personnel Never remove the top cover of your Video Recorder as this can expose you to very high voltage and other hazards Ensure that your Video Recorder is placed in a position to allow a free flow of air The apparatus shall not be exposed to dripping or splashing and that no objects filled with liquids such as vases shall be placed on the apparatus This pr...

Page 3: ... to connect to them using an Audio Visual cable Simulcast Recording With SC mode by pressing AV Hi Fi sound only recording using the Audio IN L R sockets on the front of your Video Recorder This feature enables you to simulcast sound transmitted by an audio source and the picture transmitted by the TV station Video IN Audio IN TV control buttons Controlling your TV with the supplied remote control...

Page 4: ...ideo picture will be shown on the AV channel of your television If you are using a Coaxial cable you need to select a TV channel on your Television and tune it to the Video Recorder signal a bright blue screen Please consult your Television User Guide for information on how to do this If you have trouble attaining a good picture it may be that the output frequency of the Video Recorder UHF 22 is a...

Page 5: ...rogram will move to the new position 6 Press to leave the main menu To move other programs repeat the above process Deleting the television stations 1 Press to access the main menu 2 Use 1 or 2 to select PR SET then press OK 3 Press then use 3 or 4 to select the program number you wish to delete 4 Press 1 after a short while the selected station will be deleted The remaining stations are re sorted...

Page 6: ... press 10 Press again to remove the menu 11 The new station has now been red into your Video Recorder If you wish to manually tune other channels you should repeat the above procedure To move the manually tuned channel to it s correct position see Changing the order of the television stations on page 5 If it is necessary for you to tune all the television stations manually you may find it easier i...

Page 7: ... the section you are passing Press and hold for a few seconds either REW 5 or FF 6 Releasing the REW 5 button or FF 6 button will return the Video Recorder to normal rewind or fast forward operation Slow Motion Playback Using the 1 or 2 buttons it is possible to adjust playback speed during playing back or still picture Below is a list of what speeds are accessible and how to reach them 1 once slo...

Page 8: ... selected programme will be displayed on screen You can also select the programme number using the Remote Control number buttons 3 Press 0 REC ITR to begin recording On the first press RECORD SP will appear on the television screen The Video Recorder will start recording It will continue recording until the end of the tape is reached or it is manually stopped To set the length of time which you wa...

Page 9: ...do not transmit PDC switch PDC off 8 Press 2 to select the recording speed Use the 3 or 4 to move among Standard Play Intelligent Play and Long Play IP Intelligent Play determines how much tape is left and switches speed from SP to LP if necessary to complete recording the programme IP mode is not appli cable when PDC is on 9 Check that the timer event details are correct if they are press to save...

Page 10: ...d from This will only happen once for each channel once done it will be stored in the Video Recorder s memory If you wish to record from the scart socket or RCA socket on the front press AV 6 Use the 2 button to move to the PDC section Use 3 or 4 to switch PDC off or on If you are recording from a television station which does not broadcast PDC this option should be turned off Use the 2 button to ...

Page 11: ... for the Middle East During play your Video Recorder should select the Colour System automatically however if you experience problems you may need to do it manually 1 Press to enter the main menu 2 Use 1 or 2 to select SYSTEM then press OK 3 Use 3 or 4 to select the colour system used in your recording 4 Press to exit the menus Setting the clock The Video Recorder uses a 24 hour clock so that for ...

Page 12: ...evision programme this feature will not work Press on the Control Panel All indicators in the Display Panel will be off To turn off Energy Save Press the POWER button or on the Remote Control or the Control Panel Resetting the digital tape counter The tape counter displays the play or recording time elapsed in hours minutes and seconds Press CLEAR to reset the counter to 0 00 00 When you press STO...

Page 13: ... ez REPEAT button The Video Recorder will automatically rewind for as long as the ez REPEAT button is held 2 Release the button when you want the replay to begin 3 The Video Recorder will then play the selected section twice 4 To resume normal play from any position press the ez REPEAT button during the first repeat Video Doctor The Video Doctor will show the status of aspects of the Video Recorde...

Page 14: ...sette to see if the safety tab used to prevent recording has been removed Check that the signal being received by the television is of reasonable quality A video tape cannot be inserted Check that there is not a cassette in the Video Recorder already Is the video cassette the right way round The windows should be at the top and the arrow should be pointing toward the Video Recorder The Remote Cont...

Page 15: ... not suitable or any other type of plug used then this appliance must be protected by a 5 Amp fuse Should you need to change the plug the wires in the mains lead are coloured in accordance with the following codes BLUE Neutral BROWN Live GREEN YELLOW No connection to be made If the colours of the wires in the mains lead of this appliance do not correspond with the coloured markings identifying the...

Page 16: ...ncy response Normal 100 Hz 10 kHz 6 3 dBm Hi Fi 20 Hz 20 kHz 3 3 dBm Signal to noise ratio Hi Fi More than 70 dB JIS A filter Dynamic range Hi Fi More than 85 dB JIS A filter You can control the sound level input source and power switch of your LG TV with the supplied remote control By pressing You can TV POWER Turn the TV on or off TV PR Scans up or down through memorized channels TV VOL Adjust t...

Page 17: ...d defaced misused or altered C Any claims made under the guarantee must be directed to the dealer from whom the equipment was originally purchased The dealer may before carrying out service under guarantee require a retailer s receipt as evidence of the date of purchase D Your retailer is not obligated to replace batteries when they run out E Aerial alignment and consumer control adjustments are n...

Reviews: