LG FBS162V Owner'S Manual Download Page 18

18

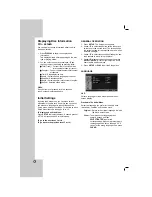
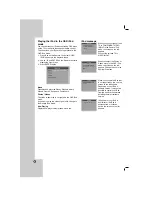
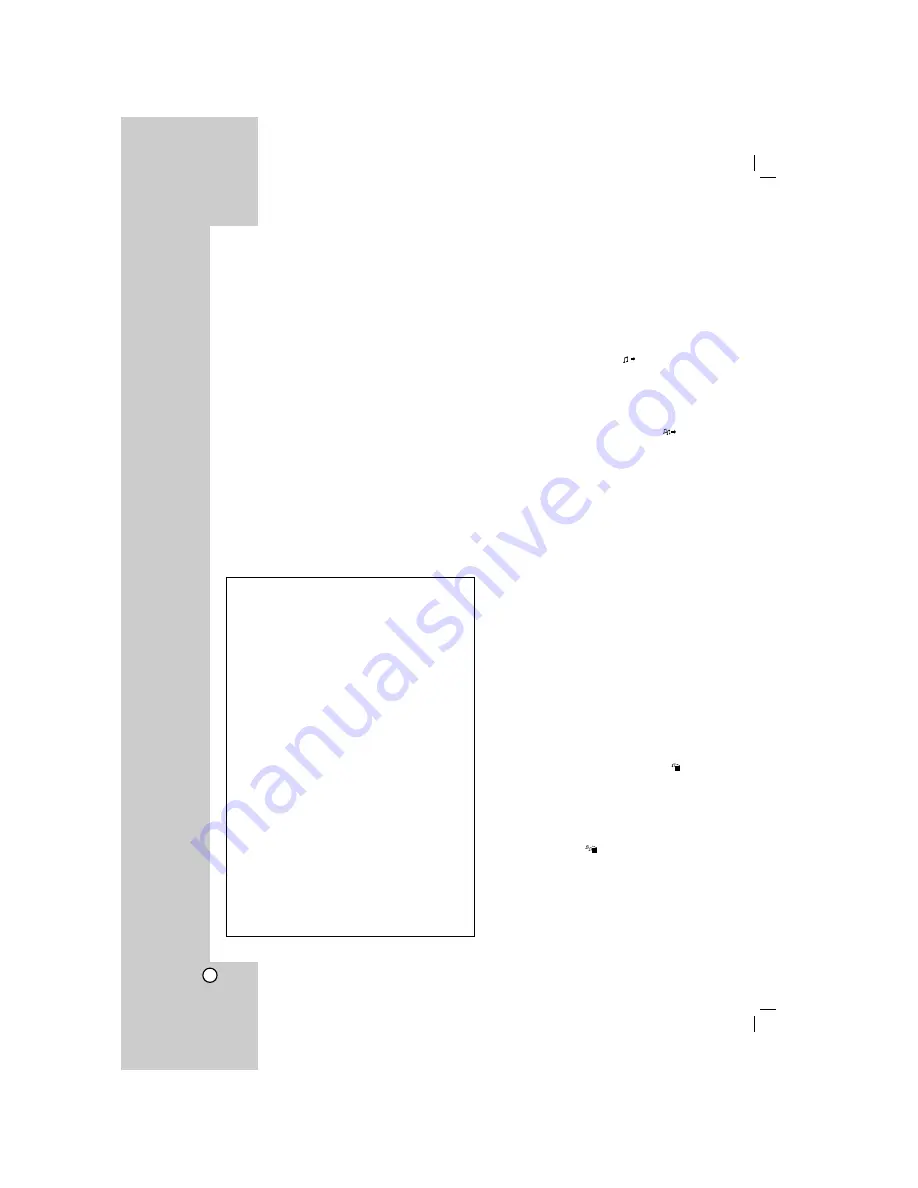
Playing an Audio CD or MP3/WMA
file

This unit can play Audio CDs or MP3/WMA files.

MP3/ WMA/ Audio CD

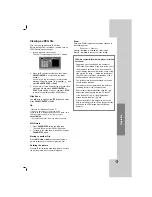
Once you insert  a cd with MP3/WMA files or Audio, a
menu appears on the TV screen.
Press 

v

V

to select a track/file and then press 

PLAY

or 

SELECT/ENTER

, and playback starts. You can use

variable playback functions. Refer to the page 16, 17.

ID3 TAG

When playing a file containing information such as
track titles, you can see the information by pressing
DISPLAY repeatedly. The information [ Folder and file
name, Song, Artist, Album, Genre, Comment, Time
information ] of the MP3/WMA file will be shown in the
display window and TV screen.

To move next or previous files, press the SKIP (

.

/

>

) button.

Tip:

• Press 

MENU

to move to the next page.

• On a CD with MP3/WMA and JPEG, you can switch

MP3/WMA and JPEG. Press 

TITLE

, and MUSIC or

PHOTO top of the menu is highlighted.
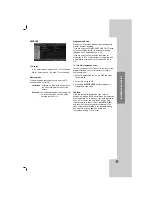
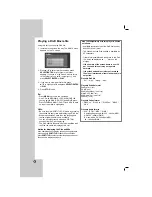
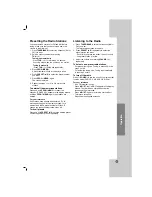
Programmed Playback 

The program function enables you to store your
favorite tracks from any disc in the unit memory. A
program can contain 300 tracks.

1. Insert a disc.

Audio CD and MP3/WMA discs: 

2. Select a track on the “List”, and then press

PROG.MEMO.

or select “

(Add)” icon and then

press 

SELECT/ENTER

to place the selected track

on the “Program” list. Repeat to place additional
tracks on the list.

Note:

You can add all tracks in the disc. Select “

(Add All)” icon

then press 

SELECT/ENTER

.

3. Select the track you want to start playing on the

“Program” list. Press 

MENU

to move to the next

page.

4. Press 

PLAY

or 

SELECT/ENTER

to start. Playback

begins in the order in which you programmed the
tracks. Playback stops after all of the tracks on the
“Program” list have played once.

5. To resume normal playback from programmed

playback, select a track of AUDIO CD (or
MP3/WMA) list and then press 

PLAY

.

Repeat Programmed Tracks 

1. Press 

REPEAT

when playing a disc. The repeat

icon appears.

2. Press 

REPEAT

to select a desired repeat mode.

• TRACK: repeats the current track
• ALL: repeats all the tracks on programmed list.
• Off(No display): does not play repeatedly.

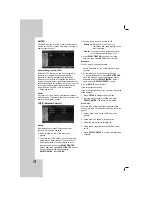
Erasing a Track from “Program” List 

1. Use 

v V

to select the track that you wish to erase

from the Program list.

2. Press 

CLEAR

. Alternatively, select “

(Delete)”

icon then press 

SELECT/ENTER

to place the

selected track on the Program list. Repeat to
erase additional tracks on the list.

Erasing the Complete Program List 

Use 

v

/

V

to select “

(Del all)” and then press

SELECT/ENTER

.

Note:

The programs are also cleared when the disc is removed.

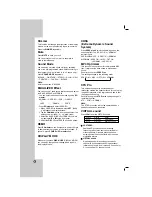
MP3 / WMA disc compatibility with this player is
limited as follows:

• Sampling frequency: within 32 - 48 kHz (MP3), 

within 24 - 48kHz (WMA)

• Bit rate: within 32 - 320kbps (MP3), 40 - 192kbps (WMA)
• The unit cannot read an MP3/WMA file that has a file

extension other than “.mp3” / “.wma”.

• CD-R physical format should be ISO 9660
• If you record MP3 / WMA files using software that

cannot create a file system (eg. Direct-CD) it is
impossible to playback MP3 / WMA files.We recommend
that you use Easy-CD Creator, which creates an ISO
9660 file system.

• File names should have a maximum of 8 letters and

must incorporate an .mp3 or .wma extension. 

• They should not contain special letters such as  / ? * : “

< > l etc.

• The total number of files on the disc should be less than

999.

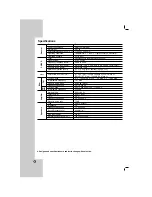
This unit requires discs and recordings to meet certain
technical standards in order to achieve optimal playback
quality. Pre-recorded DVDs are automatically set to these
standards. There are many different types of recordable
disc formats (including CD-R containing MP3 or WMA files)
and these require certain pre-existing conditions (see
above) to ensure compatible playback.

Customers should note that permission is required in
order to download MP3 / WMA files and music from the
Internet. Our company has no right to grant such
permission. Permission should always be sought from
the copyright owner.

Summary of Contents for FBS162V

Page 1: ... LFD750 FBS162V Before connecting operating or adjusting this product please read this instruction booklet carefully and completely FB162_A0U_JA1ULL5 Copyright 2007 LG Electronics U S A Inc For service support Call Toll Free Number 1 800 243 0000 ...

Page 2: ...rmful interference in a residential installation This equipment generates uses and can radiate radio frequency energy and if not installed and used in accordance with the instructions may cause harmful interference to radio communications However there is no guarantee that interference will not occur in a particular installation If this equipment does cause harmful interference to radio or televis...

Page 3: ...as two blades and a third grounding prong The wide blade or the third prong are provided for your safety If the provided plug does not fit into your outlet consult an electrician for replacement of the obsolete outlet 10 Protect the power cord from being walked on or pinched particularly at plugs convenience receptacles and the point where they exit from the apparatus 11 Only use attachments acces...

Page 4: ...inally packed at the factory Keeping the exterior surfaces clean Do not use volatile liquids such as insecticide spray near the unit Do not leave rubber or plastic products in contact with the unit for a long period of time since they leave marks on the surface Cleaning the unit To clean the player use a soft dry cloth If the surfaces are extremely dirty use a soft cloth lightly moistened with a m...

Page 5: ...e Discs DVD 8 cm 12 cm disc Audio CD 8 cm 12 cm disc In addition this unit can play a DVD R RW and CD R or CD RW that contains audio titles MP3 WMA JPEG or DivX files Note Depending on the conditions of the recording equipment or the CD R RW or DVD R RW disc itself some CD R RW or DVD R RW discs may not be played on the unit Do not attach any seal or label to either side the labeled side or the re...

Page 6: ... MIC1 MIC2 MIC Jacks 14 USB connector 15 Z OPEN CLOSE 16 SKIP TUN TUNER 17 XDSS plus MP3 Optimizer 18 B B PLAY PAUSE 19 Display window 20 Power cord 21 Antenna terminal 22 AUX IN Auxiliary input connector 23 COMPONENT VIDEO OUT PROGRESSIVE SCAN connector Y Pb Pr 24 VIDEO OUT Jack 25 iPod connector 26 Speaker terminal VOLUME Adjustment Move your finger around the touch wheel MIC1 MIC2 3 7 6 8 1 2 1...

Page 7: ...EARCH buttons 16 VOLUME buttons 17 TITLE button Use the TITLE button to display the title screen included on DVD video discs 18 DISPLAY button 19 SOUND MODE button AUDIO button SUBTITLE button RETURN button optional 20 SLEEP button 21 iPod button 22 MUTE button iPod 1 6 5 4 3 2 8 9 18 20 17 16 19 7 10 12 15 11 22 14 13 Remote Control Operation Range Point the Remote Control at the Remote Sensor an...

Page 8: ...opy protection system Video connection Connect the VIDEO OUT jack from the unit to the VIDEO IN jack on the TV using the video cable supplied V Component Video connection Connect the COMPONENT VIDEO OUT jacks from the unit to the corresponding jacks on the TV using a Y Pb Pr cable C Antenna Aerial Connections Connect the supplied FM AM antennas for listening to the radio Note To prevent noise pick...

Page 9: ...Microphone You can sing to a music source by connecting a microphone to the unit 1 Connect your microphone to the MIC1 MIC 2 Jacks will be shown in the display window 2 Play a music you want 3 Sing along with the accompaniment Adjust the microphone volume by pressing MIC VOL button MIN 1 14 MAX steps Note When not using the microphone set the MIC VOL to minimum or turn off the MICs and remove the ...

Page 10: ... CD Playback section Refer to the page 16 17 and 18 Note Do not extract the USB device in operating A back up demands to prevent a data damage If you use a USB extension cable or USB hub the USB device might not be recognized A device using NTFS file system is not supported Only FAT 16 32 file system is supported The USB function of this unit does not support all USB devices Digital camera and mob...

Page 11: ...o switch on by tapping on the front panel 6 Press SET 7 Set the minute to switch on by tapping on the front panel 8 Press SET OFF TIME indicator appears for about 0 5 seconds in the display window and then disappears 9 Set the hour to switch off by tapping on the front panel 10 Press SET 11 Set the minute to switch off by tapping on the front panel 12 Press SET 13 Adjust the volume level by tappin...

Page 12: ... display and exit the Menu Press SETUP to display the menu A second press of SETUP will take you back to initial screen To go to the next level Press B To go back to the previous level Press b GENERAL OPERATION 1 Press SETUP The Setup menu appears 2 Use v V to select the desired option then press B to move to the second level The screen shows the current setting for the selected item as well as al...

Page 13: ...Component Video jacks for connection to a TV or monitor that is compatible with a progressive scan signal set Progressive Scan to On To Turn ON progressive scan Connect component out of the unit to the input of your monitor television set your television or monitor to Component Input 1 Select Progressive Scan on the DISPLAY menu then press B 2 Select On using v V 3 Pressing SELECT ENTER will set t...

Page 14: ...If you make a mistake before pressing SELECT ENTER press CLEAR 3 Select a rating from 1 to 8 using v V Rating 1 8 Rating one 1 has the most restrictions and rating eight 8 is the least restrictive Unlock If you select unlock parental control is not active and the disc plays in full 4 Press SELECT ENTER to confirm your rating selection then press SETUP to exit the menu Password You can enter or cha...

Page 15: ...ess SELECT ENTER to exit Note All the downloaded videos from DivX VOD can only be played back on this unit Semi Karaoke When a chapter title track is fully finished this function shows the score in the screen with a fanfare sound on Turn the Semi Karaoke function on When you finished singing a score will appear on the screen off Turn the Semi Karaoke function off Fanfare and score do not appears o...

Page 16: ...During playback press REPEAT A B to select a point A and a point B and repeats a sequence from point A Starting point to point B End point Press REPEAT A B to exit ZOOM During playback or in the pause mode press ZOOM to the video image 3 steps You can move through the zoomed picture using b B v V TITLE If the current DVD title has a menu the title menu appears on the screen Otherwise the disc menu...

Page 17: ...ecall or clear 3 Press SELECT ENTER and playback starts from the marked scene Or press CLEAR and the marker number is erased from the list 4 You can play any marker by inputting its number on the marker search menu Screen Saver The screen saver appears when you leave the unit in Stop mode for about five minutes Last Scene Memory This unit memorizes the last scene from the last disc that is viewed ...

Page 18: ...PEAT when playing a disc The repeat icon appears 2 Press REPEAT to select a desired repeat mode TRACK repeats the current track ALL repeats all the tracks on programmed list Off No display does not play repeatedly Erasing a Track from Program List 1 Use v V to select the track that you wish to erase from the Program list 2 Press CLEAR Alternatively select Delete icon then press SELECT ENTER to pla...

Page 19: ... once during viewing a picture to advance to the next or previous file Rotating the picture Press v V b B during showing a picture to rotate the picture clockwise or counter clockwise Zoom Each time ZOOM is pressed the setting changes in the following order Zoom on y Zoom off Press v B or M to enlarge the video image Press V b or m to reduce the video image Preview List JPEG Folder 1 JPEG Folder 2...

Page 20: ...s unit Notice for displaying the Divx subtitle If the subtitle does not display properly during playback press and hold SUBTITLE for about 3 seconds then press SUBTITLE to select another language code until the subtitle is displayed properly List Movie Folder 1 Movie Folder 2 Movie Folder 3 Movie Folder 4 Movie Folder 5 Movie Folder 6 Movie Folder 7 Movie Folder 8 0 00 00 MOVIE 1 5 DivX file compa...

Page 21: ...until IPOD appears in the display window Note You can select the Remote iPod mode or OSD iPod mode by pressing repeatedly iPod on the remote control 2 Use v V and ENTER on the Remote Control or controls on your iPod to display the list of menu by viewing your iPod 3 Press ENTER to play Note When you connect the unit and TV to VIDEO IN OUT TV screen is turned off temporarily Connect the VIDEO OUT j...

Page 22: ...e iPod mode Now Playing Displays and plays the last played music file iPod message Remote iPod Please use Monitor output for viewing Video and photo from iPod When you connect the unit and TV to COMPONENT VIDEO IN OUT in the Remote iPod mode the screen on the left appears Connect the unit and TV to VIDEO IN OUT When you select the Photos or Videos menu in the OSD iPod mode the screen on the left a...

Page 23: ...in the display window for a moment and then a preset number will flash To change the preset number follow steps 4 5 To recall presets Press and hold PRESET v V until the desired preset number appears or press it repeatedly Listening to the Radio 1 Press TUNER BAND to select the frequency AM or FM you want The last received station is tuned in 2 Press PRESET v V repeatedly to select the preset stat...

Page 24: ...ver you press DISP MODE DISPLAY MODE you can enjoy the spectrum change with 6 types in the display window XDSS Extreme Dynamic Sound System Press XDSS plus to reinforce treble bass and the surround effect The XDSS ON or NORMAL indicator lights DVD DivX Audio CD XDSS ON NORMAL MP3 WMA XDSS ON t MP3 OPT ON t NORMAL t XDSS ON MP3 Optimizer This function is an optimizer for compressible MP3 files It i...

Page 25: ... 6669 Cambodian 7577 Catalan 6765 Chinese 9072 Corsican 6779 Croatian 7282 Czech 6783 Danish 6865 Dutch 7876 English 6978 Esperanto 6979 Estonian 6984 Faroese 7079 Language Code Fiji 7074 Finnish 7073 French 7082 Frisian 7089 Galician 7176 Georgian 7565 German 6869 Greek 6976 Greenlandic 7576 Guarani 7178 Gujarati 7185 Hausa 7265 Hebrew 7387 Hindi 7273 Hungarian 7285 Icelandic 7383 Indonesian 7378...

Page 26: ...g level is set The disc is dirty The speakers and components are connected poorly The unit is located too close to the TV Correction Plug the power cord securely into the wall outlet Insert a disc Check that the DVD or audio CD indicator in the DVD display is lit Select the appropriate video input mode on the TV so the picture from the unit appears on the TV screen Connect the video cable into the...

Page 27: ... pointed at the Remote Sensor of the unit The Remote Control is too far from the unit There is an obstacle in the path of the Remote Control and the unit The batteries in the Remote Control are flat Nothing is displayed on the front panel display Correction Connect the antenna securely Adjust the antennas and connect an external antenna if necessary Tune in the station manually Preset the stations...

Page 28: ... 20 kHz LPF Video output 1 0 V p p 75 Ω negative sync RCA jack x 1 COMPONENT VIDEO OUT Y 1 0 V p p 75 ohms negative sync RCA jack x 1 Pb Pr 0 7 V p p 75 ohms RCA jack x 1 Tuning Range 87 5 108 0 MHz or 65 0 74 0 MHz 87 5 108 0 MHz Intermediate Frequency 10 7 MHz Signal to Noise Ratio 60 55 dB Mono Frequency Response 50 10 000 Hz Tuning Range 522 1 620 kHz or 520 1 720 kHz Intermediate Frequency 45...

Page 29: ...ives you specific legal rights and you may also have other rights that may vary from state to state THIS LIMITED WARRANTY DOES NOT APPLY TO Damages or operating problems that result from shipping installation adjustment of user controls calibration maintenance or failure to maintain or separate system components and Damages or operating problems that result from normal wear and tear misuse abuse o...

Reviews: