background image

71

01

02

03

04

05

06

07

08

Get cr

eativ

e

3

   To undo an effect simply touch 

Undo

.

TIP! 

You can add more 

than one eff ect to a photo, 
except for a colour eff ect.

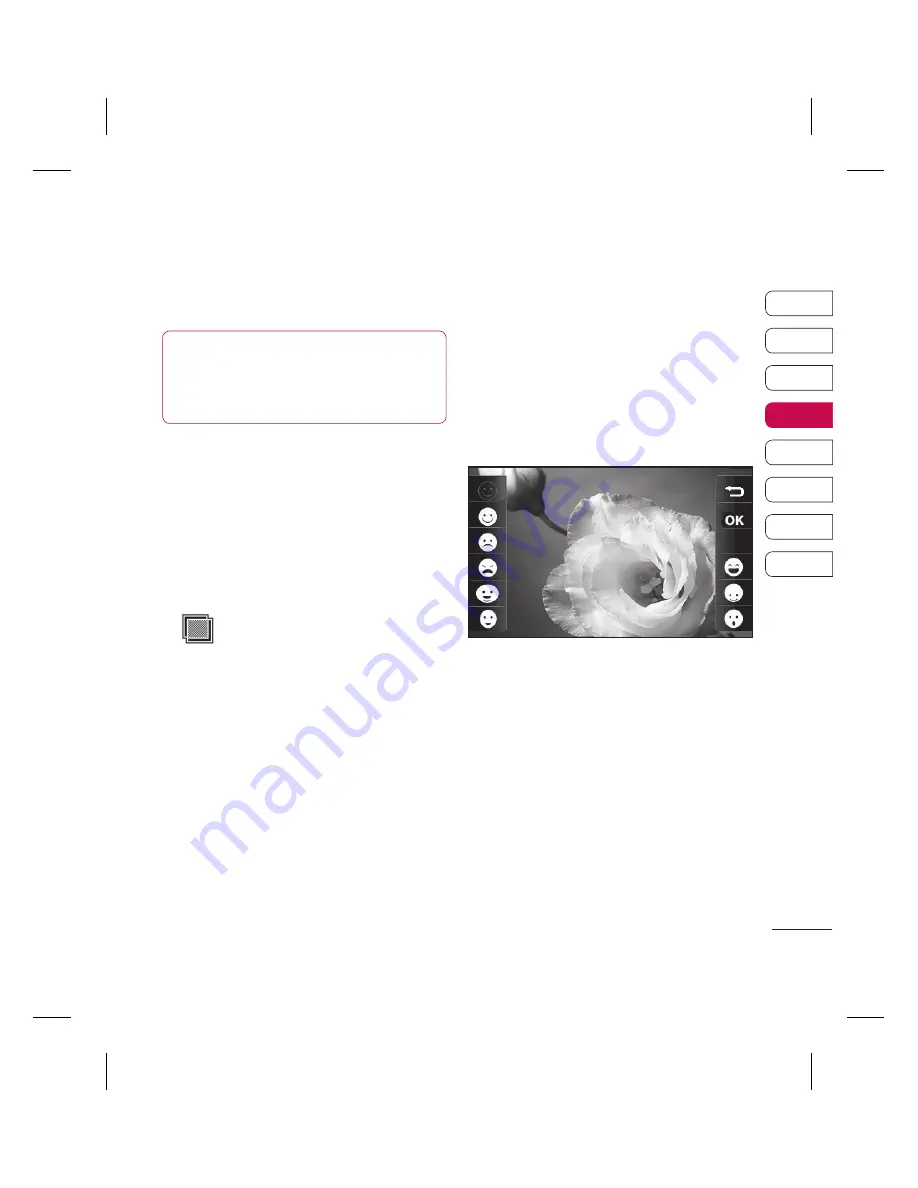
Morphing a photo

Morphing a photo is great for 
changing the facial expressions of 
friends, or just for distorting a photo 
for artistic effect.

1

   From the editing screen touch

.

2

   Choose 

Morphing

 and four 

crosses will appear on the photo.

3

   Move the crosses around the 

photo so they are on the part 
you’d like to morph. For example, 
if you are morphing a face, place 
a cross on the outside corner of 
each eye and one each side of 
the lips.

4

   Select a face to represent how 

you’d like to morph the photo.

5

   Select 

OK

 to save the changes.

Summary of Contents for CNETKP500REDULK - Cookie KP500 Cell Phone 48 MB

Page 1: ......

Page 2: ......

Page 3: ...KP500 KP500 User Guide Some of the contents in this manual may differ from your phone depending on the software of the phone or your service provider ...

Page 4: ...ive 2002 96 EC 2 All electrical and electronic products should be disposed of separately from the municipal waste stream via designated collection facilities appointed by the government or the local authorities 3 The correct disposal of your old appliance will help prevent potential negative consequences for the environment and human health 4 For more detailed information about disposal of your ol...

Page 5: ...Set up Your standby screen The basics Get creative Get organised The web Settings Accessories 01 02 03 04 05 06 07 08 ...

Page 6: ...mmon call setting 28 Contacts 30 Searching for a contact 30 Adding a new contact 30 Contact options 31 Creating a group 32 Changing your contact settings 33 Viewing information 34 Messaging 35 Messaging 35 Sending a message 35 Entering text 36 T9 predictive 36 Abc manual 37 Keyboard 37 Handwriting recognition 38 Setting up your email 40 Retrieving your email 43 Sending an email using your new acco...

Page 7: ...video 65 Capturing an image from a video 66 Viewing your photos as a slide show 66 Setting a photo as wallpaper 67 Editing your photos 68 Adding text to a photo 69 Adding an effect to a photo 70 Morphing a photo 71 Adding a colour accent to a photo 72 Swapping the colours in a photo 72 Trimming the length of your video 73 Merging two videos together 73 Merging a photo with a video 74 Adding text to...

Page 8: ...rganiser 94 Adding an event to your calendar 94 Changing your default calendar view 95 Adding an item to your to do list 95 Sharing a to do item 96 Adding a memo 96 Using date finder 97 Setting your alarm 97 Adding a memo with drawing panel 98 Voice recorder 98 Recording a sound or voice 99 Sending the voice recording 99 Using your calculator 100 Converting a unit 100 Using the stopwatch 101 Adding...

Page 9: ... as a modem 109 Settings Personalising your profiles 111 Changing your screen settings 111 Changing your phone settings 112 Changing your connectivity settings 113 Using memory manager 115 Sending and receiving your files using Bluetooth 116 Pairing with another Bluetooth device 117 Using a Bluetooth headset 118 Accessories 119 Network service 120 Technical data 120 Guidelines Guidelines for safe an...

Page 10: ...rs incoming calls Multitasking key End Power key Ends or rejects a call Turns the phone on off Press once to return to the standby screen WARNING Placing a heavy object on the phone or sitting on it while it is in your pocket can damage the phone s LCD and touch screen functionality Set up ...

Page 11: ...B cable wait until the phone has powered up and has registered to the network Side keys When the screen is idle volume of key tone During a call volume of the earpiece When playing a BGM track Short press controls the volume Micro SD memory card socket Lock Unlock key Capture button Stylus ...

Page 12: ...10 LG KP500 User Guide Set up Open view Battery cover Battery USIM Card Socket Camera lens ...

Page 13: ...battery cover towards the bottom of the phone and away from it 2 Remove the battery Using the cut out at the bottom lift it from the battery compartment WARNING Do not use your fingernail when removing the battery WARNING Do not remove the battery when the phone is switched on as this may damage the phone ...

Page 14: ... gold contact area on the card is facing downwards To remove the USIM card pull it gently in the opposite direction 4 Install the battery Insert the top of the battery first into the top edge of the battery compartment Ensure that the battery contacts align with the terminals on the phone Press down the bottom of the battery until it clicks into place ...

Page 15: ...t up 5 Charging your phone Lift and twist the charger socket cover of the on the side of your KP500 Insert the charger and plug it into a mains electricity socket Your KP500 needs to be charged until Battery full appears on screen ...

Page 16: ...d contact area is facing downwards 3 Replace the cover Formatting the memory card Your memory card may already be formatted If your card isn t formatted you will need to format it before you can begin using it 1 From the standby screen select then touch and choose Phone settings 2 Touch Memory manager then chose External memory 3 Touch Format and then confirm your choice 4 Enter the password if on...

Page 17: ...d in the correct folder for example videos will be stored in the My Videos folder Transferring your contacts To transfer your contacts from your USIM to your phone 1 From the Communicate tab select and choose Settings 2 Touch Copy 3 Choose Handset to SIM 4 Choose all or choose names one by one and touch Copy ...

Page 18: ...ttings Communicate Dialling Speed dials Contacts Call history New message New Email Messaging Entertainment Gallery My stuff Camera Video camera Muvee studio Music FM radio Games Apps Utilities Browser Organizer Alarms Voice recorder Drawing Panel Tools Sim Tool Kit Settings Profiles Screen settings Phone settings Call settings Touch settings Bluetooth Connectivity ...

Page 19: ... list will move up so more items are visible There s no need to press too hard the touchscreen is sensitive enough to pick up on a light yet firm touch Use the tip of your finger to touch the option you want Be careful not to touch any other options around it When the screen back light is off press the Unlock Lock key on the right hand side to bring back the home screen Don t cover the phone with ...

Page 20: ...18 LG KP500 User Guide Your standby screen Your standby screen Widget idle Quick keys Speed dial idle Mobile widget Speed dial list ...

Page 21: ...h to open your address book To search for the number you want to call enter the name of the contact at the top of the screen using the touchpad You can also create new contacts and edit existing ones See page 30 for details Touch to access the Messaging options menu From here you can create a new SMS or MMS or view your message folder See page 35 for details Touch to open the full Top menu which i...

Page 22: ... you re most likely to see in the status bar Icon Description Multitasking Network signal strength number of bars will vary No network signal Remaining battery life Battery empty New text message New voice message Message inbox is full Icon Description Message sending failed An alarm is set Customised Profile in use Normal profile in use Outdoor profile in use Silent profile in use Headset profile...

Page 23: ...ay pause MP3 and activate deactivate Bluetooth Using the Multitasking function Press the multitasking hard key to open the Multitasking menu From here you can view all the applications you have running and access them with one touch From any application press the Multitasking key and select Home to return to the standby screen without exiting or closing the application When you have an application...

Page 24: ...press the hard key TIP To enter for making an international call press and hold TIP Press the lock unlock hard key to lock the touchscreen to prevent calls being made by mistake TIP To bring up the keypad during a call press the TIP Touch to unlock You can unlock by touching the button for a while until the screen is able to work or press the Unlock hard key TIP You can send a message and search c...

Page 25: ... call 3 From the filtered list touch the contact you d like to call and select the number to use if you have more than one saved 4 Touch Answering and rejecting a call When your phone rings press the hard key or touch to answer the call Tap to mute the ringing This is great if you ve forgotten to change your profile to Silent for a meeting Press the hard or touch to reject an incoming call ...

Page 26: ...one so the person you are talking to cannot hear you Options Choose from a list of further in call options including Go to messages so you can check your messages Go to contacts to add or search contacts during a call You can also end the call from here by touching End call Choose to search your contacts during a call Choose to add another person to the call Chose to open a numerical keypad for na...

Page 27: ... you d like to assign to that number by touching their phone number once To find a contact tap the search field box and enter the first letter of the name of the contact required Making a second call 1 During your initial call touch and select the number you want to call 2 Dial the number or search your contacts see Making a call on page 22 for details 3 Press to connect the call 4 Both calls will...

Page 28: ... turn it off during a call to make a note of a number for example touch and select DTMF off Viewing your call logs TIP To scroll through a list of options touch the last item visible and slide your finger up the screen The list will move up so more items are visible Touch and select and tap Choose to view All View a complete list of all your dialled received and missed calls Dialled View a list of ...

Page 29: ...re is no answer or when you are not reachable 4 Input the number you d like to divert to 5 Touch Request to activate NOTE Charges are incurred for diverting calls Please contact your network provider for details TIP To turn off all call diverts choose Deactivate all from the Call divert menu Using call barring 1 Touch select and choose 2 Touch Call barring 3 Choose any or all of the six options All...

Page 30: ...choose 2 Touch Common settings From here you can amend the settings for Call reject Slide the switch to On to highlight the Reject list You can touch the text box to choose from all calls specific contacts or groups or those from unregistered numbers those not in your contacts Touch Save to change the setting Send my number Choose whether your number will be displayed when you call someone Auto re...

Page 31: ... call using a Bluetooth headset or select Handset to press a key on the handset to answer a call Save new number Select Yes to save a new number TIP To scroll through a list of options touch the last item visible and slide your finger up the screen The list will move up so more items are visible ...

Page 32: ...tacts typing in the first letter of a contact s name will jump the menu to that alphabetical area of the list TIP The alphabetical keypad is displayed once you tap the blank square TIP To scroll through your list of contacts touch the last item visible and slide your finger up the screen The list will move up so more items are visible Adding a new contact 1 From the standby screen touch and touch A...

Page 33: ...s and a Memo 8 Touch Save to save the contact TIP You can create customised groups for your contacts see Creating a group on page 32 Contact options There are many things you can do when viewing a contact Here s how to access and use the options menu 1 Open the contact you d like to use See Searching for a contact on page 30 2 You can call or send a message directly from here 3 Press to open the l...

Page 34: ...S MMS See page 35 for details on how to send messages Creating a group 1 Touch and select 2 Touch then Groups 3 Touch 4 Select Add group 5 Enter a name for your new group You can also assign a ringtone to the group 6 Touch Save NOTE If you delete a group the contacts which were assigned to that group will not be lost They will remain in your address book TIP You can edit an existing group by highl...

Page 35: ...ng settings Contact list settings Choose whether to view contacts saved to both your Handset USIM Handset only or USIM only You can also choose to show the first name or last name of a contact first Copy Copy your contacts from your USIM to your handset or from your handset to your USIM Choose to do this one at a time or all at once If you select one at a time you ll need to select each contact to...

Page 36: ...contacts Delete all your contacts Touch Yes if you are sure you want to wipe your address book Viewing information 1 From the standby screen touch and select 2 Touch and select Information 3 From here you can view your Service dial numbers your Own number your Memory info how much memory space you ve got left and My business card TIP If you ve yet to add a business card for yourself select My busi...

Page 37: ...standby screen them select and See page 40 for details 3 Touch Insert to add an image video sound or template 5 Touch T 1 at the top of the screen to enter the recipient s number or touch the search icon to open your address book You can add multiple contacts Touch Send when ready WARNING You will be charged per per 1 page text message for each person that you send the message to WARNING If an ima...

Page 38: ...n choose writing languages Tap to change numbers symbols and text keypad Use to scroll through the different keyboard types in each text entry mode for example capitals or lowercase T9 predictive In T9 mode you will see T9 mode uses a built in dictionary to recognise words you re writing based on the key sequences you touch Simply touch the number key associated with the letter you want to enter a...

Page 39: ... In Keyboard mode the screen flips to landscape and a full keyboard appears on screen Simply touch each letter to write your message and press to switch to upper case TIP Keyboard mode predicts and shows what you will type in next These words are predicted based on the sentences you have typed in so far If you do not wish to use the suggested words keep typing in new words If you wish to use the s...

Page 40: ...reen from damage Handwriting recognition translates stylus gestures into letters numbers or other character and displays these characters as text Handwriting recognition is only active where text can be entered Note Most letters can be written using different stroke styles See the tables below The position on the screen decides case not the style Alphabet If you select capital letter mode ABC lett...

Page 41: ...05 06 07 08 The basics Letter Strokes Q R S T U V W X Y Z ß Punctuation marks Mark Strokes Full stop At Note Start each stroke at the dot Numbers Numbers are written above the arrow Number Strokes 0 1 2 3 4 5 6 7 8 9 ...

Page 42: ...Setting up your email You can stay in touch on the move using email on your KP500 It s quick and simple to set up a POP3 or IMAP4 email account TIP To scroll through a list of options touch the last item visible and slide your finger up the screen The list will move up so more items are visible 1 Touch then tap 2 Select then scroll menu to Settings 3 Touch Email then Email accounts 4 Touch Add Acco...

Page 43: ...e same server as for incoming mail SMTP authentication Turn on SMTP authentication if the outgoing server requires user name and password to send email Account name Enter the mailbox name that you wish to appear as the account name for the Mailbox Now your account is set up it will appear in the list of accounts in your Email folder 6 You can check and edit settings by selecting the account in the...

Page 44: ...tings Choose whether to use the advanced settings SMTP port number Normally this will be 25 SMTPTLS SSL Choose whether to use SSL for outgoing server Incoming server port Normally this is 110 for POP3 accounts and 143 for IMAP4 accounts IncomingTLS SSL Choose whether to use SSL for incoming server SMTP Username Enter the SMTP username SMTP Password Enter the SMTP password APOP secure login Choose ...

Page 45: ...use then 4 Choose Retrieve and your KP500 will connect to your email account and retrieve your new messages Sending an email using your new account 1 Touch New Email in the Communicate menu and a new email will open 2 You can enter the recipient s address and write your message You can also attach images videos sounds or other file types 3 Touch Send and your email will be sent TIP You can uploadW...

Page 46: ...allow the sending of read confirmation messages Request reply Email Choose whether to request read confirmation messages Retrieve interval Choose how often your KP500 checks for new email messages Retrieve amount Choose the number of emails to be retrieved at any one time Include message in Fwd Reply Choose to include the original message in your reply Include attachment Choose to include the orig...

Page 47: ...lanatory Inbox All the messsages you receive are placed into your inbox From here you can view delete and more see Managing your messages below for details Mailbox All the emails you receive on your KP500 will be placed in your mailbox Drafts If you don t have time to finish writing a message you can save what you ve done so far here Outbox This is a temporary storage folder while messages are bei...

Page 48: ... 2 Select Inbox 3 Touch and then choose to Delete Delete marked messages Create new message Open a new blank message or email Move to My folders Move the marked messages to My folders Filter View your message by type This will group SMS separately from MMS Delete all Delete all of the messages If you see the message No space for USIM messages you should delete some messages on the USIM If you see ...

Page 49: ...e Text templates or Multimedia templates You can then touch to Add new Delete or Delete all templates 3 Touch Add template to create a new template 4 You can view the template by selecting it on the list and edit it by touching on the view screen Using emoticons Liven up your messages using emoticons You ll find some commonly used emoticons already on your phone 1 Touch then choose Emoticons on th...

Page 50: ... choose Settings on the Communicate menu Select Text message You can make changes to Text message centre Enter the details of your message centre Delivery report Slide the switch left to receive confirmation that your messages have been delivered Validity period Choose how long your messages are stored at the message centre Message types Convert your text into Text Voice Fax X 400 or Email Charact...

Page 51: ... Manual you will receive only notifications of MMS and you can then decide whether to download them in full Delivery report Choose to allow and or request a delivery report Read report Choose to allow and or request a reply report Priority Choose the priority level of your MMS Validity period Choose how long your message is stored at the message centre Slide duration Choose how long your slides ap...

Page 52: ...Touch to add a new Voicemail service Contact your network operator for more information on the service they provide Service message Choose to receive or block service messages You can also set your message security by creating trusted and untrusted lists of senders Info service Choose your reception status language and other settings ...

Page 53: ...hoto Your captured photo will appear on screen The name of the image runs along the bottom of the screen together with five icons down the right side Touch to move to your gallery Touch to send the photo as a message e mail or Bluetooth See page 35 for Sending a message and page 116 for Sending and receiving your files using Bluetooth Touch to edit the photo Touch to set the picture you have taken...

Page 54: ...is icon to open the settings menu See Using the advanced settings on page 61 for details Camera mode Camera mode is selected Video camera mode Touch this icon to switch to video mode Back Touch here to return to the standby screen Gallery Brightness See Adjusting the Exposure on page 61 Shot mode See Choosing a shot type on page 53 Take a picture Zoom Touch to zoom in or to zoom out ...

Page 55: ...ng a quick photo Burst shot This enables you to take 3 6 9 shots automatically in very quick succession Adjusting the exposure Exposure defines the difference between light and dark contrast in an image A low contrast image will appear foggy whereas a high contrast image will appear much sharper 1 Touch 2 Slide the contrast indicator along the bar left for a lower exposure hazier image or right fo...

Page 56: ... button as you would to take a normal photo 4 The camera will take 3 6 9 pictures in quick sequence Using the advanced settings From the viewfinder touch to open all the advanced settings options Preview settings Size Change the size of the photo to save on memory space or take a picture preset to the correct size for contact See Changing the image size on page 56 Colour Effect Choose a colour ton...

Page 57: ...e file size will increase This means you ll be able to store fewer photos in your memory View mode Choose from Full screen or Full image In Full screen some clipping of the image may occur Other settings Memory Choose whether to save your photos to the Handset memory or to the External memory Shutter sound Select one of the three shutter sounds Grid screen Choose from Off Simple cross or Trisectio...

Page 58: ... file size smaller 1 From the viewfinder touch in the top left corner 2 Select Size from the Preview menu 3 Select a pixel value from the five numerical options 3M 2048x1536 2M 1600x1200 1M 1280x960 640x480 400 240 W 320x240 or choose the preset Contacts This sets the camera to take a photo the perfect size to be added to a phone contact Choosing a colour effect 1 From the viewfinder touch in the ...

Page 59: ...n colour to black and white or sepia after it s taken but you cannot change a picture taken in black and white or sepia back to colour Viewing your saved photos 1 You can access your saved photo s from within the camera mode Simply touch and your gallery will appear on screen ...

Page 60: ...der will appear on screen 3 Holding the phone horizontally point the lens towards the subject of the video 4 Press the capture button once to start recording Or press the red dot at the bottom right of the screen 5 Rec will appear at the top of the viewfinder and a timer at the bottom showing the length of your video 6 To pause the video touch and resume by selecting 7 Touch on screen or press the...

Page 61: ...lay the video Touch to send the video as an Message or Email or by Bluetooth See page 35 for Sending messages or page 116 for Sending and receiving your files using Bluetooth Touch to edit the video Touch to view a gallery of saved videos Touch to delete the video you have just made and confirm by touching Yes The viewfinder will reappear Touch to shoot another video straight away Your current vid...

Page 62: ...en again Settings Touch this icon to open the settings menu See Using the advanced settings on page 61 for details Video mode Video mode is selected Image size Saving to handset memory external memory Back Touch here to return to the standby screen Gallery Brightness See Adjusting the exposure on page 61 Video size Recording stop Recording start Zoom Touch to zoom in or to zoom out Camera mode Tou...

Page 63: ...xposure indicator along the bar left for a lower exposure hazier image or right for a higher contrast sharper image Using the advanced settings From the viewfinder touch Settings to open all the advanced settings options Preview settings Video size Change the size of the video to save on memory space See Changing the video image size on page 63 Colour Effect Choose a colour tone to apply to the vi...

Page 64: ...ease as a result which means you ll be able to store fewer videos in the phone s memory Set time Set a duration limit for your video Choose from No limit or MMS to limit the size so that you can send the video as an MMS View mode Choose from Full screen or Full image In Full screen some clipping of the image may occur TIP If you choose MMS duration try choosing a lower image quality to enable you ...

Page 65: ...eo play back up to 12 fps are available for video recording 176x144 Small image size and therefore smaller file size Up to 15 fps are available for video play back 4 Select the size option you d like to use TIP For video format conversion software see the CD you received with your KP500 Choosing a colour tone 1 From the viewfinder touch in the top left corner 2 Select Colour Effect from the settin...

Page 66: ...ve Video camera Watching your saved videos 1 In the viewfinder touch 2 Your gallery will appear on screen 3 Touch the video you want to view once to bring it to the front of the gallery 4 Touch the video a second time to open it fully ...

Page 67: ...ck touch TIP Flick left or right to view other photos or videos TIP To delete a photo or video open it and select Touch Yes to confirm Using zoom when viewing a photo To zoom in press repeatedly To zoom out press Use the thumbnail in the bottom right corner to move the focus area Adjusting the volume when viewing a video To adjust the volume of the audio on a video whilst it is playing slide the ma...

Page 68: ...d image name 6 Touch the image then to return to the gallery 7 The image will be saved in your Media Album folder and appear in the gallery You need to exit the gallery and then re open it for this to appear WARNING Some functions will not work properly if the multimedia file has not been recorded on the phone Viewing your photos as a slide show Slideshow mode will show all the photos in your galle...

Page 69: ...k Touch to increase or decrease the speed of the slideshow Setting a photo as wallpaper 1 Touch the photo you would like to set as wallpaper twice to open it Turn the phone to landscape 2 Touch the right side of the screen to open the options menu 3 Touch 4 The screen will switch to portrait mode You can then change the size of the picture 5 When you are happy with the picture touch Set ...

Page 70: ...s the screen to select the area Draw something on your photo freehand Select the thickness of the line from the four options and the colour you would like use Put writing on the picture See Adding text to a photo on page 69 Decorate your photo with stamps Choose from the different stamps available and touch your photo wherever you d like them to be Erase line that you draw Save the changes you hav...

Page 71: ...ur Accent Add images etc See Adding an effect to a photo on page 70 Touch to return to the gallery Adding text to a photo 1 From the editing screen touch 2 Select Signature to add unframed text or choose one of the speech bubble shapes 3 Enter your text using the keypad and touch Save 4 Move the text by touching it and sliding it to the place you d like it to be ...

Page 72: ...r Apply a blurred effect Sharpen Move the marker along the bar to sharpen the focus of the photo Select OK icon to apply the changes or choose to cancel Mosaic blur Touch to apply a blurred mosaic effect to the photo Oil painting Oil painting effect Sketch Apply an effect to make the picture look like a sketch Emboss Emboss effect Solarize Change the effect of exposure to the light Vivid An effect...

Page 73: ...nds or just for distorting a photo for artistic effect 1 From the editing screen touch 2 Choose Morphing and four crosses will appear on the photo 3 Move the crosses around the photo so they are on the part you d like to morph For example if you are morphing a face place a cross on the outside corner of each eye and one each side of the lips 4 Select a face to represent how you d like to morph the...

Page 74: ... from the section marked for colour accenting 6 Alter the intensity of the accenting by sliding the marker up or down the intensity bar 7 Select Save to save the changes Swapping the colours in a photo 1 From the editing screen touch 2 Choose Colour swapping 3 Select part of the photo A traced line will appear around everything in that area which is of the same or similar colour For example someon...

Page 75: ...o the gallery and discard the changes Merging two videos together 1 Open the video you d like to edit select and touch the screen to bring up the options 2 Select and choose Video merge 3 The My stuff folder will open select either MyVideos or My memory card if fitted Choose the video you would like to merge and touch Select 4 Touch and slide the photo to merge it to the end or the beginning of th...

Page 76: ...t and choose Image merge 3 The My stuff folder will open select either My Images or My memory card if fitted Choose the photo you would like to merge into your video and touch Select 4 Touch and slide the photo to merge it to the end or the beginning of the video 5 Touch Effect to choose how the photo and video merge together None Fade out Pan zoom Oval Uncover Blind Checker board Dissolve Split o...

Page 77: ... text using the keypad and select Done 4 Touch and mark when you d like the text to appear using 5 Touch the area of the screen you d like the text to appear in 6 Touch to mark when you d like the text to disappear 7 Touch Preview to ensure you are happy with the text overlay 8 Touch Save followed by Yes Choose to save over the original file or as a new file 9 Repeat these steps to add more text ...

Page 78: ...rea of the screen you d like the photo to appear in If the photo is too big it will overlay the whole screen not just the area selected 6 Touch to mark when you d like the photo to disappear 7 Touch Preview to ensure you are happy with the photo overlay 8 Touch Save followed by Yes Choose to save over the original file or as a new file 9 Repeat these steps to add more photos Adding a voice recordi...

Page 79: ...dd more voice recordings to the video Adding a soundtrack to your video 1 Open the video you d like to edit select and touch the screen to bring up the options 2 Select and choose Audio dubbing 3 The My stuff folder will open select either My sounds or My memory card if fitted Choose the track you would like to add to your video and touch Select 4 The original audio of your video will be erased To...

Page 80: ...elect one of the four speed options x4 x2 x1 4 x1 2 4 Choose to save over the original file or as a new file Adding a dimming effect 1 Open the video you d like to edit select and touch the screen to bring up the options 2 Select and choose Dimming effect 3 Choose to save over the original file or as a new file 4 Your video will now fade in at the start and fade out at the end NOTE Only 3gp Video ...

Page 81: ... list of folders storing all of your multimedia files Pictures My images contains a list of pictures including default images pre loaded onto your phone images downloaded by you and images taken on your phone s camera Touch to change the view from thumbnail image to list My images option menus The options which are available to you in My images depend on what type of image you have selected All of...

Page 82: ...how List Grid view Grid view to List view or vice versa Folder info View the Name Size Date details of the folder and number of files and sub folders inside the folder Memory manager View the memory status Delete all Delete all of your images Sending a photo 1 Touch then 2 Touch then choose My images 3 Touch Send and choose from Message Email or Bluetooth 4 If you choose Message or Email your phot...

Page 83: ... Contacts image Allocate an image to a particular person in your contacts list so that their picture shows when they call you Start up image Set an image to appear when you switch the phone on Power off image Set an image to appear when you switch the phone off Printing an image 1 Touch then 2 Touch then My images 3 Select an image and touch 4 Touch Print then choose between Bluetooth and PictBrid...

Page 84: ...You can mark unmark the images by tapping it sequentially Mark the image that you want to move or copy and touch Copy Move Creating a slide show If you want to look at all of the images on your phone you can create a slide show to save you from having to open and close each individual image 1 Touch then 2 Touch then My images 3 Choose a start image for your slide show 4 Touch then Slide show Sound...

Page 85: ...ideos folder shows a list of downloaded videos and videos you have recorded on your phone Watching a video 1 Touch then 2 Touch then My videos 3 Select a video to play Using options while video is paused Touch while in pause mode and choose from Capture Capture the frozen frame as a picture Send Send the video in a message or via Bluetooth Delete Delete the video Edit Edit the video File info View...

Page 86: ...Merge the video with an image from your Images folder Text overlay Add text to the video Image overlay Add an image to the video Audio dubbing Choose to add sound from the Defaults folder or from your own Voice recordings Sending a video clip 1 Select a video and touch 2 Touch Send and choose from Message Email or Bluetooth 3 If you choose Message or Email your video clip will be attached to the m...

Page 87: ... Delete Delete a video Rename Rename a video Create new folder Create a new folder within the My videos folder Sort by Sort videos into order by Date Type or Name List Grid view Grid view to List view or vice versa Folder info View the Name Size Date details of the folder and number of files and sub folders inside the folder Memory manager View the memory status Delete all Delete all videos Games ...

Page 88: ...contain its own jar Playing a game 1 Touch then 2 Touch My games apps 3 Open the Games folder and choose and touch a game to launch Using the games options menu From the Games folder the following options are available when you touch Delete Delete a file Create new folder Create a folder within My games Apps Rename Rename a file Move Move a file from the phone memory to a memory card or vice versa...

Page 89: ...s probably the easiest way to transfer a file from your computer to your phone You can also use LG PC Suite via your sync cable see page 102 for details To transfer using Bluetooth 1 Make sure your phone and computer have Bluetooth switched on and are visible to one another 2 Use your computer to send the file via Bluetooth 3 When the file is sent you will have to accept it on your phone by touchi...

Page 90: ...er If this happens you can move them To move a file from Others to Documents 1 Touch then 2 Touch then Others 3 Select a file and touch 4 Touch Move choose the destination folder from the list by touching the arrow icon The screen wil display Moved when the transfer is complete Creating a movie 1 Touch then 2 Touch Muvee studio 3 Touch to add an image Checkbox images you want to include then selec...

Page 91: ...hen From here you can access a number of folders Recently played View all of the songs you have played recently All tracks Contains all of the songs you have on your phone Artists Browse through your music collection by artist Albums Browse through your music collection by album Genres Browse through your music collection by genre Playlists Contains any playlists you have created Shuffle tracks Pl...

Page 92: ...luetooth switched on and are visible to one another 2 Select the music file on the other device and choose to send it via Bluetooth 3 When the file is ready to be sent you should accept it on your phone by touching Yes 4 The file should appear in Music All tracks Playing a song 1 Touch then 2 Touch then All tracks 3 Select the song you want to play 4 Touch to pause the song 5 Touch to skip to the ...

Page 93: ...d Send the song as a message or via Bluetooth Use as Use the song as Ringtone Message tone Start up or Shut down Creating a playlist You can create your own playlists by choosing a selection of songs from the All tracks folder 1 Touch then 2 Touch then Playlists 3 Touch Add new playlist enter the playlist name and touch Save 4 The All tracks folder will show all the songs in your phone Touch all o...

Page 94: ...emove a song from the playlist Touch Yes to confirm Memory staus View the memory status Remove all Remove all tracks from the playlist Deleting a playlist 1 Touch then Entertainment 2 Touch Music then Playlists 3 Touch then Delete or Delete all to delete all of the playlists Using the radio Your LG KP500 has an FM radio feature so you can tune into your favourite stations to listen to on the move ...

Page 95: ...d allocated to a channel in your phone NOTE You can also manually tune into a station by using and displayed next to the radio frequency If you press and hold and the stations will be automatically found Resetting channels 1 Touch then 2 Touch then 3 Choose Reset to reset the current channel or choose Reset all to reset all of the channels Each channel will return to the starting 87 5Mhz frequency...

Page 96: ...time and date your event finishes in the lower two time and date boxes 6 If you would like to add a subject or a note to your event touch Note and type in your note followed by Save 7 Set Alarm and Repeat 8 Select Save and your event will be saved in the calendar A square cursor will mark the day that any events have been saved to and a bell will ring at the start time of your event so that you ca...

Page 97: ...week starts on 4 Touch Save to confirm your choice Adding an item to your to do list 1 From the standby screen select then touch and choose 2 Select To do and touch Add to do 3 Set the date for the to do item add notes and select a priority level High Medium or Low 4 Save your to do list item by selecting Save TIP You can edit a item by selecting it and touch the tab and input Confirm your amends b...

Page 98: ...tem by Text message Multimedia msg Email or Bluetooth TIP You can back up and synchronise your calendar with your computer See PC Sync on page 102 Adding a memo 1 From the standby screen select then touch and choose Select Memo 2 Touch Add memo 3 Type your memo followed by Save 4 Your memo will appear on screen next time you open the Memo application TIP You can edit an existing memo Select the on...

Page 99: ... In the After tab set the number of days 5 The Target date will be shown below Setting your alarm 1 From the standby screen select then touch and choose 2 Touch Add alarm 3 Set the time you would like the alarm to sound and touch Save 4 Choose whether you would like your alarm to repeat Once Daily Mon Fri Mon Sat Sat Sun Except holiday or Choose weekday The icons indicate the weekday you select 5 ...

Page 100: ... to set Adding a memo with drawing panel 1 From the standby screen select then touch and choose 2 Touch Add drawing 3 Draw your memo on the touch screen LCD followed by 4 Your memo will appear on screen next time you open the Drawing Panel application Voice recorder Use your voice recorder to record voice memos or other sounds 1 Touch then 2 Touch then and Settings choose from Duration Set the rec...

Page 101: ...ave finished recording touch 2 Touch Send via and choose from Message Email or Bluetooth If you choose Message or Email the recording will be added to the message and you can write and send it as normal If you choose Bluetooth you will be prompted to turn Bluetooth on NOTE After you have finished recording touch and choose Send via File Delete Use as to use the recording as your ringtone Settings ...

Page 102: ...cos tan log ln exp sqrt deg or rad etc Converting a unit 1 From the standby screen select then touch and choose 2 Select Converter 3 Choose whether you would like to convert Currency Surface Weight Length Temperature Volume or Velocity 4 You can then select the unit and enter the value you would like to convert from followed by the unit you would like to convert to 5 The corresponding value will a...

Page 103: ... lap time 5 Touch Stop to end the timer 6 Touch Resume to restart the stopwatch at the time you stopped it at or touch Reset to begin the time again Adding a city to your world time 1 From the standby screen select then touch and choose 2 Select World time 3 Touch the followed by Add city Start typing the name of the city you require and it will show at the top of the screen Get organised ...

Page 104: ...Insert the supplied CD into your PC Click on the LG PC Suite Installer which will appear on your screen 4 Select the language you would like the installer to run in and click OK 5 Follow the instructions on the screen to complete the LG PC Suite Installer wizard 6 Once installation is complete the LG PC Suite icon will appear on your desktop Connecting your phone and PC 1 Connect the USB cable to ...

Page 105: ...nformation to or restore information from Click OK 4 Your information will be backed up or restored Viewing your phone files on your PC 1 Connect your phone to your PC as outlined previously 2 Click on the Contents icon 3 All of the documents flash contents images sounds and videos you have saved onto your phone will be displayed on the screen in the LG Phone folder TIP Viewing the contents of you...

Page 106: ...cts saved to your USIM card click on the SIM card folder on the left side of your PC screen Select Edit at the top of the screen then Select all Right click your contacts and select Copy to contact Now click on the Handset folder on the left of your screen and all your numbers will be displayed Synchronising your messages 1 Connect your phone to your PC 2 Click on the Messages icon 3 All of your P...

Page 107: ...red onto your PC hard drive NOTE Your phone must be unplugged from your PC to initiate Mass Storage Using your phone as Music Sync device Your Phone can be used as Music Sync device to Sync Music Files only Music Sync can be done using Windows Media Player 10 11 and supports both Handset Memory and External Memory Card 1 Disconnect your phone from your PC 2 From the standby screen select then touc...

Page 108: ...his service and downloading content Check your data charges with your network provider Adding and accessing your bookmarks For easy and fast access to your favourite websites you can add bookmarks and save web pages 1 From the standby screen select then touch and choose 2 Select Bookmarks A list of your Bookmarks will appear on the screen 3 To add a new bookmark select and touch Add new Enter a na...

Page 109: ...n an automated manner that is easier than checking them manually The user subscribes to a feed by entering the feed s link into the reader or by clicking an RSS icon in a browser that initiates the subscription process The reader checks the user s subscribed feeds regularly for new content downloading any updates that it finds Saving a page 1 Access your required webpage as described above 2 Touch...

Page 110: ... standby screen select then touch and choose Select History 2 A list of web page titles you have accessed recently will be displayed To access one of these pages simply select the required page Changing the web browser settings 1 From the standby screen select then touch and choose Select Settings 2 You can choose to edit Profiles Appearance settings Cache Cookies Security or to reset all settings...

Page 111: ...t Modem 4 Choose LG Mobile USB Modem and select OK It will now appear on screen 5 Write the Profile that can connect to the Internet and save the values 6 The profile that you create will appear on your PC screen Select it and click Connect Your PC will connect through your KP500 NOTE For more information on synchronising using the LG PC Suite see page 103 Using Bluetooth 1 Ensure Bluetooth is swi...

Page 112: ...he Profile that can connect to the Internet and save the values 7 The profile that you create will appear on your PC screen Select it and click Connect Your PC will connect through your KP500 NOTE For more information on Bluetooth see page 116 The web 110 LG KP500 User Guide The web ...

Page 113: ... Profiles and then choose the profile you want to edit 3 You can then change all of the sounds and alert options available in the list including your Voice Ring tone and Volume Message alerts settings and more Changing your screen settings 1 Touch then choose 2 Touch and then choose from Wallpaper Choose the theme for your standby screen Top Menu Choose the style of the top menu Dialing Adjust the...

Page 114: ...nd slide your finger up the screen The list will move up so more items are visible 1 Touch then choose 2 Touch then choose from the list below Date and time Adjust your date and time settings or choose to auto update the time when you travel or for daylight saving Power save Choose to switch the factory set power saving settings Off Night only and Always on Languages Change the language of your KP5...

Page 115: ... Network settings Select Network If you set to Automatic KP500 automatically searches for the network and registers the handset to the network This is recommended for best service and quality If you set to Manual all the currently 2G GSM and 3G UMTS available networks are shown and you can select one of them for registration If the registration of the network has failed the network lists are liste...

Page 116: ...Your network operator has already saved this information You can add new access points using this menu Packet data conn Choose when your device should be connected to network for packet data USB connection mode Choose Data service and synchronise your KP500 using the LG PC Suite software to copy files from your phone See page 102 for more information on synchronisation If you use Music sync with W...

Page 117: ...e memory available on your KP500 for Pictures Sounds Video Flash MMS Email Java applications and others Handset reserved memory View the memory available on your handset for SMS Contacts Calendar To do list Memo Alarm Call history Bookmarks and Miscellaneous items SIM memory View the memory available on your SIM Card External memory View the memory available on your external memory card you may ne...

Page 118: ...rch for other Bluetooth devices If not your KP500 will search for other Bluetooth enabled devices within range 4 Choose the device you want to send the file to and touch Select 5 Your file will be sent TIP Keep an eye on the progress bar to make sure your file is sent To receive a file 1 To receive files your Bluetooth must be both On and Visible See Changing your Bluetooth settings on the right fo...

Page 119: ...Turn on or off My address Show your Bluetooth address Pairing with another Bluetooth device By pairing your KP500 and another device you can set up a passcode protected connection This means your pairing is more secure 1 Check your Bluetooth is On and Visible You can change your visibility in the Settings menu 2 Touch Search 3 Your KP500 will search for devices When the search is completed Refresh...

Page 120: ...ame with your headset to place your headset in pairing mode and pair your devices 3 Touch Ask before connect or Always connect and touch Yes to Connect now Your KP500 will automatically switch to Headset profile TIP See page 29 for details on BT answer mode so that you can control how you answer calls when your Bluetooth headset is connected ...

Page 121: ... about your KP500 KP500 User Guide Protection Film WARNING When the protection film is attached on touch window touch sensitivity might be decreased Accessories Accessories NOTE Always use genuine LG accessories Failure to do this may invalidate your warranty Accessories may be different in different regions please check with our regional service company or agent for further inquires ...

Page 122: ...de are called Network Services These are special services that you arrange through your wireless service provider Before you can take advantage of any of these Network Services you must subscribe to them through your service provider and obtain instructions for their use from your service provider General Product name KP500 System GSM 900 DCS 1800 GSM 850 PCS 1900 AmbientTemperatures Max 55 C disc...

Page 123: ......

Page 124: ...ption Rate or SAR Tests for SAR are conducted using standardised methods with the phone transmitting at its highest certified power level in all used frequency bands While there may be differences between the SAR levels of various LG phone models they are all designed to meet the relevant guidelines for exposure to radio waves The SAR limit recommended by the International Commission on Non Ionizi...

Page 125: ...r cookers Do not drop Do not subject this unit to mechanical vibration or shock Switch off the phone in any area where you are required by special regulations For example do not use your phone in hospitals as it may affect sensitive medical equipment Do not handle the phone with wet hands while it is being charged It may cause an electric shock and can seriously damage your phone Do not to charge ...

Page 126: ...necessarily Efficient phone operation Electronics devices All mobile phones may get interference which could affect performance Do not use your mobile phone near medical equipment without requesting permission Avoid placing the phone over pacemakers for example in your breast pocket Some hearing aids might be disturbed by mobile phones Minor interference may affect TVs radios PCs etc Road safety C...

Page 127: ...lume is at a reasonable level so that you are aware of your surroundings This is particularly imperative when near roads Avoid damage to your hearing Damage to your hearing can occur if you are exposed to loud sound for long periods of time We therefore recommend that you do not turn on or off the handset close to your ear We also recommend that music and call volumes are set to a reasonable level...

Page 128: ...t Do not use it on the ground without permission from the crew Children Keep the phone in a safe place out of the reach of small children It includes small parts which may cause a choking hazard if detached Emergency calls Emergency calls may not be available under all mobile networks Therefore you should never depend solely on the phone for emergency calls Check with your local service provider B...

Page 129: ...use it in high humidity such as in the bathroom Do not leave the battery in hot or cold places this may deteriorate the battery performance There is risk of explosion if the battery is replaced by an incorrect type Dispose of used batteries according to the manufacturer s instructions Please recycle when possible Do not dispose as household waste If you need to replace the battery take it to the n...

Page 130: ...ly inserted No connection to the network Signal weak Outside GSM network Move higher to a window or open space Check service provider coverage map Codes do not match When you want to change a security code you have to confirm the new code by entering it again The two codes that you have entered do not match Contact your Service Provider Function cannot be set Not supported by Service Provider or r...

Page 131: ...emperature is right wait for a while and then charge again Check power supply and connection to the phone Check the battery contacts clean them if necessary Plug in to a different socket or check voltage If the charger does not warm up replace it Only use original LG accessories Replace battery Phone loses network Signal too weak Reconnection to another service provider is automatic Number not per...

Page 132: ... under these limited warranty terms 5 Upon request from LG or their designated service agent the consumer must provide information to reasonably prove the date of purchase 6 Unless other service arrangements have been specified the customer shall bear the cost of shipping a defective product back to the Customer Service Department of LG LG shall bear the cost of shipping the product back to the con...

Page 133: ... 9 Products operated outside published maximum ratings 10 Products used or obtained n a rental program 11 Consumables such as fuses 12 Suspected defects caused by a failure of the cellular network 3 CONDITIONS No other express warranty is applicable to this product The DURATION OF ANY IMPLIED WARRANTIES INCLUDING THE IMPLIED WARRANTY OF MARKETABILITY IL LIMITED TO THE DURATION OF THE EXPRESS WARRA...

Page 134: ......

Reviews: