background image

September LCD TV 47LX9500

28

3D SECTION

3D SECTION

3D

This section of the manual will discuss the 

47LX9500 LCD Direct View Television ability to 

play 3D material.

Upon completion of this section the Technician 

will have a better understanding of the how 3D 

works.

Summary of Contents for 47LX9500

Page 1: ...LCD DV Troubleshooting 47 Class Full HD 1080P LCD TV 47 diagonally 47LX9500 47LX9500 LED Backlights 1080P Direct View LCD Training Published September 10th 2010 ...

Page 2: ...eration Troubleshooting of Contact Information Preliminary Matters Specifications LCD Overview General Troubleshooting Steps Signal Distribution Disassembly Instructions and Voltages Main Board Inverter Boards Main and Secondary LED Backlight Drivers Soft Touch Keys Disassembly Section Removal of Circuit Boards Ft Control Board Speakers ...

Page 3: ...which can save time and money sometimes can be overlooked These techniques will also be presented This Section will get the Technician familiar with the Disassembly Identification and Layout of the LCD Display Panel At the end of this Section the Technician should be able to Identify the Circuit Boards and have the ability and knowledge necessary to safely remove and replace any Circuit Board or A...

Page 4: ...Electronics Unauthorized modifications will not only void the warranty but may lead to property damage or user injury If wires screws clips straps nuts or washers used to complete a ground path are removed for service they must be returned to their original positions and properly fastened CAUTION CAUTION To avoid personal injury disconnect the power before servicing this product If electrical powe...

Page 5: ...ice pursuant to Part 15 of the FCC Rules These limits are designed to provide reasonable protection against harmful interference when the equipment is operated in a residential installation This equipment generates uses and can radiate radio frequency energy and if not installed and used in accordance with the instruction manual may cause harmful interference to radio communications However there ...

Page 6: ...tronics Alabama Inc 201 James Record Road Huntsville AL 35813 32LG40 32LH30 37LH55 42LG60 42LG70 42LH20 42LH40 42LH50 42LH90 42SL80 47LG90 47LH85 47LX9500 47LX9500 42PG20 42PQ20 42PQ30 50PG20 50PJ350 50PK750 50PS80 50PS60 60PK750 60PS11 60PS60 60PS80 LCD DV PLASMA Also available on the Plasma Page PDP Panel Alignment Handbook Schematics with Bookmarks Plasma Control Board ROM Update Jig required P...

Page 7: ...ercise care when making voltage and waveform checks to prevent costly short circuits from damaging the unit 5 Be cautious of lost screws and other metal objects to prevent a possible short in the circuitry 1 Check the appearance of the Replacement Panel and Circuit Boards for both physical damage and part number accuracy 2 Check the model label Verify model names and board model matches 3 Check de...

Page 8: ... examination using your senses the first check should always be the DC Supply Voltages to those circuits under test Always confirm the supplies are not only the proper level but be sure they are noise free If the supplies are missing check the resistance for possible short circuits Isolate To further isolate the failure check for the proper waveforms with the Oscilloscope to make a final determina...

Page 9: ...September LCD TV 47LX9500 9 This section of the manual will discuss the specifications of the 47LX9500 LCD Direct View Display 47LX9500 PRODUCT INFORMATION SECTION 47LX9500 PRODUCT INFORMATION SECTION ...

Page 10: ...taches to the Television via two connections 1 HDMI Cable from the Dongle to the TV to transfer Audio and Video Signals 2 Wired Remote cable between the TV and Dongle for Control Functions Wireless Media Box Wireless Media Box Media Box Wireless Receiver Transmitter Dongle Attaches via Velcro to the back of the set Wired Remote to control the Media Box HDMI TV A V Inputs ...

Page 11: ...ptor Wireless Router DLNA Adaptor Dongle Side A V Inputs 1 DLNA Digital Living Network Alliance Using the LG Wireless LAN for Broadband 1DLNA Adaptor which is sold separately allows the TV to connect to a wireless LAN network The DLNA adaptor attaches to the Television via either of the two USB connections ...

Page 12: ...TruMotion 480Hz Full HD 1080p Resolution 10M 1 Dynamic Contrast Ratio Seamless Design Picture Wizard II Easy Picture Calibration Smart Energy Saving Magic Motion Remote Control Easy Picture Calibration ENERGY STAR Qualified XD Engine Intelligent Sensor AV Mode II Cinema Sports Game Clear Voice II ISFccc Ready 24P Real Cinema USB 2 0 JPEG MP3 DivX HD DivX HD 4 HDMI V 1 4 Inputs SIMPLINK Connectivit...

Page 13: ...y and freedom with wireless HD capability You don t have to take our word for it that this is an amazing TV To earn THX certification our TV s passed more than 30 rigorous tests ensuring you re bringing an uncompromised HD experience home as the director wanted it Entertainment on tap NetCast Entertainment Access brings the best Internet services direct to your TV no computer required Instantly ac...

Page 14: ...els 1920 H 1080 V Enjoy twice the picture quality of standard HDTV with almost double the pixel resolution See sharper details like never before Just imagine a Blu ray disc or video game seen on your new LG Full HD 1080p TV HDMI 1 3 Deep Color Digital multi connectivity HDMI 1 3 Deep color provides a wider bandwidth 340MHz 10 2Gbps than that of HDMI 1 2 delivering a broader range of colors and als...

Page 15: ... on your energy bill Draws less than 1 Watt in stand by Save Energy Save Money It reduces the plasma display s power consumption The default factory setting complies with the Energy Star requirements and is adjusted to the comfortable level to be viewed at home Turns on Intelligent Sensor TruMotion 480Hz the world s first TruMotion 480Hz panel a combination of LG s existing 240Hz technology with a...

Page 16: ... color tint sharpness and backlight levels Take the guesswork out of picture adjustments with this simple to use feature It s not actually magic but it will sure seem that way Seamless Design You ll love the stunning picture while it s on and marvel at its appearance while it s off The display is a seamless edge to edge panel of glass over an ultra slim almost unnoticeable bezel It s a sleek elega...

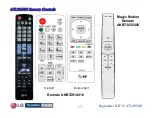
Page 17: ...September LCD TV 47LX9500 17 47LX9500 Remote Controls 47LX9500 Remote Controls Magic Motion Remote AKB73035402 Remote AKB72914018 Top Half Bottom Half ...

Page 18: ...To access the Service Menu 1 You must have either Service Remote p n 105 201M or p n MKJ39170828 2 Press In Start 3 A Password screen appears 4 Enter the Password Note A Password is required to enter the Service Menu Enter 0000 Note If 0000 does not work use 0413 MKJ39170828 105 201M ...

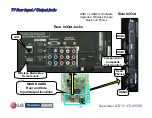
Page 19: ...nput Output Jacks Rear In Out Jacks Side In Out MAIN BOARD Rear and Side Input Output locations USB1 or USB2 for Software Upgrades Wireless Dungle Music and Photos USB 2 HDMI 4 USB 1 Component or Composite Video Audio 3 LAN Wireless Media Box Remote Jack Head Phones ...

Page 20: ...c Software Downloads however if there are problems completing download a Wired Internet Connection is preferred For network setup assistance press the green button for the Simple Manual With Software Update Highlighted Press Select on Remote Continue on next page Bring up the Customer s Menu then Press the Red button on Remote Scroll down to item 9 Network Connections ...

Page 21: ...heck Update version comparison current software version and Released software version After completion of the test a Pop up menu is displayed with preloaded back ground picture Select NO if everything is OK Additional TV Checks can be made by Scrolling down Picture Sound and Network Test If you select Yes Service call number Model name SW version and serial No is displayed Note Confirm the Suffix ...

Page 22: ... 6 You can see the download progress Bar 7 Do not unplug until unit has automatically restarted 8 When download is completed you will see COMPLETE 9 Your TV will be restarted automatically USB Automatic Software Download Instructions Generic USB Automatic Software Download Instructions Generic Currently Installed Version Software Version found on the USB Flash Drive CAUTION Do not remove AC power ...

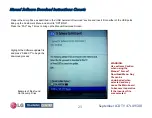
Page 23: ...s Bring up the Customer s Menu and scroll to OPTIONS Press the FAV key 7 times to bring up the Manual Download Screen Example of files found On the Jump Drive Highlight the Software update file and press SELECT to begin the download process WARNING Use extreme Caution when using the Manual Forced Download Menu Any file can be downloaded when selected and may cause the Main board to become inoperat...

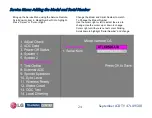
Page 24: ...Service Remote Scroll down to item 6 Model Number D L to highlight Press Select or Cursor Right Change the Model and Serial Number to match To Change the Model Number Use the cursor right or left to select the area to change Use the cursor up or down to change Cursor right until there is no text cursor blinking Scroll down to highlight Serial Number and change ...

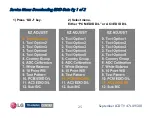
Page 25: ...September LCD TV 47LX9500 25 Service Menu Downloading EDID Data Pg 1 of 2 Service Menu Downloading EDID Data Pg 1 of 2 1 Press ADJ key 2 Select menu Either PCM EDID D L or AC3 EDID D L ...

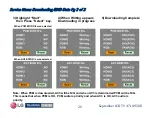
Page 26: ...t then Press Select key 4 When Writing appears Downloading in progress 5 Downloading Complete When PCM EDID D L was selected When AC3 EDID D L was selected Note When PCM is downloaded AC3 will be N G and when AC3 is downloaded PCM will be N G This means that when PCM is OK PCM audio is priority and when AC3 is OK AC3 audio is priority ...

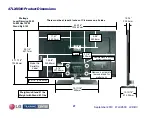
Page 27: ... 16 33 02mm 10 13 16 274 32mm 7 7 8 200mm 9 59 243 8mm 8 16 207 36mm 2 3 16 55 88mm Weight w o Stand 51 lbs Weight with Stand 61 1 lbs Center There must be at least 4 inches of Clearance on all sides 27 17 47 443 9mm 12 3 4 323 85mm Model No Serial No Label Wattage Local Dimming 90W Full White 130W Stand By 0 1W September 2010 47LX9500 LCD DV Remove stand to access bottom two screws ...

Page 28: ...D SECTION 3D SECTION 3D This section of the manual will discuss the 47LX9500 LCD Direct View Television ability to play 3D material Upon completion of this section the Technician will have a better understanding of the how 3D works ...

Page 29: ... TV Wider viewing angle Longer Viewing distance Longer battery life 1 5h charging 40h battery life Better sync performance User friendly Glasses 1 L frame for glasses users 2 UV coating to prevent scratch 3 LED indicator for user convenience 4 Easy to Recharge with USB port 1 3 2 4 IR Emitter Location 600 600 7m ...

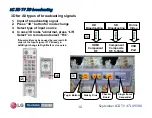
Page 30: ...input source 4 In case 3D looks abnormal press L R Select on remote and select R L Abnormality may be caused by reversed L R order of the input signal If TV already in Left Right change to Right Left or vice versa HD Broadcasting SD Broadcasting Online Video Input Input Input USB Port Component Composite RF S Video 1 2 4 3 Top Bottom Side by Side Checker Board Single frame Sequential HDMI Componen...

Page 31: ... We have to come up with a scheme that will allow us to see the same image from two different angles giving us 3D effects Note The Left and Right eye are actually seeing the same image but from a different angle but for this explanation one is shown inverted from the other for clarity purposes simply to show there is a difference between the two images seen by each eye If the two images were added...

Page 32: ...ft and right images by synchronizing the TV and the glasses Fundamentals of Shutter glasses Shutter glasses 3D The image is broadcast using two different viewing angles every other frame The 3D Glasses are then synchronized with the two different images to give the 3D effect They are blanked between scene changes ...

Page 33: ...September LCD TV 47LX9500 33 Active glasses 3DTV components Active glasses 3DTV components Battery IR Receiver TN LCD shutter Sync signal TV with built in IR Transmitter Shutter Actuator ...

Page 34: ...matter 3D Formatter All Formats of input available and conversion technology development Full HD input available 3D Enhancement 1 Side by Side 2 Top and Bottom 3 Checkerboard 4 Frame Sequential Full Resolution available 3D Formatter R L R L 2 Frame by Frame 1 Line by Line ...

Page 35: ...hold the glasses about 1 ft in front of you towards a white sheet of paper They should still able to see the 3D Emitter signal from the TV while playing a 3D movie If the glasses sync up the paper will appear as looking through normal sun glasses if not synced the paper will appear amber in color Charge the 3D Glasses Change the 3D Glasses No 3D No 3D OK Possible FPGA Main or FRC T CON 3D has prob...

Page 36: ... Main 1 5 5 1V 6 0V 7 0V 8 Gnd 4 5 1V 3 1 6V 2 2 15V 1 5 1V Possible Main or T CON 3D has problems Replace T CON 3D or Main Board Should be OK Replace T CON Formatter B D B 0 61V E Gnd C 0 03V Q906 B 0V E Gnd C 1 9V Q907 B 0V E Gnd C 3 5V Q102 IC100 5 3V p p 12 MHz 5 5V p p 60 Hz Continued from previous page Check 3D_SYNC Line Main P7800 pin 50 T CON 3D P802 pin 2 Should be 5 5V p p 60 Hz 1 6VDC C...

Page 37: ...asses displays unnatural images due to no time difference during eye movements It is recommended to see 3D images within a distance of 2m The brain is not able to adjust the focus when you are more than 2m away from the TV Customers don t have the condition for seeing a display within 2m below warning sentence should be noticeable If it is impossible for customer to view 3D image displayed on the ...

Page 38: ...he manual will discuss Disassembly Layout Circuit Board Identification of the 47LX9500 LCD Direct View Television Upon completion of this section the Technician will have a better understanding of the disassembly procedures the layout of the printed circuit boards and be able to identify each board ...

Page 39: ...screw The Stand has to be removed before removing the back Removing the Back Cover Removing the Back Cover The AC Cord Does Not unplug Stand Base is Glass Handle with Care There could be many different types Putting in an improper screw when reassembling may Cause damage Two screws under Stand frame ...

Page 40: ...Invisible Speaker Right IR LED Board Keyboard Inverter Main Inverter Secondary Extension Board A Main Extension Board B Main Extension Board Secondary LVDS Cable Invisible Speaker Left LG Logo Board Warning The Frame has many sharp edges 3D Emitter Board T CON 3D Woofer Panel Connection Points To Logo ...

Page 41: ...CN1 CN3 CN2 CN11 CN4 CN5 CN12 CN104 CN105 CN23 CN24 P7900 P7802 P8000 P8800 To TFT Panel CN13 LED Extension Board LED Extension Board LED Extension Board CN103 CN101 V25 V32 V33 V40 V41 V48 V49 V56 V57 V64 V65 V72 V73 V80 V81 V88 V89 V96 V73 V80 V81 V88 V1 V8 V9 V16 V17 V24 V25 V32 V33 V40 V41 V48 V49 V56 V105 V112 V113 V120 V121 V128 V29 V136 V137 V144 V145 V152 V153 V160 V161 V168 If the Panel i...

Page 42: ...ct P201 P205 P204 and AC In SK101 P201 Press in gently on the two tabs to release lock P201 SK101 Remove the 6 screws indicated by the arrows AC In P205 P204 SK101 fits very snug into it s connector Press in on the two tabs to release lock Board is Thin be careful not to flex p n EAY60803402 ...

Page 43: ... of Chocolate Heat Transfer Material Be sure to transfer to new Board if present Disconnect P7900 P2100 P2101 P8200 P2000 P8800 P2200 P7800 P7901 P7802 P8000 P8003 P2401 P7800 Decorative Metal Plate P7900 Remove decorative plastic and remove the board P8800 P2200 Press in on the side release tabs to remove N C After removing the Main there are tabs sticking through the Main board holding the Metal...

Page 44: ...4 Removing the Main Board notice Removing the Main Board notice Note Behind the Main board are pieces of Chocolate Heat transfer material Be sure to replace these pieces if any should fall Chocolate Chocolate Chocolate Chocolate ...

Page 45: ... allow screws to fall NOTE If Servicing the Board leave the screws installed to provide stability and grounding CN1 CN3 CN2 Flip the locking tab upward pull the ribbons out N C CN5 CN4 On CN2 CN3 CN4 and CN5 Flip the locking tab upward pull the ribbons out The Inverter Main will run without Inverter Secondary Comes with the Panel The Inverter Secondary will run without Local Dimming signals being ...

Page 46: ...4 and CN105 CN103 Use caution do not allow screws to fall NOTE If Servicing the Board leave the screws installed to provide stability and grounding N C On CN104 and CN105 Flip the locking tab upward pull the ribbons out CN105 CN104 CN101 The Inverter Secondary will run without Inverter Main Comes with the Panel The Inverter Secondary will run without Local Dimming signals being provided by CN103 ...

Page 47: ...g the front frame 2 Remove the stand support bracket that surrounds the T CON 3D board 6 screws See Fig 1 Comes with the Panel Fig 1 1 2 3 4 5 6 Stand Bracket 1 2 3 4 P805 P806 P802 P803 P804 3 Disconnect P802 P803 P804 P805 and P806 4 Remove the 4 screws securing the T CON 3D Fig 2 Push In Push In P802 P805 P806 Flip up the Locking mechanism to release ribbon cable ...

Page 48: ... TV 47LX9500 48 Removing the T Removing the T CON 3D Board Notice CON 3D Board Notice Note Behind the T CON 3D is a piece of Chocolate Heat transfer material Be sure to replace this piece if it should fall Chocolate ...

Page 49: ...tors Tab Tab J4 Press gently upward on the two tabs at the top And gently downward on the two tabs at the bottom Lift the board straight up J2 J1 To the Keyboard To the Main P8200 To the Main P2000 Motion Remote Tab Tab IR Filter is on the front side Be careful not to loose it Part number is Item 390 on the Exploded View May be shown on the wrong side ...

Page 50: ...LESHOOTING SECTION TROUBLESHOOTING SECTION Troubleshooting This section of the manual will discuss troubleshooting Upon completion of this section the Technician will have a better understanding of how to diagnosis and resolve problems ...

Page 51: ...1V from hot ground during this time F101 is 4 12V When the controller chip receives the PWR ON command 3 3V via P201 Pin 1 the primary section increases its current supplying ability Both Primary fuses F101 and F500 now read a little more than 391 2V P201 Connector To Main Board 12V is routed out P201 pins 17 19 and 21 and 24V is routed out P201 pins 2 3 and 4 P204 Connector To Inverter Main Board...

Page 52: ...52 Power Supply SMPS Board Layout Power Supply SMPS Board Layout Hot Ground Shock Hazard F101 3 15A 250V STBY 4 11V Run 392V From Hot Gnd F501 3 15A 250V STBY 161V Run 391V From Hot Gnd F100 6 3A 250V AC Protect p n EAY60908801 ...

Page 53: ...LVDS Video Ft IR 24V INV On Model 1_Opt1 Panel Control INV_CTL Microprocessor IC8101 RL_ON Tru Motion LVDS Video C8108 R8184 Q8004 CN1 P201 Bridge P204 To Panel Backlights Power On Power On 5 P205 CN101 24V P8000 12V 24V Regulators P8200 Inverter On P7800 Reset Generator 1 AC In 3 5V_ST B Cent Extension Board A Left Extension Board A Right Extension Board 9 P DIM P DIM IC8003 5V_Normal 8 4 P7802 L...

Page 54: ...Vcc 12V 3 36V G Q8003 Model_Opt_1 1 8V 12V R8010 10KΩ C8000 100uF 3 5V_ST RL_ON GPIO 09 2 92V Q8002 L8000 3 5V_ST n c INV_On PWR ON PWM DIM IC8101 Micro RL_ON Power Det 14 VDD 40 Key 1 25 Key 2 26 Power On Off 2_2 20 R8004 4 7K 3 41V 3 41V 3 41V 11 81V Q8001 0V 36 R8060 10KΩ 3 3V_Normal 11 81V 12V Gnd 13 13 16 16 n c n c n c 23 23 n c n c n c Gnd Q8000 R8032 10K R8187 22Ω C8103 0 1uF IC900 BCM R10...

Page 55: ...e AC is arriving at the connector SK101 b Unplug P8000 on the Main Board to make insertion of the Jumpers easier Use P700 Side to insert resistors TEST 1 1 Add a jumper between 3 5V STBY pin 7 8 9 or 10 and Pin 1 PWR_ON Apply AC This will turn on the power supply relays will click a Check that the 24V and 12V power supplies are turned on P201 12V pins 17 19 and 21 P201 24V pins 2 3 and 4 P204 and ...

Page 56: ...ould turn on SMPS OK Inverter OK Backlights Abnormal a Recheck all connections b Confirm the INV On Off line pulling up to at least 3V and arriving at both Inverters c Check the connections to the Inverters If the 24V and the Inverter On command is arriving at the Inverters in then see Inverter Section for further testing Note Either Inverter can run separately REMOVE AC POWER Power Supply Board B...

Page 57: ...oltage and Diode Check Power Supply Connector P201 Voltage and Diode Check Open 0V 0V ERROR 24 Open 0V n c n c 23 Open 0V n c n c 22 1 39V 11 88V 0V 12V 21 Open 0 37V 3 3V 0V 1 P DIM 20 1 39V 11 88V 0 42V 12V 19 Open 2 92V 0V INV ON 18 1 39V 11 88V 0V 12V 17 Open n c n c n c 16 Gnd Gnd Gnd Gnd 13 15 Open 3 41V 3 45V 3 5V 9 12 GND GND GND GND 5 8 0 424V 24 7V 0V 24V 2 4 1 68V 3 1V 0V PWR ON 1 Diode...

Page 58: ...or room light condition Output from the Video Processor IC900 Range 0 37V to 3 3V P204 SMPS to CN14 Inverter Main Open 0V 0V ERROR 14 Open n c n c n c 13 Open 2 92V 0V 2 I C 12 Open 0 37V 3 3V 0V 1 P DIM 11 GND GND GND GND 6 10 0 424V 24 65V 0V 24V 1 5 Diode Check Run STBY Label Pin Open 2 92V 0V 2 I C 12 Open 0 37V 3 3V 0V 1 P DIM 11 GND GND GND GND 6 10 0 424V 24 65V 0V 24V 1 5 Diode Check Run S...

Page 59: ...de values taken with all Connectors Removed AC Voltage Readings From Hot Ground Pins 1 and 2 for STBY and RUN OL N EL132 OL 120Vac L EL131 Diode Check Run STBY Label Pin SK101 SMPS to AC IN SK101 Bottom Right of SMPS F100 F100 6 3A 250V AC IN F100 Diode Check Main Power Switch Closed Red or Black Lead on Fuse Open Other Lead on Hot Ground L N ...

Page 60: ...Power Supply F101 and F501 Voltage Checks F101 F101 3 15A 250V From Hot Gnd STBY 2 9V Run 393 3V F500 F500 3 15A 250V From Hot Gnd STBY 159 6V Run 392 6V If reading the voltage on F101 right after power off it takes a very long time to bleed down to the reading given here ...

Page 61: ... and CN5 Inverter Secondary 13V U101 Q105 Q106 L206 and C151 out CN104 and CN105 The Inverters must also deliver grounding pulses Drive Signals to each of the 216 LED Blocks This is accomplished by the 14 switching components 10 on Inverter Main U9 U11 and U13 and 5 on Inverter Secondary U2 U5 and U13 Inverter Main has 4 Connectors CN2 CN5 that connect to Extensions boards The Left hand Extension ...

Page 62: ...e IOP Structure The Image below shows the actual Backlight Bars used in the 47LX9500 The Cartridges are assembled from the bottom to the top like shingles on a roof Cartridge Bar Cartridges Removed Integrated Optic Plate Integrated Optic Plate ...

Page 63: ...formation IOP Structure Information 4 LEDs per block 216 Blocks 8 Blocks per cartridge 9 bars with 3 cartridges per bar 32 LEDs per cartridge 96 LEDs per bar 864 LEDs total Cartridge BLU Backlight Unit Bar Cartridge There are 3 Cartridges per bar ...

Page 64: ...tember LCD TV 47LX9500 64 IOP Cartridge Breakdown IOP Cartridge Breakdown This shows the 47 Cartridge Breakdown The Individual LEDs can be checked using the Diode Mode forward bias test The LED will light ...

Page 65: ...tion 65 September 2010 47LX9500 LCD DV CN1 LED Extension Board V25 V32 V33 V40 V41 V48 V49 V56 V57 V64 V65 V72 V73 V80 V81 V88 V89 V96 CN2 CN3 CN4 CN5 CN6 CN7 CN8 CN9 CN10 CN11 LED Extension Board V73 V80 V81 V88 V1 V8 V9 V16 V17 V24 V25 V32 V33 V40 V41 V48 V49 V56 CN25 CN26 CN27 CN28 CN29 CN30 CN31 CN32 CN33 CN23 CN24 LED Extension Board V105 V112 V113 V120 V121 V128 V29 V136 V137 V144 V145 V152 ...

Page 66: ...f the IOP Panel 1 Case Top Ass y 2 TFT Panel Ass y 3 Guide Panel 4 Sheet DBEFD 5 Sheet Prism U 6 Sheet Prism L 7 Sheet Diffuser L 8 Plate Diffuser 9 Cartridge Ass y 10 Cover Bottom 11 Driver Boards 2 12 Extension Boards 3 13 FRC Flexible Ribbon Cables 13 12 11 10 9 8 7 6 5 4 3 2 1 ...

Page 67: ...7V 12 9V L101 F1 12A 65V 24 7V U6 U5 U4 13V POWER SUPPLY For CN2 CN3 12 9V 13V POWER SUPPLY For CN4 CN5 L102 C75 Gnd Q10 Q7 12 9V 12 9V U103 3 3V 3 46V L103 Q11 Q8 U102 U101 A0950 1050 C 12 9V C89 DO NOT MEASURE U501 U1 Q15 U3 U11 U10 U9 Y1 Y501 8MHz 8MHz CN5 CN4 U7 U8 CN2 CN3 CN11 CN10 n c U13 A0950 1050 C CN1 INVERTER MAIN INVERTER MAIN 295KHz 39 5V p p 295KHz 39 5V p p 12 9V ...

Page 68: ... POWER SUPPLY For CN104 CN105 DO NOT MEASURE 8MHz 12 8V C151 A0950 105 0 C Q501 E B C Y501 U4 U3 CN105 CN104 U501 CN103 n c 12 8V 12 9V Q101 Q102 Q105 24 7V E B C Q109 E B C Q108 Q12 E B C Q3 U103 3 4V 3 3V L207 U5 U2 U13 U101 Q106 Q103 E B C F1 12A 65V 24 7V C101 CN101 L206 E B C E B C INVERTER SECONDARY 295KHz 39 5V p p ...

Page 69: ... 12 9V CN1 INVERTER MAIN A B A B A Power for Main Extensions Board A Left Side To Connectors CN2 and CN3 B Power for Main Extensions Board B Center To Connectors CN4 and CN5 B A CN2 A B To CN 1 Extension Left CN3 B for LED Blocks Pins 1 2 11 12 21 22 31 32 41 42 To CN 2 Extension Left CN2 B for LED Blocks Pins 9 10 11 12 21 22 31 32 To CN 12 Extension Cent CN4 B for LED Blocks Pins 11 12 21 22 31 ...

Page 70: ...outing 47LE8500 Inverter Secondary B Routing 12 9V 12 8V 24 7V 12 8V DO NOT MEASURE INVERTER SECONDARY C C Power for Secondary Extensions Board Right Side Connectors To Connectors CN23 and CN24 C C To CN 23 Extension Right B to LED Blocks pins 19 20 29 30 39 40 49 50 To CN 24 Extension Right B to LED Blocks pins 1 2 11 12 21 22 31 32 41 42 C151 DC to DC Driver Gnd September 2010 47LX9500 LCD DV 70...

Page 71: ... Converter Troubleshooting 14 5V p p 296KHz Q5 Q8 Q106 39 53V p p 296KHz Q4 Q7 Q105 30 1V p p 296KHz Q4 Q7 Q105 1 3 2 Each of the Pin numbers for the Components listed above are the same Q5 Q8 or Q106 Pin 3 is Ground Main Pin 1 Secondary Main Pin 1 Secondary Main Pin 3 Secondary Q5 Q8 Q106 Main Pin 2 Secondary ...

Page 72: ...by the Customer s Menu the DC Level of P DIM is manipulated by Overall Contrast Ratio Monitored by the BCM or Mstar Video Processor As the overall brightness of the video content decreases so does P DIM voltage If the Intelligent Sensor is utilized it too manipulates P DIM As the overall room light decreases in intensity P DIM decreases This data represents nearly 5000 steps in room light monitori...

Page 73: ...econdary Fuse F101 Check Top Left of the Board Just under CN1 Connector F1 Diode Mode Check 1 33V Red Lead on Fuse 0 56V Black Lead on Fuse Center Left of the Board Just up and right of CN101 Connector F101 Diode Mode Check 1 34V Red Lead on Fuse 0 55V Black Lead on Fuse Inverter Main Inverter Secondary F1 12A 65V F101 12A 65V ...

Page 74: ...0 74 Inverter Crystals Y1 Y501 Main and Y501 on Secondary Inform Inverter Crystals Y1 Y501 Main and Y501 on Secondary Information ation Crystal Y301 Inverter Main Inverter Secondary Y501 Y501 Y1 Use Top Leg Use Bottom Leg 8Mhz ...

Page 75: ...ter Extension board connects to CN4 and CN5 CN2 13V Line Pins 9 10 11 12 21 22 31 32 Example U5 Voltage Supplies from Inverter Main To Extension Boards Left and Center CN3 13V Line Pins 1 2 11 12 21 22 31 32 41 42 Inverter Secondary has 2 Connectors CN104 CN105 that connect to the right hand Extension board rear view Each Extension board has 9 connections to the Backlight LEDs CN4 13V Line Pins 11...

Page 76: ...v Main and CN103 Inv Secondary 100 IRE 3 41V p p 240Hz 5 IRE 3 41V p p 240Hz Drive Signals being delivered to the LED Blocks V1 V216 Note If a particular block is exhibiting a dimmer level than the other or the overall brightness seems dim be sure to first check the customer s Menu setting for Backlights Raise the percentage and see if the overall brightness returns to normal If not 1st Check the ...

Page 77: ...on all pins 12 55V B CN4 pin 01 20 B 31 12 55V B CN4 pin 02 19 B 32 0 7V 3 9V V81 CN4 pin 03 18 V81 33 0 7V 3 9V V82 CN4 pin 04 17 V82 34 0 7V 3 9V V83 CN4 pin 05 16 V83 35 0 7V 3 9V V84 CN4 pin 06 15 V84 36 0 7V 3 9V V85 CN4 pin 07 14 V85 37 0 7V 3 9V V86 CN4 pin 08 13 V86 38 0 7V 3 9V V87 CN4 pin 09 12 V87 39 0 7V 3 9V V88 CN4 pin 10 11 V88 40 12 55V B CN3 pin 01 10 B 41 12 55V B CN3 pin 02 9 B ...

Page 78: ...from the Video Processor IC900 Range 0 37V to 3 3V Gnd 0V 0V ERROR 14 Open N C N C N C 13 Open 2 92V 0V 2 I C 12 Open 0 37V 3 3V 0V 1 P DIM 11 GND Gnd Gnd Gnd 6 10 1 33V 24 7V 0V 24V 1 5 Diode Check Run STBY Label Pin CN11 Inverter Main to Main P7900 1 87V 2 72V 0V S_SCLK 10 1 87V 0 18V 0 28V 0V S_MOSI 9 1 9V 1 96V 0V S_CS_N 8 Gnd Gnd Gnd Gnd 7 Open 0 42V 0V M1_SCLK 6 Open 0 04V 3 26V 0V M1_MOSI 5...

Page 79: ... n c 7 1 07V 0V 0V n c 6 Gnd Gnd Gnd Gnd 5 1 08V 0 43V 0V M2_SCLK 4 1 08V 0 04V 3 2V 0V M2_MOSI 3 GND Gnd Gnd Gnd 2 1 08V 0 046V 0V R_VS 1 Diode Check Run STBY Label Pin Open 2 92V 0V I C 12 Open 0 37V 3 3V 0V 1 P DIM 11 Gnd Gnd Gnd Gnd 6 10 1 34V 24 7V 0V 24V 1 5 Diode Check Run STBY Label Pin CN101 Inverter Secondary to P205 SMPS Inverter On Control 1 PDIM Pin 11 can vary according to incoming v...

Page 80: ...ber LCD TV 47LX9500 80 Inverter Main and Secondary Local Dimming Control Signals Wavefo Inverter Main and Secondary Local Dimming Control Signals Waveforms rms For clearer details see the Interconnect Diagram ...

Page 81: ...ry DC to DC converter IC600 that creates several voltages 8V Measured at pin 11 25 63V Measured at pin 8 6V Measured at pin 2 16V Measured at pin 42 3 3V Measured at pin 23 24 or L601 5V Created by D601 on the back side of the board Another voltage is generated for the panel 8 17V measured at L701 These Voltages can also be measured at the ribbon connectors delivering signals to the TFT panel usin...

Page 82: ...204 IC201 X100 25MHz P802 P803 IC200 IC205 Q1002 Q1001 Q1004 Q1003 P901 n c L601 IC600 L600 IC302 L307 IC304 L305 IC301 IC307 L306 IC202 A2 A1 C D600 20 68V 1 2V 1 27V 8 2V 2 52V 2 53V 3 3V 3 33V 1 85V 1 88V 3 4V 1 07V 1 05V 11 4V 11 36V 3 34V 3 35V 8V Pin 11 25 6V Pin 8 8V Pin 61 8 2V Pins 73 74 3 4V Pins 76 77 16V Pins 79 80 5V Pins 71 25 6V Pins 66 6V Pins 63 64 8 2V Pins 7 8 3 4V Pins 4 5 8V P...

Page 83: ...ember LCD TV 47LX9500 83 T T CON 3D TFT Drive Board Checks CON 3D TFT Drive Board Checks T CON 3D Board Locations Check for 12V Voltage supplied from P803 Pins 1 2 and or P802 pins 49 51 P802 Check 12V P803 ...

Page 84: ...September LCD TV 47LX9500 84 T T CON 3D 12V CON 3D 12V VLCD_POWER VLCD_POWER Power Development Diagram Power Development Diagram ...

Page 85: ...CON 3D TFT Drive Panel Voltage Development Checks Development Checks The development for the voltages for P805 and P806 connectors to the panel are shown here This is an excerpt from the Interconnect diagram Panel voltages are outlined in the rounded cornered boxes ...

Page 86: ...LCD TV 47LX9500 86 T T CON 3D TFT Drive Panel Voltage Checks CON 3D TFT Drive Panel Voltage Checks See the previous page for the development for the voltages for P806 and P805 connectors which are Panel voltages ...

Page 87: ...September LCD TV 47LX9500 87 T T CON 3D Control Board X100 Crystal Checks CON 3D Control Board X100 Crystal Checks 25Mhz T CON 3D Board X100 Runs when set is On 1 71V DC 4 8V p p 1 65V DC 3 25V p p ...

Page 88: ...1 27V 22 11 45V 23 3 4V 24 3 4V 25 11 38V 26 11 38V 27 11 07V 28 0V 29 4 24V 30 1 9V 31 0 59V 32 3 3V 33 3 13V 34 0V 35 0V 36 0V 37 11 33V 38 11 37V 39 n c 40 n c 41 1 27V 42 16V 43 5 96V 44 5 96V 45 5 96V 46 5 96V 47 Gnd 48 5 97V 1 0 59V 2 3 3V 3 3 3V 4 0V 5 4 26V 6 Gnd 7 1 8V 8 7V 9 2 7V 10 4 78V 11 8 47V 12 3 33V 13 Gnd 14 3 6V 15 0 12V 16 5 21V 17 0 6V 18 1 13V 19 1 18V 20 Gnd 21 11 4V 22 0 56...

Page 89: ...D_DIM 9 1 67V 1 16V RRXB1 31 Open 0V 3DTV 8 1 67V 1 19V RRXB1 30 n c n c n c 7 1 67V 1 19V RRXB0 29 Open 3 32V FRC_RESET 6 1 67V 1 19V RRXB0 28 1 73V 3 34V SCL3_3 3V 5 n c n c n c 27 1 73V 3 34V SDA3_3 3V 4 Gnd Gnd Gnd 26 1V 3 33V V_SYNC 3 1 67V 1 08V RRXA4 25 2 34V 0 03V 3D_Sync_Out 2 1 67V 1 26V RRXA4 24 Gnd Gnd Gnd 1 Diode Check Run Label Pin Diode Check Run Label Pin T T CON 3D Board LVDS P802...

Page 90: ...eter in Diode Mode with all Connectors Removed P804 Connector T CON 3D Board to P7803 Main P804 Gnd Gnd Gnd 6 Open 3 32V E_TDI 5 Open 0 35V E_TMS 4 Open 3 33V E_TDO 3 Open 0V E_TCK 2 Gnd Gnd Gnd 1 Diode Check Run LABEL Pin 1 Gnd Gnd Gnd 4 Gnd Gnd Gnd 3 Open 11 55V PANEL_VCC 2 Open 11 55V PANEL_VCC 1 Diode Check Run LABEL Pin P803 Connector T CON 3D Board to P7802 Main T CON 3D 12V TP 1 ...

Page 91: ...6V VCOMRFB 18 Gnd Gnd 70 0 44V H_CONV 44 Gnd Gnd 17 1 23V RRMV2N 69 0 25V SOE_R 43 25 6V VGH 26V 16 1 15V RRMV2P 68 Gnd Gnd 42 Gnd Gnd 15 1 23V RRMV1N 67 1 66V POL 41 2 3V GSC 14 1 15V RRMV1P 66 0V GSP 40 0 83V GOE 13 1 23V RRMV0N 65 Gnd Gnd 39 Gnd Gnd 12 1 13V RRMV0P 64 0 26V V18 38 5V VGL 5V 11 Gnd Gnd 63 0 27V V17 37 n c OPT_P 10 1 23V RLMV6N 62 1 97V V16 36 Gnd Gnd 9 1 12V RLMV6P 61 2 68V V15 ...

Page 92: ... Gnd Gnd 18 Gnd Gnd 70 15 75V V2 44 1 26V LLMV6N 17 0 83V GOE 69 15 75V V1 43 1 16V LLMV6P 16 2 3V GSC 68 Gnd Gnd 42 1 27V LLMV5N 15 Gnd Gnd 67 0 24V SOE_L 41 1 26V LLMV5P 14 25 6V VGH 26V 66 Gnd Gnd 40 1 26V LLMV4N 13 Gnd Gnd 65 1 66V POL 39 1 18V LLMV4P 12 6V VCOMLFB 64 0V GSP 38 Gnd Gnd 11 6V VCOMLOUT 63 Gnd H_CONV 37 1 23V LLMVCLKN 10 Gnd Gnd 62 3 33V OPT_N 36 1 22V LLMVCLKP 9 8V Z_OUT 61 Gnd ...

Page 93: ...d selection circuits STAND BY STBY 3 5V P8000 pins 9 12 The Main board also develops several B sources on the board LVDS Panel_VCC 12V Not generated but switched from the 12V arriving from the SMPS AUDIO IC8801 1 8V 3 3V BCM IC900 Video Processors 1 2V IC9701 Tru Motion and Local Dimming IC 1 26V_MEMC 1 5V_MEMC D1 5V D1 8V and 3 3V RUN 12V pins 13 19 and 21 24V pins 2 4 TUNER and VSB CIRCUIT Made ...

Page 94: ...nent or Composite These connectors are Mini plug type P8200 To Front IR P7901 To Inverter Secondary P8100 n c P8000 To SMPS See next page for component identification LAN Wireless Media Box Remote P7900 To Inverter Main P2100 to Woofer P2101 to Right Speaker P2000 to Motion Remote P2200 to Logo board To 3D Emitter To T CON 3D P8800 To Left Speaker P1000 n c To T CON 3D ...

Page 95: ...302 X1001 IC901 IC8000 IC301 IC605 Q8004 Q8003 Q8001 IC8002 IC8001 IC8003 IC8007 IC8008 IC9702 IC603 P7901 P7802 P8000 P7803 P2401 25MHz 32 768KHz 10MHz SW8100 Micro Reset IC9703 Q8005 IC8005 LAN RS232 RGB Optical Audio PC Audio HDMI Ft Left Audio HDMI Selector Micro processor Woofer Audio Ft Right Audio 54MHz Panel Vcc Sw IC9701 LG5111 INV_CTL Sw 1 8V Dimming EEPROM NVRAM LVDS Dimming DDR DDR DDR...

Page 96: ...In 3 3 76V Out E Gnd 2 5 1V In 4 10 5V 8 5 17V In 3 5 1V 5 3 3V IC8800 1 8V_AMP Q8001 PANEL_VCC 4 3 33V 6 0 81V IC8004 A2 5V Regulator Pin Regulator Pin Control 1st Driver 5 3 33V 7 5 06V Pin for USB 1 Gnd B 0V 6 5 1V Out 8 0V Gnd 1 n c 2 1 8V Out C 0 68V 7 5 1V Out 2 3 26V B 3 3 3V B E Gnd 8 n c IC8001 D1 2V and A1 2V 3 3 26V B Pin Regulator 4 n c IC9702 1 8V_L Dimming Q8003 PANEL_VCC IC302 USB 1...

Page 97: ...D G IC8100 Q200 S G D Q8301 Q8304 D8307 IC8400 Q8303 Q8300 D8309 Q8305 Q8302 D8306 Q8701 IC8700 IC8401 IC8200 Digital Video Analog Video Q702 D8310 Q8306 Q701 IC602 IC606 Q901 IC604 Q8000 Q8002 Power On Sw DDR DDR DDR_VTT Reg RS232 Buffer EDID RGB EEPROM for Micro HDMI CEC CEC Pull Up Wireless IR_PASS FLASH_WP for IC901 Power On Driver 3 1 2 RGB Sync Wireless Power FET Switch Wireless Buffer Sound...

Page 98: ...1 2 6 HDMI 1 2 0V Gnd 13 0 9V 13 0V 3 3V Dongle In B 2 05V Pin Hot Swap 3 0V Gnd 14 5V 14 3 3V C 2 75V B 4 2V 4 0V Gnd 15 3 3V E Gnd C 0V 5 3 37V IC8401 EDID Data 16 3 3V E Gnd 6 3 37V Pin PC Q901 FLASH_WP 7 0V Gnd 1 0V Gnd Pin for IC901 Q8303 4 5 7 HDMI 8 3 37V 2 0V Gnd B 0V Flash_WP Pin Hot Swap 3 0V Gnd C 3 36V B 0V IC8200 RS232 4 0V Gnd E Gnd C 4 2V Pin Routing 5 0 7V E Gnd 1 0V 6 4 1V Q8000 R...

Page 99: ...Digital Volt meter Main Board X9701 and X1001 Crystal Checks Main Board X9701 and X1001 Crystal Checks 25Mhz MAIN Board 1 6V 1 6V X9701 3 55V p p 4 5V p p IC1001 BCM Overtone X1001 54Mhz 746mV p p IC9701 TruMotion Dimming Crystal Runs when set is On 725mV p p Either leg ...

Page 100: ...101 Crystal Checks Main Board X8100 and X8101 Crystal Checks 32 768KHz MAIN Board X8100 3 48V p p 2 46V p p IC8100 Micro Crystal 1 47V Can not read A Waveform on left side Either leg Runs all the time Top leg Bottom leg X8101 1 8V 3V p p Runs all the time ...

Page 101: ...Backlight setting and Intelligent Sensor room light condition Range 0 37V to 3 3V P8000 Main Board to P201 SMPS P8000 Odd Pins Front Row Open 0V 0V ERROR 24 Open n c n c n c 23 Open n c n c n c 22 Open 11 88V 0V 12V 21 Open 0 37V 3 3V 0V 1 P DIM 20 Open 11 881V 0V 12V 19 1 61V 2 92V 0V INV ON 18 Open 11 88V 0V 12V 17 Open n c n c n c 16 Gnd Gnd Gnd Gnd 13 15 1 18V 3 41V 3 45V 3 5V 9 12 Gnd Gnd Gnd...

Page 102: ...SET 46 0 97V 1 14V RRXA3 29 1 15V 1 26V RRXB4 12 n c n c n c 45 1 15V 1 26V RRXA4 28 0 97V 1 09V RRXB4 11 Open 0V 3DTV 44 0 97V 1 08V RRXA4 27 Gnd Gnd Gnd 10 1 03V 0V 3D_DIM 43 Gnd Gnd Gnd 26 Gnd Gnd Gnd 9 1 03V 0 05V 3D_DIM_2 42 n c n c n c 25 Gnd Gnd Gnd 8 n c n c n c 41 1 15V 1 19V RRXB0 24 Gnd Gnd Gnd 7 1 15V 1 17V RRXA0 40 0 97V 1 19V RRXB0 23 Gnd Gnd Gnd 6 0 97V 1 19V RRXA0 39 1 15V 1 19V RR...

Page 103: ... Board To J1 IR Board P8200 1 1 Clock pulses only present when Intelligent Sensor is turned on 3 7V p p 2 IR pulses 2 5V p p Open 0V 0V LED_R BUZZ 12 0 51V 3 33V 0V 3 3V_Normal 11 Gnd Gnd Gnd Gnd 10 Open 1 52V 1 57V 2 IR 9 2 2V 0 82V 0V LED_LOGO 8 Gnd Gnd Gnd Gnd 7 1 18V 3 37V 3 46V 3 5V_ST 6 1 86V 2 7V 2 76V KEY 2 5 1 86V 3 37V 3 45V KEY 1 4 Gnd Gnd Gnd Gnd 3 Open 3 37V 3 45V 1 SDA 2 Open 3 37V 3...

Page 104: ...ND GND GND 7 1 05V 0 42V 0V M1_SCLK 6 1 05V 0 04V 3 26V 0V M1_MOSI 5 GND GND GND GND 4 1 05V 0 42V 0V M0_SCLK 3 1 05V 0 04V 3 26V 0V M0_MOSI 2 1 05V 0 059V 0V L_VS 1 Diode Check Run White to Black STBY Label Pin P7901 Main to Inverter Secondary CN103 Gnd Gnd Gnd Gnd 8 1 07V 0V 0V M3_SCLK 7 1 07V 0V 0V M3_MOSI 6 Gnd Gnd Gnd Gnd 5 1 08V 0 23V 0V M2_SCLK 4 1 08V 0 04V 3 2V 0V M2_MOSI 3 Gnd Gnd Gnd Gn...

Page 105: ...d on by Q8700 front side of the board Q8700 turned on by Microprocessor pin 38 Diode Mode values taken with all Connectors Removed Gnd Gnd 0V Gnd 19 20 Open 3 3V 0 67V IR 18 Gnd Gnd 0V Gnd 17 1 8V 3 3V 0V Wireless_TX 16 1 8V 3 3V 0V Wireless_RX 15 Gnd Gnd 0V Gnd 14 1 04V 3 3V 0V I2C_SDA 13 1 04V 3 3V 0V I2C_SCL 12 Gnd Gnd 0V Gnd 11 Open 3 3V 0V n c 10 Gnd Gnd 0V Gnd 9 Open 3 3V 0V Interrupt 8 2 8V...

Page 106: ...n with all Connectors Removed Gnd Gnd Gnd Gnd 6 Open 3 32V 0V E_TDI 5 Open 0 35V 0V E_TMS 4 Open 3 33V 0V E_TDO 3 Open 0V 0V E_TCK 2 Gnd Gnd Gnd Gnd 1 Diode Check Run SBY LABEL Pin P7803 Main To T CON 3D P807 Gnd Gnd Gnd Gnd 4 Gnd Gnd Gnd Gnd 3 Open 11 55V 0V PANEL_VCC 2 Open 11 55V 0V PANEL_VCC 1 Diode Check Run SBY LABEL Pin P7802 Main To T CON 3D P803 P7803 P7802 1 1 ...

Page 107: ...nd Gnd Gnd Gnd 8 Open 2 98V 0V DD 7 Open 2 98V 0V DC 6 Open 3 05V 0V M_RFModule_Reset 5 Open 3 3V 0V M_REMOTE_TX 4 Open 3 3V 0V M_REMOTE_RX 3 Gnd Gnd Gnd Gnd 2 0 51V 3 33V 0V 3 3V_Normal 1 Diode Check Run STBY Label Pin P2000 MAIN Board To J4 Ft IR for Motion Remote Sensor Open 0 03V 0V 3D_SYNC 3 Gnd Gnd Gnd Gnd 2 Open 5 1V 0V 5V_EMITTER 1 Diode Check Run SBY LABEL Pin P2401 Main To 3D Emitter P24...

Page 108: ...h all Connectors Removed Open 12 35V 0V SPK_Woofer 2 Open 12 35V 0V SPK_Woofer 1 Diode Check Run SBY LABEL Pin P2100 Main To Speaker Woofer Open 12 35V 0V SPK2 R 4 Open 12 35V 0V SPK2 R 3 Open 12 35V 0V SPK2 R 2 Open 12 35V 0V SPK2 R 1 Diode Check Run SBY LABEL Pin P2101 Main To Speaker Right Open 12 35V 0V SPK L 4 Open 12 35V 0V SPK L 3 Open 12 35V 0V SPK R 2 Open 12 35V 0V SPK R 1 Diode Check Ru...

Page 109: ...Pin 25 Q8800 Mute Active Low Location Top left of IC8801 Normal 3 3V Collector to Pin 25 of all three ICs IC8800 Amp 1 8V 1 This general information covers IC2101 Woofer Audio Out IC2100 Front Right Audio Out and IC8801 Front Left Audio Out Speaker Output Connectors P2100 Woofer Audio Out P2101 Front Right Audio Out and P8800 Front Left Audio Out Note 3 3V input pin 3 from IC8005 3 3V_Normal Regul...

Page 110: ...in Stand By During run pin 9 reads 1 54V The IR pulses 1 6V p p J1 pin 9 are sent to P8200 on the Main board and on to the Microprocessor IC8101 via pin 16 The Intelligent Sensor communicates with the Micro Video Processor IC900 BCM Chip via clock and data lines SCL1 and SDA1 arriving on connector J1 from P8200 pins 1 and 2 on the Main board The Front Power LEDs are controlled by these same Clock ...

Page 111: ...ont IR Board Connections Identified Front IR Board Connections Identified J1 To Main Board p n EBT61093402 J2 J4 To Key Board Motion Remote Motion Remote Sensor IR Sensor Intelligent Sensor Front of TV Back of TV Power LEDs LED Driver ...

Page 112: ...IN 1 Pulses only present when Intelligent Sensor is turned on 3 7V p p 2 IR pulses 2 5V p p Open 0V 0V LED_R BUZZ 12 Open 3 33V 0V 3 3V_Normal 11 Gnd Gnd Gnd Gnd 10 Open 1 52V 1 57V 2 IR 9 Open 0 82V 0V LED_LOGO 8 Gnd Gnd Gnd Gnd 7 Open 3 37V 3 46V 3 5V_ST 6 Open 2 7V 2 76V KEY 2 5 Open 3 37V 3 45V KEY 1 4 Gnd Gnd Gnd Gnd 3 Open 3 37V 3 45V 1 SDA 2 Open 3 37V 3 45V 1 SCL 1 Diode Check Run STBY Lab...

Page 113: ... Diode Mode values taken with all Connectors Removed J2 Front IR to Key Board Gnd Gnd Gnd Gnd 4 Gnd 2 7V 2 76V Key 2 3 Gnd Gnd Gnd Gnd 2 Gnd 3 37V 3 45V Key 1 1 Diode Check Run STBY Label Pin 1 82K Key 2 POWER 270Ω Key 2 INPUT 1 82K Key 1 MENU 270Ω Key 1 ENTER 4 7K Key 1 VOL 10K Key 1 VOL 4 7K Key 2 CH 10K Key 2 CH RESISTANCE KEY LINE BUTTON Resistance when key is pressed ...

Page 114: ...mote around the pointer moves with the movement of the remote When the pointer is placed over a selectable button you can press the center Enter button and active the object This makes navigation much easier You can also adjust the volume change channels and mute the audio with the Motion Remote A convenient wrist band can be attached to the remote to avoid dropping and damaging the remote The Mot...

Page 115: ...heck Diode Mode values taken with all Connectors Removed J4 Front IR to Main Board P2000 Motion Remote Gnd Gnd Gnd Gnd 8 1 96V 2 98V 0V DD 7 1 96V 2 98V 0V DC 6 Open 3 05V 0V M_RFModule_Reset 5 1 95V 3 3V 0V M_REMOTE_TX 4 1 95V 3 3V 0V M_REMOTE_RX 3 Gnd Gnd Gnd Gnd 2 1 17V 3 33V 0V 3 3V_Normal 1 Diode Check Run STBY Label Pin ...

Page 116: ...ECTION INVISIBLE SPEAKER SECTION The 47LX9500 contains the 8 Magnet Invisible Speaker system The Full Range Speakers point downward so there is no front viewable speaker grill or air ports Full Range Speaker p n EAB61353002 Back View Front View Woofer ...

Page 117: ...g Manual and Adobe version of the Training Manual The Adobe version of this Training Manual allows the viewer to The Adobe version of this Training Manual allows the viewer to zoom in and out making reading of the small text easier zoom in and out making reading of the small text easier This Power Point shows a graphical representation of the 11 X 17 This Power Point shows a graphical representati...

Page 118: ...RRXBCK 35 Gnd Gnd Gnd 34 1 67V 1 14V RRXB2 33 1 67V 1 2V RRXB2 32 1 67V 1 16V RRXB1 31 1 67V 1 19V RRXB1 30 1 67V 1 19V RRXB0 29 1 67V 1 19V RRXB0 28 n c n c n c 27 Gnd Gnd Gnd 26 1 67V 1 08V RRXA4 25 1 67V 1 26V RRXA4 24 Diode Check Run Label Pin 1 67V 1 14V RRXA3 23 1 67V 1 20V RRXA3 22 Gnd Gnd Gnd 21 1 67V 1 20V RRXACK 20 1 67V 1 16V RRXACK 19 Gnd Gnd Gnd 18 1 67V 1 14V RRXA2 17 1 67V 1 22V RRX...

Page 119: ...ck or White Screen 1V per div 4MSes 3 66V p p Inverter Main CN11 pin 09 Black Screen Inverter Main CN11 pin 11 White Screen 1V per div 4MSes 3 68V p p Inverter Main CN11 pin 11 Black Screen 1V per div 4MSes 3 88V p p 1V per div 4MSes 3 56V p p Inverter Secondary CN103 pin 03 White Screen 1V per div 4MSes 3 56V p p Inverter Secondary CN103 pin 02 Black Screen Inverter Secondary CN103 pin 01 Black o...

Page 120: ...V 1 Gnd B 0V 6 5 1V Out 6 3 34V PWR On Off2 Ctl 2 1 8V Out C 0 68V 7 5 1V Out 7 5 17V In 3 3 3V B E Gnd 8 n c 8 5 17V In Q8700 Wireless PWR Q8700 Wireless PWR Q8800 AMP Mute to Dongle In Turns on Q8701 Dongle Out Turns on Q8701 AMP_MUTE1 IC8801 B 0 66V 0 0V w Dongle In B 0V 0 0V w Dongle Out B 0V C 0 14V 24V w Dongle In C 24 6V 24V w Dongle Out C 3 34V E Gnd E Gnd E Gnd 47LX9500 MAIN BACK SIDE SIM...

Page 121: ...6V 2 6 03V 3 3 15V 4 0 17V 5 2 72V 6 3 3V 7 0V 8 25 6V 9 24 7V 10 1 26V 11 Gnd 12 5 54V 13 0V 14 0V 15 Gnd 16 0V 17 1 26V 18 4 24V 19 Gnd 20 Gnd 21 1 27V 22 11 45V 23 3 4V 24 3 4V 25 11 38V 26 11 38V 27 11 07V 28 0V 29 4 24V 30 1 9V 31 0 59V 32 3 3V 33 3 13V 34 0V 35 0V 36 0V 37 11 33V 38 11 37V 39 n c 40 n c 41 1 27V 42 16V 43 5 96V 44 5 96V 45 5 96V 46 5 96V 47 Gnd 48 5 97V 1 0 59V 2 3 3V 3 3 3V...

Page 122: ...47LX9500 47LX9500 Conclusion Conclusion Page Page This concludes the 47LX9500 training session Direct View LCD Direct View LCD ...

Reviews: