background image

APPENDIX

104

APPENDIX

EXTERNAL CONTROL THROUGH RS-232C

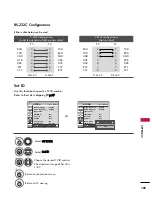
RS-232C Setup

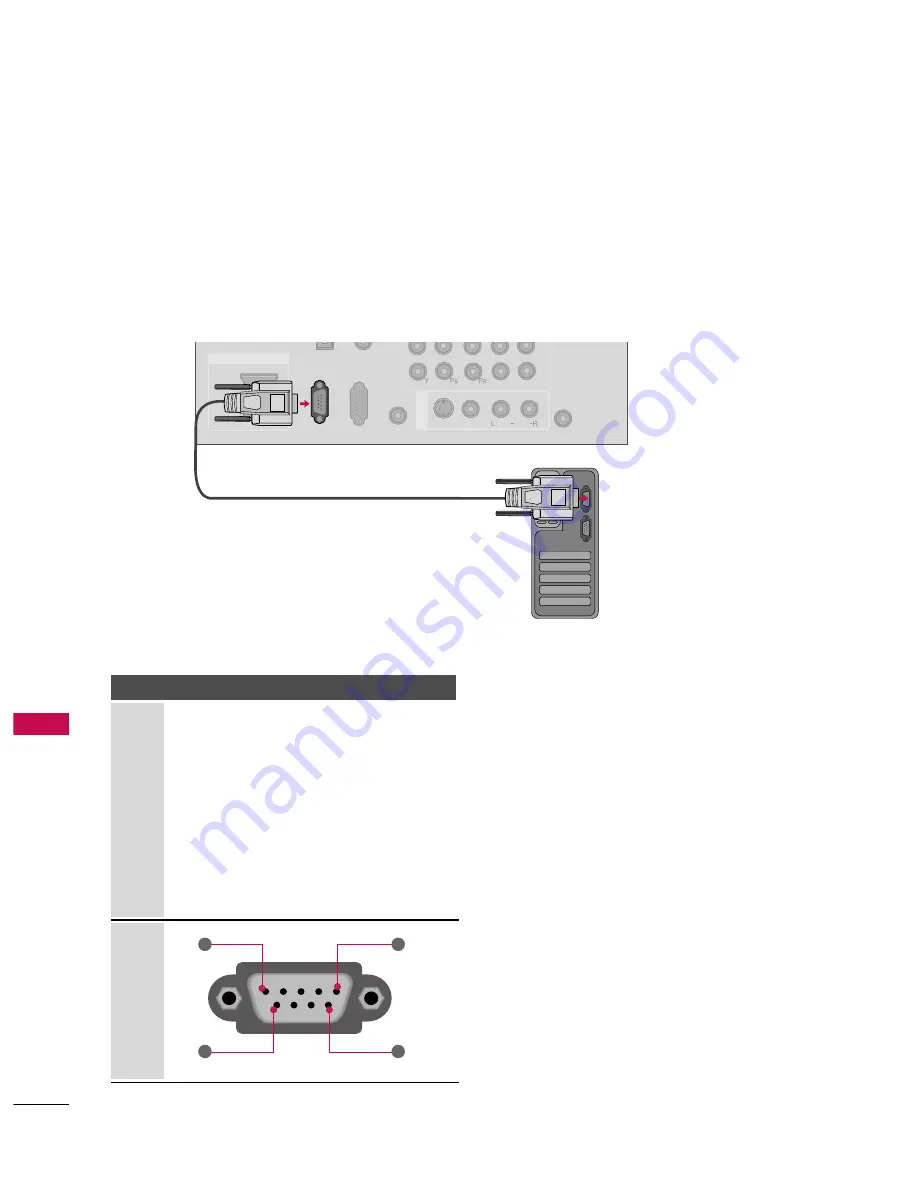
The RS-232C port allows you connect the RS-232C input jack to an external control device (such as a computer
or an A/V control system) to control the TV’s functions externally.

Note: RS-232C on this unit is intended to be used with third party RS-232C control hardware and software.

The instructions below are provided to help with programming software or to test functionality using telenet
software.

1

2

L

R

RGB(PC)

REMOTE

CONTROL IN

AUDIO

VIDEO

S-VIDEO

/MONO

A

V

 IN 1

HDMI/DVI IN 

2

1

ANTENNA

 IN

RS-232C IN

(CONTROL

 & SER

VICE)

Type of Connector; D-Sub 9-Pin Male

No. Pin 

Name

1 No 

connection

2

RXD (Receive data)

3

TXD (Transmit data)

4

DTR (DTE side ready)

5

GND

6

DSR (DCE side ready)

7

RTS (Ready to send)

8

CTS (Clear to send)

9

No Connection

1

6

5

9

PC

Communication Parameters

Baud rate : 9600 bps (UART)

Data length : 8 bits

Parity : None

Stop bit : 1 bit

Communication code : ASCII code

Use a crossed (reverse) cable.

Summary of Contents for 32PQ10C

Page 1: ...other features will increase power consumption that could exceed the limits necessary to quality for Energy Star rating Please read this manual carefully before operating your set Retain it for future reference Record model number and serial number of the set See the label attached on the back cover and quote t tion to your dealer when you require service PLASMA TV OWNER S MANUAL 42PQ20 50PQ20 42P...

Page 2: ... modifications not expressly approved by the party responsible for compliance could void the user s authority to operate the equipment CAUTION Do not attempt to modify this product in any way without written authorization from LG Electronics Unauthorized modification could void the user s authority to operate this product The lightning flash with arrowhead symbol within an equilateral triangle is ...

Page 3: ...o your outlet consult an electrician for replacement of the obsolete outlet Protect the power cord from being walked on or pinched particularly at plugs convenience receptacles and the point where they exit from the apparatus Only use attachments accessories specified by the manufacturer Use only with the cart stand tripod bracket or table specified by the manufacturer or sold with the apparatus W...

Page 4: ...pon Pay particular attention to plugs wall outlets and the point where the cord exits the appliance Do not make the TV with the power cord plugged in Do not use a damaged or loose power cord Be sure do grasp the plug when unplugging the power cord Do not pull on the power cord to unplug the TV WARNING To reduce the risk of fire or electrical shock do not expose this product to rain moisture or oth...

Page 5: ...e to carry larger TVs Do not press against or put stress on the front panel of the TV V Ve en nt ti il la at ti io on n Install your TV where there is proper ventila tion Do not install in a confined space such as a bookcase Do not cover the product with cloth or other materials e g plastic while plugged in Do not install in excessively dusty places If you smell smoke or other odors coming from th...

Page 6: ...Turning On TV 32 Channel Selection 32 Volume Adjustment 32 Initial Setting 33 Quick Menu 35 Favorite Channel Setup 36 On Screen Menus Selection 37 Channel Setup Auto Scan Auto Tuning 38 Add Delete Channel Manual Tuning 39 Channel Editing 40 Input List 41 Input Label 42 AV Mode 43 SIMPLINK 44 USB Entry Modes 46 Photo List 47 Music List 51 PICTURE CONTROL Picture Size Aspect Ratio Control 54 Energy ...

Page 7: ...n Mode Analog Broadcasting System Captions 77 Digital Broadcasting System Captions 78 Caption Option 79 TIME SETTING Clock Setting Auto Clock Setup 80 Manual Clock Setup 81 Auto On Off Time Setting 82 Sleep Timer Setting 83 PARENTAL CONTROL RATINGS Set Password Lock System 84 Channel Blocking 87 Movie TV Rating 88 Downloadable Rating 93 External Input Blocking 94 Key lock 95 APPENDIX Troubleshooti...

Page 8: ... a prolonged period 2 or more hours for LCD 1 or more hours for Plasma Image burn can also occur on the letterboxed areas of your TV if you use the 4 3 aspect ratio setting for an extended period IMPORTANT INFORMATION TO PREVENT IMAGE BURN BURN IN ON YOUR TV SCREEN Image shown may differ from your TV It is the movie quality mode for watching a movie just like at the theater even at home You can wa...

Page 9: ...6 7 8 0 9 FLASHBK P A G E SL EE P PIC TURE CD Manual Bolts for stand assembly Refer to P 1 1 x 4 Cable Holder O Op pt ti io on n E Ex xt tr ra as s Wipe spots on the exterior only with the polishing cloth Do not wipe roughly when removing stain Excessive pressure may cause scratch or discoloration Polishing Cloth This feature is not available for all models D sub 15 pin Cable When using the VGA D ...

Page 10: ...Illuminates red in standby mode Illuminates blue when the TV is switched on Remote Control Sensor I n t e l l i g e n t Sensor Adjusts picture according to the s u r ro u n d i n g conditions G G When the TV cannot be turned on with the remote control press the main power button on the TV and then turn on the TV with the remote control When the power is turned off with the main power button on the...

Page 11: ...0PS30 Remote Control Sensor POWER Button Power Standby Indicator Illuminates red in standby mode Illuminates blue when the TV is switched on 42 50PQ60 50 60PS60 CH VOL MENU INPUT ENTER CH VOL CHANNEL E E D D Buttons VOLUME Buttons ENTER Button MENU Button INPUT Button POWER Button Remote Control Sensor Intelligent Sensor Adjusts picture according to the surrounding condi tions Intelligent Sensor A...

Page 12: ...stems Includes an optical connection Note In standby mode this port do not work RS 232C IN CONTROL SERVICE PORT Used by third party devices AUDIO RGB DVI 1 8 headphone jack for analog PC audio input RGB PC Analog PC Connection Uses a D sub 15 pin cable VGA cable REMOTE CONTROL PORT For a wired remote control COMPONENT IN Analog Connection Supports HD Uses a red green and blue cable for video red a...

Page 13: ...reen from damage 1 Loose the bolts from TV 2 Detach the stand from TV 3 After removing the stand install the included p pr ro ot te ec ct ti io on n c co ov ve er r over the hole for the stand Press the P PR RO OT TE EC CT TI IO ON N C CO OV VE ER R into the TV until you hear it click Protection Cover G G When assembling the desk type stand check whether the bolt is fully tightened If not tight en...

Page 14: ... not available for all models After installing the TV you can adjust the TV manually to the left or right direction by 20 degrees to suit your viewing position G G Ensure adequate ventilation by following the clearance recommendations G G Do not mount near or above any type of heat source CAUTION CABLE ARRANGEMENT Image shown may differ from your TV After Connecting the cables as necessary install...

Page 15: ...nt kit a detailed installation manual and all parts necessary for assembly are provided G G Do not use screws longer then the standard dimen sion as they may cause damage to the inside to the TV G G For wall mounts that do not comply with the VESA standard screw specifications the length of the screws may differ depending on their specifica tions G G Do not use screws that do not comply with the V...

Page 16: ...ckets bolts and tighten them securely in the upper holes Secure the wall brackets with the bolts not provided as parts of the product must purchase separately to the wall Match the height of the bracket that is mounted on the wall to the holes in the product Ensure the eye bolts or brackets are tightened securely Use a sturdy rope not provided as parts of the product must pur chase separately to t...

Page 17: ...al Wire 75 ohm Single family Dwellings Houses Connect to wall jack for outdoor antenna Be careful not to bend the copper wire when connecting the antenna Copper Wire To improve the picture quality in a poor signal area please purchase a signal amplifier and install properly If the antenna needs to be split for two TV s install a 2 Way Signal Splitter If the antenna is not installed properly contac...

Page 18: ...fer to the owner s manual for the digital set top box operation Select the C Co om mp po on ne en nt t 1 1 input source on the TV using the I IN NP PU UT T button on the remote control If connected to C CO OM MP PO ON NE EN NT T I IN N2 2 input select the C Co om mp po on ne en nt t 2 2 input source on the TV To prevent the equipment damage never plug in any power cords until you have finished con...

Page 19: ... s manual for the digital set top box Select the H HD DM MI I1 1 H HD DM MI I2 2 H HD DM MI I3 3 or H HD DM MI I4 4 Only 42 50PQ60 50 60PS60 input source on the TV using the I IN NP PU UT T button on the remote control 2 1 HDMI DTV Horizontal Vertical Frequency KHz Frequency Hz 31 469 59 94 31 50 60 00 44 96 59 94 45 00 60 00 33 72 59 94 33 75 60 00 27 00 24 00 33 75 30 00 67 43 59 94 67 50 60 00 ...

Page 20: ...put of the digital set top box to the H HD DM MI I D DV VI I I IN N1 1 2 2 H HD DM MI I I IN N3 3 or H HD DM MI I I IN N4 4 Only 42 50PQ60 50 60PS60 jack on the TV Connect the audio output of the digital set top box to the A AU UD DI IO O R RG GB B D DV VI I jack on the TV 1 How to connect 2 How to use Turn on the digital set top box Refer to the owner s man ual for the digital set top box Select ...

Page 21: ...n PB blue and PR red Connect the audio outputs of the DVD to the C CO OM MP PO ON NE EN NT T I IN N A AU UD DI IO O1 1 jacks on the TV 1 How to connect 2 How to use Turn on the DVD player insert a DVD Select the C Co om mp po on ne en nt t 1 1 input source on the TV using the I IN NP PU UT T button on the remote control If connected to C CO OM MP PO ON NE EN NT T I IN N 2 2 input select the C Co o...

Page 22: ...the TV using the I IN NP PU UT T button on the remote control Refer to the DVD player s manual for operating instructions 2 1 1 2 VIDEO AUDIO L R RGB PC REMOTE CONTROL IN AN AUDIO VIDEO S VIDEO MONO AV IN 1 COMPONENT IN L R S VIDEO AUDIO 1 2 HDMI DVI IN 2 1 CONTROL SERVICE HDMI DVD OUTPUT 1 Connect the S VIDEO output of the DVD to the S S V VI ID DE EO O input on the TV Connect the audio outputs o...

Page 23: ... ANT OUT Wall Jack Antenna 1 2 Connect the RF antenna out socket of the VCR to the A AN NT TE EN NN NA A I IN N socket on the TV Connect the antenna cable to the RF antenna in socket of the VCR 1 How to connect 2 How to use Set VCR output switch to 3 or 4 and then tune TV to the same channel number Insert a video tape into the VCR and press PLAY on the VCR Refer to the VCR owner s manual 2 1 ...

Page 24: ...the remote control G G If you have a mono VCR connect the audio cable from the VCR to the A AU UD DI IO O L L M MO ON NO O jack of the TV NOTE 1 2 VIDEO AUDIO L R RGB PC DIO B DVI REMOTE CONTROL IN ANTEN IN AUDIO VIDEO S VIDEO MONO AV IN 1 COMPONENT IN L R S VIDEO VIDEO OUTPUT SWITCH ANT IN ANT OUT 1 S Video Connection Connect the S VIDEO output of the VCR to the S S V VI ID DE EO O input on the T...

Page 25: ...O OUT AUDIO RGB DVI C HDMI DVI IN 2 1 1 2 G G When connecting with external audio equipments such as amplifiers or speakers you can turn the TV speakers off in the menu G G p p 7 72 2 NOTE G Do not look into the optical output port Looking at the laser beam may damage your vision G G Block the SPDIF out optical about the contents with ACP Audio Copy Protection function CAUTION Connect one end of t...

Page 26: ... PC C input source on the TV using the I IN NP PU UT T button on the remote control Connect the VGA output of the PC to the R RG GB B P PC C jack on the TV Connect the PC audio output to the A AU UD DI IO O R RG GB B D DV VI I jack on the TV 1 How to connect 2 1 2 How to use Turn on the PC and the TV Select the H HD DM MI I1 1 H HD DM MI I2 2 H HD DM MI I3 3 or H HD DM MI I4 4 Only 42 50PQ60 50 60...

Page 27: ...G Avoid keeping a fixed image on the screen for a long period of time The fixed image could become permanently imprinted on the screen G G The synchronization input form for Horizontal and Vertical frequencies is separate G G Depending on the graphics card some resolu tion settings may not allow the image to be positioned on the screen properly NOTES Supported Display Specifications RGB PC HDMI PC...

Page 28: ...ed Select P PI IC CT TU UR RE E Select S Sc cr re ee en n R RG GB B P PC C Select R Re es so ol lu ut ti io on n Select the desired resolution 1024 x 768 1280 x 768 1360 x 768 Auto config Resolution G Position Size Phase Reset Screen Move Prev MENU 1MENU 3 4 2 ENTER ENTER ENTER 5 ENTER Enter Move PICTURE Picture Mode Standard Contrast 50 Brightness 50 Sharpness 50 Color 50 Tint 0 Advanced Control ...

Page 29: ... Resolution Position Size Phase Reset Screen Move Prev MENU To Set 3 2 ENTER ENTER Select Y Ye es s 4 ENTER Start Auto Configuration 5 ENTER Select P PI IC CT TU UR RE E 1MENU If the position of the image is still not correct try Auto adjustment again If picture needs to be adjusted again after Auto adjustment in RGB PC you can adjust the P Po os si it ti io on n S Si iz ze e or P Ph ha as se e En...

Page 30: ...n n This function is to adjust pic ture to left right and up down as you prefer S Si iz ze e This function is to minimize any vertical bars or stripes visible on the screen background And the horizontal screen size will also change The S Si iz ze e adjustment range is 3 30 0 3 30 0 P Ph ha as se e This function allows you to remove any horizontal noise and clear or sharpen the image of characters ...

Page 31: ...n RGB PC mode Select R Re es se et t 3 ENTER Select P PI IC CT TU UR RE E Select S Sc cr re ee en n R RG GB B P PC C 1MENU 2 ENTER Select Y Ye es s 4 ENTER 5 ENTER Auto config Position Resolution Size Phase Reset G Screen Move Prev MENU Initialize Settings Enter Move PICTURE Picture Mode Standard Contrast 50 Brightness 50 Sharpness 50 Color 50 Tint 0 Advanced Control Reset Screen RGB PC R G E Yes ...

Page 32: ...g mode of the TV Opens the list of Quick Menu options G G p p 5 51 1 Displays the main menu Rotates through inputs Also switches the TV on from standby G G p p 5 51 1 Used to enter a program number for multiple program channels such as 2 1 2 2 etc Displays the channel list Tune to the last channel viewed Control USB menu PHOTO LIST and MUSIC LIST Control the SIMPLINK compatible devices See a list ...

Page 33: ...WN PAGE UP DOWN Navigate the on screen menus and adjust the system settings to your preference Allows the user to move return one step in an interactive application or other user interaction function Shows the present screen information It helps you select and set images and sounds when connecting AV devices G G p p 4 43 3 Increase decrease the sound level Scroll through the programmed Favorite ch...

Page 34: ...s the TV on from standby G G p p 5 51 1 Adjust the the power saving mode of the TV Adjusts the volume Switch the sound on or off G G p p 4 40 0 Changes the channel Move from one full set of screen information to the next one Control USB menu PHOTO LIST and MUSIC LIST Control the SIMPLINK compatible devices Opens the list of Quick Menu options G G p p 5 51 1 See a list of AV devices connected to TV...

Page 35: ... preference Displays the main menu Allows the user to move return one step in an interactive application or other user interac tion function DASH LIST FLASHBK THUMBSTICK Up Down Left Right ENTER MENU RETURN NUMBER button Installing Batteries Open the battery compartment cover on the back and install the batteries matching correct polarity with with Install two 1 5V AAA batteries Do not mix old or ...

Page 36: ...on the remote control Select the viewing source by using the I IN NP PU UT T button on the remote control This TV is programmed to remember which power state it was last set to even if the power cord is out When finished using the TV press the P PO OW WE ER R button on the remote control The TV reverts to standby mode 1 2 3 Press the C CH H or or N NU UM MB BE ER R buttons to select a channel numb...

Page 37: ...t the P Pi ic ct tu ur re e menu P Pi ic ct tu ur re e m mo od de e manually while inspecting the TV but the TV will automatically return to preset in store mode after 5 minutes Select Home Use to use this TV at home Select English Español or Français 1 2 ENTER Next Español Français Language English Select A Au ut to o or M Ma an nu ua al l Select desired time option 1 3 ENTER 2 Year Current Time ...

Page 38: ...i A Au ud di io o Changes the audio language Digital signal S SA AP P Selects MTS sound Analog signal S Sl le ee ep p T Ti im me er r Select the amount of time before your TV turns off automatically E Ej je ec ct t U US SB B Select Eject USB in order to eject USB device Your TV s OSD On Screen Display may differ slightly from what is shown in this manual Q Menu Quick Menu is a menu of features whi...

Page 39: ...el to the Favorite List Select D De el l A Ad dd d F Fa av v To tune to a favorite channel press the F FA AV V Favorite button repeatedly 2Q MENU 1 CH 1 4 5 6 7 8 0 9 2 3 Select your desired channel or 3 Select F Fa av vo or ri it te e 4Q MENU Return to TV viewing Q Menu Close Vivid Standard Off English Off Eject Aspect Ratio Picture Mode Sound Mode Caption Multi Audio Sleep Timer Del Add Fav Ejec...

Page 40: ...an check which programs are stored in the memory by displaying the program list Displayed when the Locked channel Mini Glossary E Channel List E EXIT DTV DTV 20 3 2 BBC 3 1 1 BBC 30 1 3 BBC DTV Select a channel 2 1 LIST Display the channel list 3 CH P A G E Turn the pages 4 LIST Return to TV viewing ENTER ...

Page 41: ...e Auto Volume Off Clear Voice On Level 0 Balance 0 Sound Mode Standard SRS TruSurround XT Off Treble 50 Bass 50 Reset AUDIO E Enter Move Clock Off Time Off On Time Off Sleep Timer Off TIME Enter Move Photo List Music List USB Enter Move TV AV1 AV2 Component1 Component2 RGB PC HDMI1 HDMI2 HDMI3 INPUT E Enter Move Lock System Off Set Password Block Channel Movie Rating TV Rating Children TV Rating G...

Page 42: ...nging the next channel run A Au ut to o T Tu un ni in ng g C Cl lo os se e Stop A Au ut to o T Tu un ni in ng g 1MENU 3 2 ENTER ENTER 5 ENTER A password is required to gain access to Auto Tuning menu if the Lock System is turned on 6RETURN Return to the previous menu MENU Return to TV viewing Enter Move CHANNEL Auto Tuning Manual Tuning Channel Edit Enter Move CHANNEL Auto Tuning Manual Tuning Cha...

Page 43: ... T TV V C CA AD DT TV V or C CA AT TV V Select channel you want to add or delete 3 ENTER 4 Select A Ad dd d or D De el le et te e 5 ENTER A password is required to gain access to Manual Tuning menu if the Lock System is turned on 6RETURN Return to the previous menu MENU Return to TV viewing Enter Move CHANNEL Auto Tuning Manual Tuning Channel Edit Enter Move CHANNEL Auto Tuning Manual Tuning Chann...

Page 44: ...the channels deleted from the Custom List are displayed in gray Once a channel is highlighted you can add or delete the channel by referring to the small window at the top right corner of the screen Channel Editing Select C CH HA AN NN NE EL L 1MENU 2 ENTER Select C Ch ha an nn ne el l E Ed di it t RETURN Return to TV viewing Return to the previous menu 5MENU Enter Move CHANNEL Auto Tuning Manual ...

Page 45: ...e broadcasts A AV V 1 1 2 2 Select them to watch a VCR or other external equipment C Co om mp po on ne en nt t 1 1 2 2 Select them to watch DVD or a Digital set top box R RG GB B P PC C Select it to view PC input H HD DM MI I1 1 4 4 or 1 1 3 3 Select them to watch high definition devices TV AV1 AV2 Component1 Component2 Input Label Q MENU Exit Select a desired input source except T TV V Then you c...

Page 46: ...ect the source Select the label 1 2Q MENU 3RETURN Return to the previous menu MENU Return to TV viewing With using INPUT button Enter Move OPTION Menu Language English Audio Language English Input Label SIMPLINK On Key Lock Off Caption Off Demo Mode On ISM Method Normal Set ID 1 Enter Move OPTION Menu Language English Audio Language English Input Label SIMPLINK On Key Lock Off Caption Off Demo Mod...

Page 47: ...t the desired source If you select C Ci in ne em ma a C Ci in ne em ma a in AV mode C Ci in ne em ma a will be selected both for PICTURE menu Picture Mode and AUDIO menu Sound Mode respectively If you select O Of ff f in AV mode the P Pi ic ct tu ur re e M Mo od de e and S So ou un nd d M Mo od de e return to previous selected value 2RETURN Return to TV viewing Cinema or ...

Page 48: ... switch the Input source with the INPUT button on the remote control the SIMPLINK device will stop G G When you select a device with home theater functionality the sound output automatically switches to the home theater speakers G G If a connected SIMPLINK home theater system doesn t play the audio from the TV connect the DIGITAL AUDIO OUT terminal on the back of the TV to the DIGITAL AUDIO IN ter...

Page 49: ...nction Note To operate SIMPLINK an HDMI cable over Version 1 3 with CEC function should be used CEC Consumer Electronics Control SIMPLINK Menu T TV V v vi ie ew wi in ng g Switch to the previous TV channel regardless of the current mode D DI IS SC C p pl la ay yb ba ac ck k Select and play discs When multiple discs are available the titles of discs are conveniently displayed at the bottom of the s...

Page 50: ...se only a USB storage device which was formatted as a FAT or NTFS file system provided with the Windows operating system In case of a storage device formatted as a different utility pro gram which is not supported by Windows it may not be recognized G G Please connect power to a USB storage device which requires an external power supply If not the device may not be recognized G G Please connect a ...

Page 51: ...nt page Total pages Total number of marked photos Usable USB memory Corresponding buttons on the remote control Supported photo file JPG You can play JPG files only Only baseline scan is supported among JPG USB Device Page 1 1 No Marked Photo List Up Folder Free Space 150MB Move PopUp Menu Move Page Mark 2Folders 4Files 3 4 5 1 1 2 Select U US SB B Select P Ph ho ot to o L Li is st t 2 Top Folder ...

Page 52: ...marked photos If no photos are marked you can view all photos individually or all photos in the folder in a slide show TOP FOLDER Drive1 4 Select the desired Popup menu ENTER ENTER ENTER Move Move Page Mark CH FAV PopUp Menu Move Move Page Mark CH FAV PopUp Menu Drive1 Drive1 Butterfly Upper Photo X Box 1366x768 125KB View Mark All Delete Close When you select a file not folder this PopUp menu is ...

Page 53: ...t folder or drive Select the desired photos Show the Popup menu 5 Select V Vi ie ew w The selected photo is displayed in full size 2 3 1 4 ENTER ENTER ENTER USB Device Page 1 1 No Marked Photo List Up Folder Free Space 150MB 2Folders 4Files USB Device Page 1 1 No Marked Photo List Up Folder Free Space 150MB 1366x768 125KB TOP FOLDER Drive1 Drive1 Drive1 Butterfly 1366x768 125KB View Mark All Delet...

Page 54: ...m of 4 hours After 4 hours the slide show will end and go to TV mode or external input mode G G B BG GM M Listen to music while viewing photos in full size Set the BGM device and album in O Op pt ti io on n G G R Ro ot ta at te e Rotate photos Rotates the photo 90 180 270 360 clockwise G G D De el le et te e Delete photos G G O Op pt ti io on n Set values for S Sl li id de e S Sp pe ee ed d and M ...

Page 55: ...00 24000 22050Hz MPEG2 5 16 48KHz Moves to upper level file Preview If any album jacket for the file exists this jack et is displayed Current page Total pages Total number of marked musics Usable USB memory Corresponding buttons on the remote control 1 3 4 5 6 2 Select U US SB B Select M Mu us si ic c L Li is st t 1 2 MENU ENTER ENTER USB Device Music List Up Folder Free Space 150MB 3945 KB 128 Kb...

Page 56: ...irang Move Move Page Mark CH FAV PopUp Menu Duration Title Up Folder Good Bye Arirang 05 30 04 12 3945 KB 128 Kbps Play Play with Photo Mark All Delete Close G G P Pl la ay y During stop Play the selected music Once a song finishes playing the next selected one will be played When there are no selected musics to play the next one in the current fold er will be played If you go to a different folde...

Page 57: ...ended period of time NOTE G G When music is playing is displayed in front of the music play time G G A damaged or corrupted music file that does not play displays 00 00 as the play time G G Music files with copy protection will not play G G Press E EN NT TE ER R A A or R RE ET TU UR RN N button to stop the screen saver G G This TV can not play music files less than 16 Kbytes ...

Page 58: ...V RGB PC input source use 4 3 or 16 9 aspect ratio Zoom Cinema Zoom Set By Program 4 3 16 9 Q Menu Close F F 16 9 G G Vivid Standard Off English Off Add Eject Aspect Ratio Picture Mode Sound Mode Caption Multi Audio Sleep Timer Del Add Fav Eject USB CH Select the A As sp pe ec ct t R Ra at ti io o Select the desired picture format 1Q MENU 2 3Q MENU Return to TV viewing ...

Page 59: ... the proper picture proportion to match the source s image 4 3 Choose 4 3 when you want to view a picture with an original 4 3 aspect ratio 16 9 Adjust the picture horizontally in a linear proportion to fill the entire screen 4 3 4 3 16 9 16 9 ...

Page 60: ...pro portion Note When enlarging or reducing the picture the image may become distorted Just Scan Normally the edges of video signals are cropped 1 2 Just Scan turns off this cropping and shows the complete video Notes If there is noise on the edges of the original signal it will be visible when Just Scan is activated J Ju us st t S Sc ca an n operates only in DTV CADTV Component HDMI DTV DVI DTV 7...

Page 61: ...de Standard Contrast 90 Brightness 50 Sharpness 60 Color 60 Tint 0 Advanced Control Enter Move PICTURE R G Aspect Ratio 16 9 Energy Saving Intelligent Sensor Picture Mode Standard Contrast 90 Brightness 50 Sharpness 60 Color 60 Tint 0 Advanced Control It reduces the plasma display s power consumption The default factory setting complies with the E En ne er rg gy y S St ta ar r requirements and is ...

Page 62: ...ustments Cinema expresses the optimal screen quality when it is darkest When selecting C Ci in ne em ma a Aspect ratio changes to Just scan 1Q MENU Select P Pi ic ct tu ur re e M Mo od de e Vivid Standard Expert1 Expert2 Game Sport Cinema 2 Select V Vi iv vi id d S St ta an nd da ar rd d C Ci in ne em ma a o or r C Ci in ne em ma a S Sp po or rt t G Ga am me e E Ex xp pe er rt t1 1 or E Ex xp pe e...

Page 63: ... t B Br ri ig gh ht tn ne es ss s S Sh ha ar rp pn ne es ss s C Co ol lo or r or T Ti in nt t 1MENU Select P Pi ic ct tu ur re e M Mo od de e 2 ENTER Select V Vi iv vi id d S St ta an nd da ar rd d C Ci in ne em ma a S Sp po or rt t or G Ga am me e 3 ENTER 4 ENTER 5 ENTER 6RETURN Return to the previous menu MENU Return to TV viewing Enter Move PICTURE E Aspect Ratio 16 9 Energy Saving Intelligent ...

Page 64: ...PICTURE CONTROL 62 PICTURE CONTROL ...

Page 65: ...PICTURE CONTROL 63 ...

Page 66: ...PICTURE CONTROL 64 PICTURE CONTROL ...

Page 67: ...PICTURE CONTROL 65 ...

Page 68: ...alize the adjusted value 1MENU 3 2 ENTER ENTER 4MENU Return to TV viewing Enter Move PICTURE E R G Picture Mode Standard Contrast 50 Brightness 50 Sharpness 50 Color 50 Tint 0 Advanced Control Reset Screen RGB PC Enter Move PICTURE E R G Picture Mode Standard Contrast 50 Brightness 50 Sharpness 50 Color 50 Tint 0 Advanced Control Reset Screen RGB PC Resetting video configuration i i ...

Page 69: ... Co ol lo or r W Wa as sh h Inversion will automatical ly invert the plasma display panel color every 30 minutes W Wh hi it te e W Wa as sh h White Wash removes ghost images from the screen Use spar ingly Watch the TV normally for a while before using this feature to see if the ghost image disappears on its own Select O OP PT TI IO ON N Select I IS SM M M Me et th ho od d 1MENU 2 ENTER Select N No...

Page 70: ...Off Demo Mode On ISM Method Normal Set ID 1 E E Off On 1 000 000 1contrastratioforabrighterpictureandincreasedenergyefficiency XD On XD Off Select O OP PT TI IO ON N 1MENU Select D De em mo o M Mo od de e 2 ENTER Select O On n 3 ENTER 7RETURN Return to the previous menu MENU Return to TV viewing ENTER Return to TV viewing 4MENU When there is no user input Display the E Streamer In the lower part e...

Page 71: ...ct A Au ut to o V Vo ol lu um me e Select O On n or O Of ff f 1MENU 3 2 ENTER ENTER 4RETURN Return to the previous menu MENU Return to TV viewing Enter Move AUDIO Auto Volume Off Clear Voice II On Level 0 Balance 0 Sound Mode Standard SRS TruSurround XT Off Treble 50 Bass 50 Reset Enter Move AUDIO Auto Volume Off Clear Voice II On Level 0 Balance 0 Sound Mode Standard SRS TruSurround XT Off Treble...

Page 72: ...II On Level 0 Balance 0 Sound Mode Standard SRS TruSurround XT Off Treble 50 Bass 50 Reset Enter Move AUDIO Auto Volume Off Clear Voice II On Level 0 Balance 0 Sound Mode Standard SRS TruSurround XT Off Treble 50 Bass 50 Reset L R L R E E ADJUSTMENT FOR LEVEL If you select C Cl le ea ar r V Vo oi ic ce e I II I O On n L Le ev ve el l will be abled This feature adjusts the voice level Select L Le e...

Page 73: ...ptimum sound quality at the factory and are not adjustable Standard Music Game Sport Cinema 1Q MENU Select S So ou un nd d M Mo od de e 2 Select S St ta an nd da ar rd d M Mu us si ic c C Ci in ne em ma a S Sp po or rt t or G Ga am me e 3Q MENU Return to TV viewing You can also adjust S So ou un nd d M Mo od de e in the A AU UD DI IO O menu Q Menu Close F F 16 9 G G Vivid Off English Off Add Eject...

Page 74: ...NTER S SR RS S T Tr ru uS Su ur rr ro ou un nd d X XT T Takes advantage of any multi channel format without needing to add extra speakers or equipment Dialog clarity bass enrichment and the addition of stereo audio enhancement produces an immersive sound experience from standard stereo material 6RETURN Return to the previous menu MENU Return to TV viewing 4RETURN Return to the previous menu MENU R...

Page 75: ...aste and room situations 4RETURN Return to the previous menu MENU Return to TV viewing Enter Move AUDIO Auto Volume Off Clear Voice On Level 0 Balance 0 Sound Mode Standard SRS TruSurround XT Off Treble 50 Bass 50 Reset Enter Move AUDIO Auto Volume Off Clear Voice On Level 0 Balance 0 Sound Mode Standard SRS TruSurround XT Off Treble 50 Bass 50 Reset L R L R E E Close E E E E Balance 0 L R ...

Page 76: ...Select O On n or O Of ff f 1MENU 3 2 ENTER ENTER 4RETURN Return to the previous menu MENU Return to TV viewing Enter Move AUDIO Clear Voice II On Level 0 Balance 0 Sound Mode Standard SRS TruSurround XT Off Treble 50 Bass 50 Reset TV Speaker On Enter Move AUDIO Clear Voice On Level 0 Balance 0 Sound Mode Standard SRS TruSurround XT Off Treble 50 Bass 50 Reset TV Speaker On L R L R E E Off On ...

Page 77: ...ialize the adjusted value 3 ENTER 4MENU Return to TV viewing Enter Move AUDIO Auto Volume Off Clear Voice II On Level 0 Balance 0 Sound Mode Standard SRS TruSurround XT Off Treble 50 Bass 50 Reset Enter Move AUDIO Auto Volume Off Clear Voice II On Level 0 Balance 0 Sound Mode Standard SRS TruSurround XT Off Treble 50 Bass 50 Reset L R L R E E Resetting audio configuration i i ...

Page 78: ...automatically used if the broadcast is only in Mono Select S SA AP P Select M Mo on no o S St te er re eo o or S SA AP P Return to TV viewing 1Q MENU 3 2 Q MENU Select M Mu ul lt ti i A Au ud di io o Select other languages Return to TV viewing 1Q MENU 3 2 Q MENU Analog TV Digital TV F F English G G Q Menu Close F F 16 9 G G Vivid Off Off Add Eject Aspect Ratio Picture Mode Sound Mode Caption Multi...

Page 79: ...e E En ng gl li is sh h S Sp pa an ni is sh h or F Fr re en nc ch h 1MENU 3 2 ENTER ENTER 4RETURN Return to the previous menu MENU Return to TV viewing Enter Move OPTION Menu Language English Audio Language English Input Label SIMPLINK On Key Lock Off Caption Off Demo Mode On ISM Method Normal Set ID 1 Enter Move OPTION Menu Language English Audio Language English Input Label SIMPLINK On Key Lock ...

Page 80: ...on screen menus will be shown in the selected language 1MENU 3 2 ENTER ENTER 4RETURN Return to the previous menu MENU Return to TV viewing Enter Move OPTION Menu Language English Audio Language English Input Label SIMPLINK On Key Lock Off Caption Off Demo Mode On ISM Method Normal Set ID 1 Enter Move OPTION Menu Language English Audio Language English Input Label SIMPLINK On Key Lock Off Caption O...

Page 81: ...ect C CC C1 1 4 4 or T Te ex xt t1 1 4 4 4 Analog Broadcasting System Captions When selecting O Of ff f Sub menus for Analog DTV and Digital Option become disabled C CA AP PT TI IO ON N The term for the words that scroll across the bottom of the TV screen usually the audio portion of the pro gram provided for the hearing impaired T TE EX XT T The term for the words that appear in a large black fra...

Page 82: ...a ap pt ti io on n Select O On n 1MENU 3 2 ENTER ENTER Select C CC C1 1 4 4 T Te ex xt t1 1 4 4 or S Se er rv vi ic ce e1 1 6 6 4 5RETURN Return to the previous menu MENU Return to TV viewing Enter Move OPTION Menu Language English Audio Language English Input Label SIMPLINK On Key Lock Off Caption Off Demo Mode On ISM Method Normal Set ID 1 Enter Move OPTION Menu Language English Audio Language E...

Page 83: ...color for the text T Te ex xt t O Op pa ac ci it ty y Specify the opacity for the text color B Bg g B Ba ac ck kg gr ro ou un nd d C Co ol lo or r Select a background color B Bg g B Ba ac ck kg gr ro ou un nd d O Op pa ac ci it ty y Select the opacity for the background color 7RETURN Return to the previous menu MENU Return to TV viewing Enter Move OPTION Menu Language English Audio Language Englis...

Page 84: ...en nt tr ra al l M Mo ou un nt ta ai in n P Pa ac ci if fi ic c A Al la as sk ka a or H Ha aw wa ai ii i Canada E Ea as st te er rn n C Ce en nt tr ra al l M Mo ou un nt ta ai in n P Pa ac ci if fi ic c N Ne ew w F F l la an nd d or A At tl la an nt ti ic c 4 Select A Au ut to o O On n or O Of ff f depending on whether or not your viewing area observes Daylight Saving time 5 6RETURN Return to the ...

Page 85: ...ect the Year Month Date Hour or Minutes option 4 Set the Year Month Date Hour or Minutes option 5 6RETURN Return to the previous menu MENU Return to TV viewing Enter Move TIME Clock Off Time Off On Time Off Sleep Timer Off Enter Move TIME Clock Off Time Off On Time Off Sleep Timer Off Year Month 2 Date 21 Hour 2 AM 2008 Minute 10 Time Zone Eastern Daylight Saving Auto Close F F Manual G G ...

Page 86: ...V A AV V1 1 2 2 C Co om mp po on ne en nt t1 1 2 2 R RG GB B P PC C or H HD DM MI I1 1 3 3 or H HD DM MI I1 1 4 4 Select T TI IM ME E Select O Of ff f t ti im me e or O On n t ti im me e Select R Re ep pe ea at t 1MENU 3 2 ENTER ENTER Select O Of ff f O On nc ce e D Da ai il ly y M Mo on n F Fr ri i M Mo on n S Sa at t W We ee ek ke en nd d or S Su un nd da ay y 4 Select and set H Ho ou ur r or M ...

Page 87: ...Ti im me er r in the T TI IM ME E menu Q Menu Close F F 16 9 G G Vivid Off English Off Add Eject Aspect Ratio Picture Mode Sound Mode Caption Multi Audio Sleep Timer Del Add Fav Eject USB CH 16 9 F F Off G G Standard Select S Sl le ee ep p T Ti im me er r 1Q MENU 2 Select O Of ff f 1 10 0 2 20 0 3 30 0 6 60 0 9 90 0 1 12 20 0 1 18 80 0 or 2 24 40 0 minutes 3Q MENU Return to TV viewing ...

Page 88: ...ies Movies that have been shown at the theaters or direct to video movies use the Movie Rating System MPAA only Ratings for Television programs including made for TV movies TV G General audience TV PG Parental guidance suggested TV 14 Parents strongly cautioned TV MA Mature audience only TV Y All children TV Y7 Children 7 years older Set up blocking schemes to block specific channels ratings and e...

Page 89: ...le Select L LO OC CK K 1MENU ENTER Input the password 21 4 5 6 7 8 0 9 2 3 5RETURN Return to the previous menu MENU Return to TV viewing Enter Move LOCK Lock System Off Set Password Block Channel Movie Rating TV Rating Children TV Rating General Downloadable Rating Input Block Enter Move LOCK Lock System On Set Password Block Channel Movie Rating TV Rating Children TV Rating General Downloadable R...

Page 90: ...on nf fi ir rm m 4 3 ENTER 1 4 5 6 7 8 0 9 2 3 Select L LO OC CK K 1MENU ENTER Input the password 21 4 5 6 7 8 0 9 2 3 5RETURN Return to the previous menu MENU Return to TV viewing Enter Move LOCK Lock System Off Set Password Block Channel Movie Rating TV Rating Children TV Rating General Downloadable Rating Input Block Enter Move LOCK Lock System Off Set Password Block Channel Movie Rating TV Rat...

Page 91: ...ot want to watch or that you do not want your children to watch Select L LO OC CK K 1MENU ENTER Input the password 21 4 5 6 7 8 0 9 2 3 6MENU Return to the previous menu RETURN Return to TV viewing Enter Move LOCK Lock System Off Set Password Block Channel Movie Rating TV Rating Children TV Rating General Downloadable Rating Input Block Ch Change Move Page CH Move Previous Block Unblock BLUE BLUE ...

Page 92: ...TER G General audience PG Parental guidance suggested PG 13 Parents strongly cautioned R Restricted NC 17 No one 17 and under admitted X Adult only Blocking Off Permits all programs G G If you set PG 13 G and PG movies will be available PG 13 R NC 17 and X will be blocked Select L LO OC CK K 1MENU ENTER Input the password 21 4 5 6 7 8 0 9 2 3 5RETURN Return to the previous menu MENU Return to TV v...

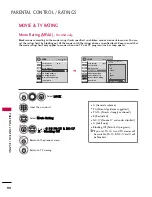
Page 93: ...ot apply to other TV programs Unless you block certain TV programs intended for mature audi ences in the TV Rating sub menu your children can view those programs Select L LO OC CK K 1MENU ENTER Input the password 21 4 5 6 7 8 0 9 2 3 6RETURN Return to the previous menu MENU Return to TV viewing Enter Move LOCK Lock System Off Set Password Block Channel Movie Rating TV Rating Children TV Rating Gen...

Page 94: ...alogue applies to TV PG TV 14 Language adult language applies to TV PG TV 14 TV MA Sex sexual situations applies to TV PG TV 14 TV MA Violence applies to TV PG TV 14 TV MA Select L LO OC CK K 1MENU ENTER Input the password 21 4 5 6 7 8 0 9 2 3 6RETURN Return to the previous menu MENU Return to TV viewing Enter Move LOCK Lock System Off Set Password Block Channel Movie Rating TV Rating Children TV ...

Page 95: ...nces PG Parental Guidance 14 Viewers 14 years and older 18 Adult programming Blocking Off Permits all programs Select L LO OC CK K 1MENU ENTER Input the password 21 4 5 6 7 8 0 9 2 3 5RETURN Return to the previous menu MENU Return to TV viewing Enter Move LOCK Lock System Off Set Password Block Channel TV Rating English TV Rating French Downloadable Rating Input Block Enter Move LOCK Lock System O...

Page 96: ...of 13 years and younger 16ans Not convenient for children of 16 years and younger 18ans This programs is only for adults Blocking off Permits all programs Select L LO OC CK K 1MENU ENTER Input the password 21 4 5 6 7 8 0 9 2 3 5RETURN Return to the previous menu MENU Return to TV viewing Enter Move LOCK Lock System Off Set Password Block Channel TV Rating English TV Rating French Downloadable Rati...

Page 97: ...sired D Do ow wn nl lo oa ad da ab bl le e R Ra at ti in ng g option 4 3 ENTER Select desired option and block it 5 ENTER Select L LO OC CK K 1MENU ENTER Input the password 21 4 5 6 7 8 0 9 2 3 6RETURN Return to the previous menu MENU Return to TV viewing Enter Move LOCK Lock System Off Set Password Block Channel Movie Rating TV Rating Children TV Rating General Downloadable Rating Input Block Ent...

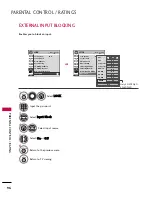
Page 98: ...RETURN Return to the previous menu MENU Return to TV viewing Enter Move LOCK Lock System Off Set Password Block Channel Movie Rating TV Rating Children TV Rating General Downloadable Rating Input Block Enter Move LOCK Lock System Off Set Password Block Channel Movie Rating TV Rating Children TV Rating General Downloadable Rating Input Block AV1 F F Off G G AV2 Off Component1 Off HDMI1 Off RGB PC O...

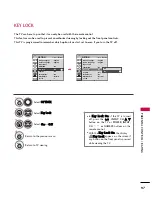
Page 99: ...s turned off press the INPUT CH D D E E button on the TV or POWER INPUT CH or NUMBER buttons on the remote control With the K Ke ey y L Lo oc ck k O On n the display K Ke ey y L Lo oc ck k appears on the screen if any button on the front panel is pressed while viewing the TV 4RETURN Return to the previous menu MENU Return to TV viewing Enter Move OPTION Menu Language English Audio Language English...

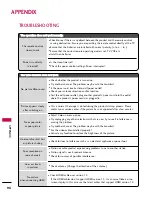
Page 100: ... problem may be with the broadcast Is the power cord inserted into wall power outlet Check your antenna direction and or location Test the wall power outlet plug another product s power cord into the outlet where the product s power cord was plugged in This is normal the image is muted during the product startup process Please contact your service center if the picture has not appeared after a few...

Page 101: ... OK but No sound Unusual sound from inside the product No sound when connecting HDMI or USB No output from one of the speakers T Th he e a au ud di io o f fu un nc ct ti io on n d do oe es s n no ot t w wo or rk k Press the VOL or VOLUME button Sound muted Press MUTE button Try another channel The problem may be with the broadcast Are the audio cables installed properly Adjust Balance in menu opti...

Page 102: ...ime such as a vacation it s a good idea to unplug the power cord to protect against possible damage from lightning or power surges CAUTION 2 1 The specifications shown above may be changed without prior notice for quality improvement MODEL AC100 120V 50 60Hz NTSC M ATSC 64 256 QAM VHF 2 13 UHF 14 69 CATV 1 135 DTV 2 69 CADTV 1 135 75 ohm 32 104 F 0 40 C Less than 80 4 140 F 20 60 C Less than 85 Di...

Page 103: ...tand Without stand With stand Without stand 40 9 x 26 3 x 3 0 inches 1040 8 x 669 2 x 76 8 mm 40 9 x 28 5 x 12 1 inches 1040 8 x 725 8 x 308 0 mm 55 7 pounds 25 3 kg 51 3 pounds 23 3 kg 48 3 x 32 4 x 13 8 inches 1228 8 x 824 6 x 353 0 mm 48 3 x 30 3 x 3 1 inches 1228 8 x 772 0 x 78 9 mm 77 1 pounds 35 0 kg 71 6 pounds 32 5 kg MODELS 32PQ10C 32PQ10C UA 50PS30 50PS30 UA Dimensions Width x Height x D...

Page 104: ... C7 D0 D1 D2 D3 D4 D5 D6 D7 D0 D1 D2 D3 D4 D5 D6 D7 Lead code Low custom code High custom code Data code Data code Repeat code Tf 4 5 ms 9 ms 2 25 ms 9 ms 0 55 ms 0 56 ms 1 12 ms 0 56 ms 2 24 ms Tf Tf Tf 108ms 455KHz Bit 0 Bit 1 1 How to Connect Connect your wired remote control to the Remote Control port on the TV 2 Remote Control IR Codes Output waveform Single pulse modulated with 37 917KHz sig...

Page 105: ... Button 5B RETURN Remote control Button 7E SIMPLINK Remote control Button 30 AV MODE Remote control Button 79 RATIO Remote control Button D6 TV Discrete IR Code TV Input Selection C4 POWER ON Discrete IR Code Only Power On C5 POWER OFF Discrete IR Code Only Power Off 5A AV1 Discrete IR Code AV1 Input Selection D0 AV2 Discrete IR Code AV2 Input Selection BF COMPONENT1 Discrete IR Code Component1 In...

Page 106: ...ovided to help with programming software or to test functionality using telenet software 1 2 L R RGB PC REMOTE CONTROL IN AUDIO VIDEO S VIDEO MONO AV IN 1 HDMI DVI IN 2 1 ANTENNA IN RS 232C IN CONTROL SERVICE Type of Connector D Sub 9 Pin Male No Pin Name 1 No connection 2 RXD Receive data 3 TXD Transmit data 4 DTR DTE side ready 5 GND 6 DSR DCE side ready 7 RTS Ready to send 8 CTS Clear to send 9...

Page 107: ...on to specify a TV ID number Refer to Real Data Mapping G G p p 9 97 7 Select O OP PT TI IO ON N Select S Se et t I ID D Choose the desired TV ID number The adjustment range of Set ID is 1 99 1MENU 3 2 ENTER ENTER 4RETURN Return to the previous menu MENU Return to TV viewing Enter Move OPTION Menu Language English Audio Language English Input Label SIMPLINK On Key Lock Off Caption Off Demo Mode On...

Page 108: ...status during the standby mode O OK K A Ac ck kn no ow wl le ed dg ge em me en nt t The TV transmits ACK acknowledgement based on this for mat when receiving normal data At this time if the data is data read mode it indicates present status data If the data is data write mode it returns the data of the PC computer In this model TV will not send the status during the standby mode Data Format Comman...

Page 109: ...ata x 0 06 6 V Vo ollu um me e C Co on nt tr ro oll C Co om mm ma an nd d k k f f To adjust volume You can also adjust volume with the volume buttons on remote control Transmission k f Set ID Data Cr Data Min 00 Max 64 transmit by Hexadecimal code Refer to Real data mapping See page 107 Acknowledgement f Set ID OK NG Data x 0 07 7 C Co on nt tr ra as st t C Co om mm ma an nd d k k g g To adjust sc...

Page 110: ...also adjust color temperature in the PICTURE menu Transmission k u Set ID Data Cr Data 00 Medium 01 Cool 02 Warm Acknowledgement u Set ID OK NG Data x 1 18 8 I IS SM M M Me et th ho od d C Co om mm ma an nd d jj p p To avoid having a fixed image remain on screen Transmission j p Set ID Data Cr Data 01 Inversion 02 Orbiter 04 White Wash 08 Normal Acknowledgement p Set ID OK NG Data x 1 19 9 P Po ow...

Page 111: ...ysical 00 Data 01 02 Major is 30 00 1E Data 03 04 Minor is 3 00 03 Data 05 0010 0010 in binary 22 Total ma 00 00 00 1E 00 03 22 Acknowledgement a Set ID OK Data00 Data01 Data02 Data03 Data04 x a Set ID NG Data00 x 2 22 2 C Ch ha an nn ne ell A Ad dd d D De ell C Co om mm ma an nd d m m b b To add and delete the channels Transmission m b Set ID Data Cr Data 00 Channel Delete Data 01 Channel Add Ack...

Page 112: ......

Reviews: