PICTURE CONTROL
OK
Move
PICTURE
B
B
Br
•
Br
•
Br
•
Br
•
Br
Br
Br
i h
i ht
ight
ight
ight
ight
ight
ight
ight
g
g
g
ness
ness
ness
ness
ness
ness
ness
0
50
50
50
50
50
50
50
50
•
Sharpness
70
•
Colour
70
•
Tint
0
•
Colour Temp.
C50
•
Advanced Control
•
Picture Reset
•
Screen
R
G
W
C
•
Advanced Control
Dynamic Contrast
◄
Off
►
Dynamic Colour
High
Skin
Color
0
Noise Reduction
Digital Noise Reduction
Medium
Black Level
Auto
Clear White
High
Gamma
Medium
Eye Care
▼
low
Auto
Close
Image shown may differ from your TV.
•
Press the
MENU/EXIT
button to return to normal TV viewing.
•
Press the
BACK
button to move to the previous menu screen.
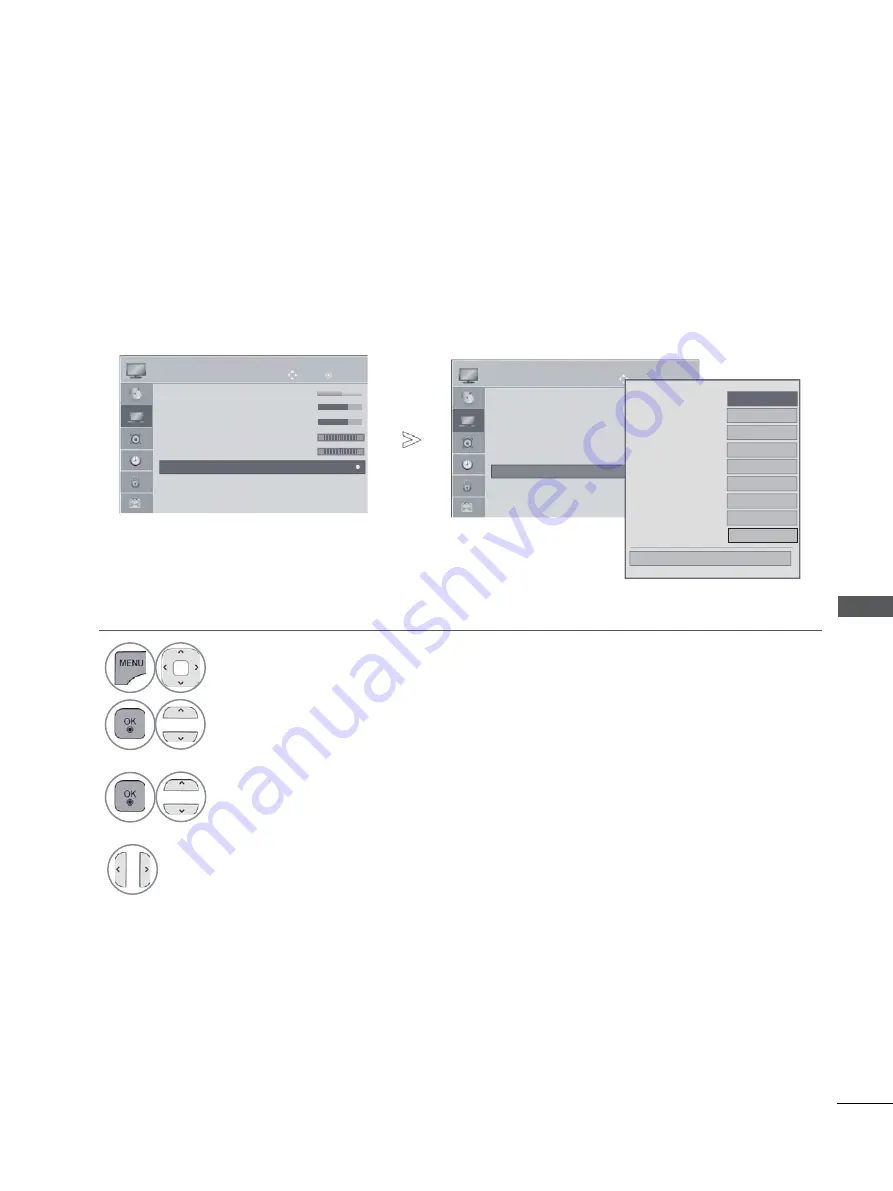
1
Select
PICTURE
.
2
Select
Advanced Control
.
3
Select your desired Source.:
Dynamic Contrast
,
Dynamic Colour
,
Clear White, Skin Colour,
Noise Reduction
,
Digital Noise Reduction
,
Gamma
,
Black Level
,
Eye Care
,
Real Cinema
,
Colour Gamut
or
xvYCC
.
4
Make appropriate adjustments.
OK
Move
PICTURE
B
B
Br
•
Br
•
Br
•
Br
•
Br
Br
Br
i ht
i ht
ight
ight
ight
ight
ight
ight
ight
g t
g
ness
ness
ness
ness
ness
ness
ness
ess
50
50
50
50
50
50
50
50
50
50
•
Sharpness
70
•
Colour
70
•
Tint
0
•
Colour Temp. C50
•
Advanced Control
•
Picture Reset
•
Screen
R
G
W
C
•
Advanced Control
►
►
PICTURE IMPROVEMENT TECHNOLOGY
You can calibrate the screen for each Picture Mode or set the video value according to the special
video screen.
You can set the video value differently for each input.
To reset to the factory default screen after making adjustments to each video mode, execute the
“Picture Reset” function for each Picture Mode.
PIC
TU
R
E C
O
N
TR
O
L
47


