background image

- 5 -

LGE Internal Use Only

Copyright © 2008 LG Electronics. Inc. All right reserved. 
Only for training and service purposes

1. Application Object

These adjustment instructions are applicable to CW81A/B
Chassis.

2. Notes

(1) Because this is a cold chassis, it is not necessary to use    

an isolation transformer. However,operating it using a    

transformer between the power supply line and chassis

input to prevent electric shock and to protect the test
instrument.

(2)All adjustments must be done in correct sequence.

However, for better productivity, it can be changed in a pre-
permitted range.

(3) Environment conditions: If not specified, it must be done in

following conditions.
1) Temperature: 25±5°C 
2) Humidity : 65±10% 

(4) AC Voltage : 100-240V ±10%, 50/60Hz
(5) If  not  specified, the receiver must be operated for more

than 20 minutes prior to the adjustment.

(6) Signal: Received the standard color signal. (65dB±1dBuV)

PAL/SECAM : LG standard signal means the digital pattern
PAL_EU 05CH

(7) If not specified, APC ON is APC CLEAR(DYNAMIC).

3. AGC Voltage Adjustment

3-1. Necessary Instrument

: Digital Multi meter : 1 set

- Max Input Current : Over 1A/ Max Input Voltage : 500Vdc
- Measurement Range : 10mV-100mVdc/ Accuracy : 0.03%

3-2. Adjustment Preparation

1) Input in the 75Ω cable 65dB(±1dB) LG standard signal.
2) Connect the multi-meter to J105(AGC Check Marking)

3-3. Adjustment

(1) Press the “INSTART” key of factory remote control and

select “VP0 (RF AGC)” adjustment mode.

(2) Press the VOL +/-(

F

/

G

)Key until the multi-meter shows

reading as shown below.

(3) CAUTION : Since the signal strength can be easily

changed by the condition of signal cable , you
need to check the signal strength frequently in
order to prevent misadjustment.

4. Screen Voltage Adjustment

4-1. Adjustment (Use factory remote control)

(1) Input in the 75Ω cable LG standard signal (Digital

Pattern,480NC)

(2) Press the “ADJ” key of factory remote control once to make

the TV set display horizontal line.

(3) Turn the screen volume on the FBT clockwise until the

horizontal line is visible and turn it counterclockwise until
horizontal line faintly visible.

(Exit screen voltage adjustment by press “Enter(

A

)” key of

factory remote control.)

5. Purity and Convergence Adjustment

5-1. Purity Adjustment

(1) Adjustment Preparation

1) Receive Red Raster Pattern for purity adjustment.(51ch)
2) Demagnetize the CPT and Cabinet with a degaussing

coil.

(2) Adjustment

1) Pre-adjust the static convergence (STC) with the 4 and

6pole magnet.

2) If the horizontal Line is inline with CPT Mark,2-Pole

magnet should direct 3-9 o’clock direction

3) If not,direct 2-Pole magnet handle toward 6-12 o’clock

direction and adjust the Horizontal Line to fall onto the
mark opening the magnet at an angle.

4) Push the DY(deflection yoke) all the way to the CPT

funnel.

5) Turn the purity magnet(2-pole magnet) so that the

“green” color portion of left side and the “blue” color
portion on the right side have equal amount of
color.

6) Pull the DY slowly backward and fix it when the whole

screen becomes red. (The specified torque for fixing DY
screw should be 10Kg/cm.) 

5-2. Convergency Adjustment

(1) Necessary Instrument

1) Degaussing Coil
2) Convergency fixing instrument (special tools)

(2) Adjustment Preparation

1) Operate the unit at the least 15 minutes before

adjustment.

2) Using degaussing coil,remove the stains on CPT &

Cabinet.

3) Received the Cross Hatch Pattern for Convergence

(09ch).

4) Let the Contrast in normal luminance level.

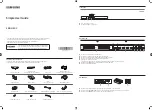
ADJUSTMENT INSTRUCTIONS

G     R     B

G     R     B

R

G     R     B

<Fig. 1>

<Fig. 2>

Summary of Contents for 21FU3RL

Page 1: ...COLOR TV SERVICE MANUAL CAUTION BEFORE SERVICING THE CHASSIS READ THE SAFETY PRECAUTIONS IN THIS MANUAL CHASSIS CW81A MODEL 21FU3RL 21FU3RL T3 website http biz LGservice com Internal Use Only ...

Page 2: ... All right reserved Only for training and service purposes CONTENTS Contents 2 Safety Precautions 3 Specifications 4 Adjustment Instructions 5 Trouble Shooting 8 Block Diagram 13 Exploded View 14 Exploded View Parts List 15 Replacement Parts List 16 SVC Sheet ...

Page 3: ...ure Before returning the receiver to the customer always perform an AC leakage current check on the exposed metallic parts of the cabinet such as antennas terminals etc to be sure the set is safe to operate without damage of electrical shock Leakage Current Cold Check Antenna Cold Check With the instrument AC plug removed from AC source connect an electrical jumper across the two AC plug prongs Pl...

Page 4: ...ked by models 4 Specification and performance of each parts are followed each drawing and specification by part number in accordance with B O M 5 The receiver must be operated for about 20 minutes prior to the adjustment Item Specification Remark Receiving System PAL BG DK I NTSC M AV3 58 4 43 China Indonesia Thai Vietnam PAL BG DK I NTSC M AV3 58 4 43 CIS SECAM DK PAL BG DK I NTSC M AV3 58 4 43 A...

Page 5: ...ngth frequently in order to prevent misadjustment 4 Screen Voltage Adjustment 4 1 Adjustment Use factory remote control 1 Input in the 75Ω cable LG standard signal Digital Pattern 480NC 2 Press the ADJ key of factory remote control once to make the TV set display horizontal line 3 Turn the screen volume on the FBT clockwise until the horizontal line is visible and turn it counterclockwise until ho...

Page 6: ...s the MUTE key of factory remote control after adjustment finished In case there is excess RED color at screen voltage adjustment adjust it using Volume G Key of factory remote control until the RED color disappear 6 4 Manual Adjustment 1 Adjust using white Balance meter and factory remote controller 2 Enter into adjustment mode by pressing the INSTART key of factory remote control 3 Use the CHD C...

Page 7: ... that the middle circle of the Digital Pattern 480NC 13CH coincide with the effective screen of CPT 9 3 Adjustment 21 Super Slim Ultra S S Model 1 Vertical Position Adjustment Select SVC02 V POS and adjust so that the horizontal center line coincide with geometric horizontal center of the CPT 2 Vertical Linearity Adjustment Select SVC02 V LIN and adjust so that the size of the upper circle is alik...

Page 8: ... 8 TROUBLE SHOOTING LGE Internal Use Only Copyright 2008 LG Electronics Inc All right reserved Only for training and service purposes 1 TV FUNCTIONAL 2 TU IF SECTION J512 J544 ...

Page 9: ...r defectiveness Maneuver defectiveness In case of influx NOISE R C is not operate Maneuver defectiveness J624 J625 C603 C604 C609 C610 R605 R616 R611 R612 J509 Q241 R247 No color 1 2 5 56 57 52 54 35 36 40 50 54 46 48 4 9 20 24 49 62 17 23 LV762xx 4 SMPS PRIMARY DB801 TS4805G DB802 D5SB60 IC810 STR W6553A MONO STR W6554A STEREO C852 R808 ZD851 ...

Page 10: ... Copyright 2008 LG Electronics Inc All right reserved Only for training and service purposes 5 SMPS SECONDARY SECTION DB801 TS4805G DB802 D5SB60 IC810 STR W6553A MONO STR W6554A STEREO C852 R808 ZD851 6 VERTICAL SECTION STV9326 ...

Page 11: ...nternal Use Only Copyright 2008 LG Electronics Inc All right reserved Only for training and service purposes 7 HORIZONTAL SECTION L402 L403 L404 C401 C402 C412 8 SOUND PROCESSING SECTION LV762xx LC75024 LA72702 ...

Page 12: ... 12 LGE Internal Use Only Copyright 2008 LG Electronics Inc All right reserved Only for training and service purposes 9 CPT DRIVE SECTION 8 D902 D902 ...

Page 13: ...T BY TRANS 1W Op t 57 56 64 9V Fro m IC804 IC804 9V REG IC04 ST 5V REG 9v Fro m IC804 IC661 5V 5 1V IC751 LA72730 STEREO Op t IC751 LA72730 STEREO Op t JA01 HIC291 Game Pac k Game Op t HIC291 Game Pac k Game Op t 4 5 6 8 7 Fro m USOC Vid eo Gam e Aud io Gam e JA02 54 SIF o ut IF 3 611 1 4 7 AV2 V R L IN 2 5 9 LA72702 BTSC IC701 LIN TV RIN TV 2 1 19 20 R L Out L OUT R OUT SAW SAW 5 9 10 IF IN Z102 ...

Page 14: ...ectrical and mechanical parts in this chassis have special safety related characteristics These parts are identified by in the Schematic Diagram and EXPLODED VIEW It is essential that these special safety parts should be replaced with the same components as recommended in this manual to prevent X RADIATION Shock Fire or other Hazards Do not modify the original design without permission of manufact...

Page 15: ...0V C691 10uF 50V C675 10uF 50V C672 4 7uF 50V C656 4 7uF 50V C654 22uF 50V C682 4 7uF 50V C642 0 1uF C645 0 1uF C678 100 R666 100 R665 4 7 K R678 10UH L604 5V_1 JA01 FULL SCART 1 2 3 4 5 6 7 8 9 10 11 12 13 14 15 16 17 18 19 20 21 100 R503 75 R203 100 R202 100K R207 240K R208 1uF 50V C22 IC601 100 R542 100 R543 R250 T W 100 R561 100uF 10V C521 1uF 50V C675 1uF 50V C672 39K R539 P551 B value 10 9 8...

Page 16: ...May 2008 Printed in Korea P NO MFL41322905 ...

Reviews: