background image

38

Menu Button Function

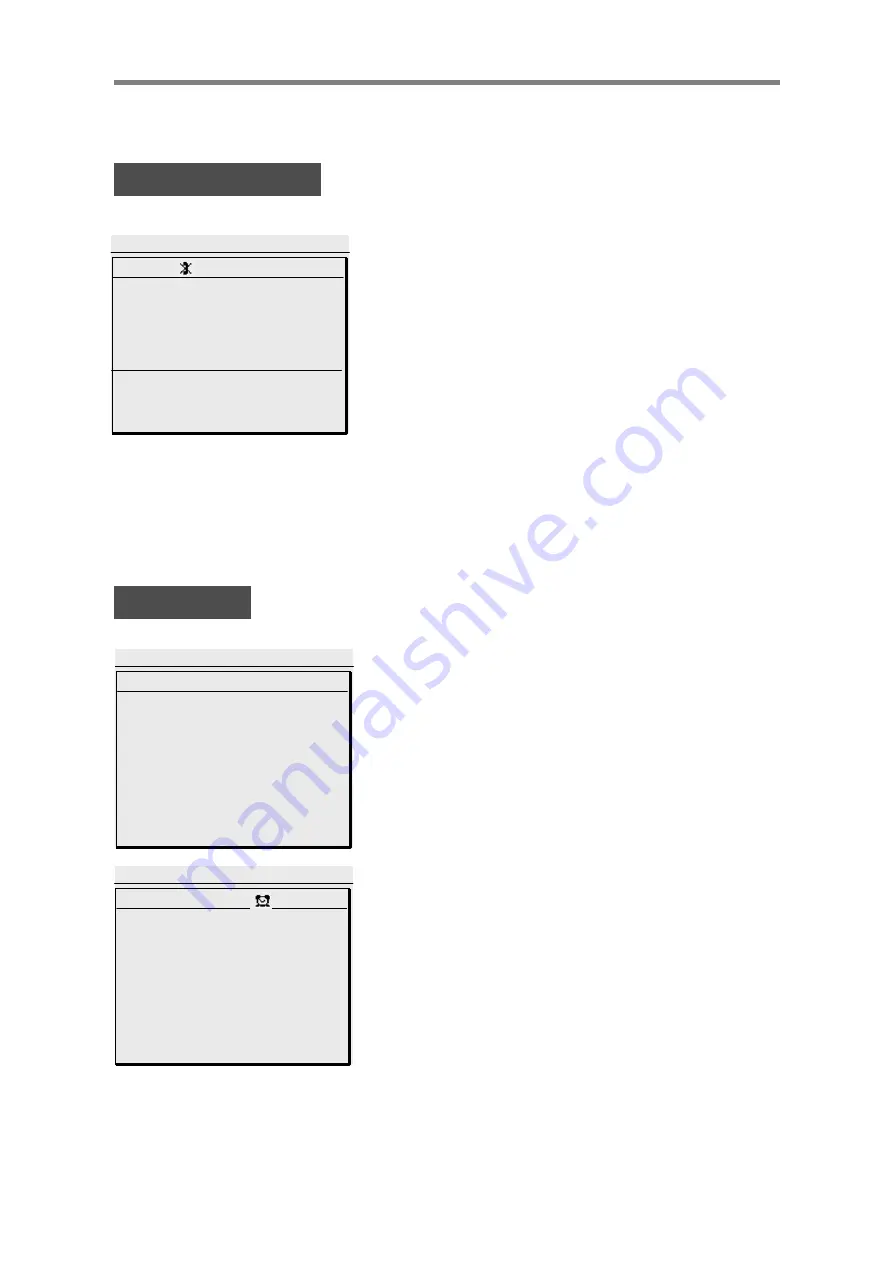
1.7 DO NOT DISTURB

STA IN DO NOT DISTURB
04 JUL 03               06:01 pm
PICKUP      CONF      REDIAL

SUN MON TUE WED THU FRI SAT

1

2   3   4   5   6   7   8
9  10  11  12  13  14  15

16  17  18  19  20  21  22
23  24  25  26  27  28  29
30  31   

2004

07 / 01

After setting the DND, the DND icon will 
be displayed on the top of LCD.

1.8 WAKE UP

1.DIALED CALLS    6.PAGING

2.RECEIVED CALLS7.DO NOT DISTURB

3.SPEED DIAL        8.WAKE UP
4.CALL FORWARD
5.ABSENT MESSAGE

ENTER YOUR WAKEUP TIME

HH:MM                       04:01 pm

BACK            SAVE              EXIT

Enter the alarm time.

After setting the alarm time, 
press the[SAVE]button. 

The alarm icon will be displayed on the top 
of LCD and [

*]

is blinking.

1.DIALED CALLS    6.PAGING

2.RECEIVED CALLS7.DO NOT DISTURB

3.SPEED DIAL        8.WAKE UP
4.CALL FORWARD
5.ABSENT MESSAGE

ENTER YOUR WAKEUP TIME

07:30-C                       04:01 pm

BACK                SAVE            EXIT

-S:One Day (Default)

-C:Every Day ( # )

* Set the time : e.g. (7hour)

• am  07:00 

• pm  19:00

Summary of Contents for LDP-7024LD

Page 1: ...1 Important Safety Information ...

Page 2: ...2 Important Safety Information ...

Page 3: ...3 Important Safety Information ...

Page 4: ...2 Off Hook 3 Intercom Dialing 4 Intercom Ring Back 5 Intercom Busy 6 Intercom Do Not Disturb 7 Intercom Dialing Error 8 Intercom Receiving 9 Intercom Talk 10 CO Line Busy 11 CO Dialing CO Talk 12 Checking messages 13 Page Call Log 1 Received Call 2 Dialed Call 3 Lost Call 3 1 Answer 3 2 Del Cur Delete Current 3 3 Del All Delete All 3 4 Save 3 5 Name Tel Phone Book 1 New Entry 2 Search by name 3 Se...

Page 5: ...Book 3 Schedule 3 1 Schedule ADD DEL EDIT 3 2 Find schedule 3 3 Delete past schedule 3 4 View alarm schedule 3 5 Delete all schedule 4 Customize 4 1 Change language 4 2 Register name 4 3 Ring type 4 4 Speaker Headset 4 5 E MIC Headset 4 6 Bright Level 5 Setting 5 1 ENBLOCK MODE 5 2 Station COS 5 3 Password 5 4 Speed PGM 5 5 Answer mode 6 Voice mail 6 1 Internal Voice Mail 6 2 External Voice Mail E...

Page 6: ... user with 3 soft key and navigation key Features Trendy and Stylish LDP Family design Multi Level Graphic LCD 9 32 Dual LED 24 Flexible buttons Additional Device Port for SLT and FAX Call Log Feature Call Recording Feature USB Module Option Hands Free Solution Blue Tooth Module Option Wall Mountable Option ...

Page 7: ...rward 3 DND mode 4 Earphone mode 5 Full Duplex Speaker Phone Mode 6 Mute mode 7 Setting melody 8 Setting alarm 9 Schedule 10 Phone book 11 ON Already paired but linked radio with headset 12 STADY ON Ready to make and answer a call BLINK Ongoing communication via Bluetooth headset Description ...

Page 8: ...Earphone Jack Socket Ear Mic Mode Speaker Speed Button DND Fwd Button Speaker Button Hold Save Button Phonebook Button LCD Display 10 11 12 13 14 15 16 17 Message Waiting LED 3 Soft Button Flexible Button Trans Pgm Button Call back Button Volume Button Menu Button Handsfree Microphone ...

Page 9: ...ays information about telephone status dialing directories and test message information Illuminates when the phone is ringing Used to work in conjunction with fixed and flexible features The remaining Flex buttons can be assigned to a feature This button is used to start a transfer TRS of a call or enter programming mode PGM A station can initiate a call back request to another busy station Once t...

Page 10: ...d to the handset and the other end to the handset jack at the bottom of the telephone Connect the end of the cable to the port at the bottom of telephone and the other end to the switch port Connect the Earphone to the headphone jack at the left side of the telephone In case front view of the base ...

Page 11: ...11 Putting into operation ADP Additional Device Port ...

Page 12: ...12 Putting into operation ADP Additional Device Port ...

Page 13: ...et Enter the extension number Dial 9 0 or select CO line flexible button talk 2 Answering an Outside Call or Lift handset or talk CO Line ICM Line Lift handset Enter the desired phone number talk or CO Line ICM Line Lift handset or talk Press flashing CO line button or loop key ...

Page 14: ...which becomes available will be displayed Message Wait Camp On and Flash Then by pressing one of 3 soft button a user can activate the desired feature 3 Soft Button Navigation Button Sometimes a system does show all message for some operation then the arrow key will be displayed the begin or end line By pressing a Navigation Button of LDP 7000 series others will be displayed BUSY STA 100 CALLBK CA...

Page 15: ... 1 Idle STATION 100 T FEB 01 04 05 34 pm PICKUP CONF REDIAL PICKUP press the PICKUP button to Can pickup the ring in the same pickup group CONF press the MSG button to can cancel the unsupervised conference REDIAL press the REDIAL button to make a last number redial 1 1 Pickup STATION 100 T FEB 01 04 05 34 pm PICKUP CONF REDIAL CALL TO STA 104 FROM 100 05 34 pm TRANS CONF MUTE A station can pickup...

Page 16: ...wers the call Press the CONF button CONFERENCE FEB 01 04 05 34 pm FORWARD CONF REDIAL Dial the phone number of the desired party e g 104 CALL TO STA 104 FEB 01 04 05 34pm MSG FLASH The station 104 answers the call CALL TO STA 104 FEB 01 04 05 34 pm TRANS CONF MUTE Press the CONF button twice CONFERENCE FEB 01 04 05 34 pm CONF MUTE For making a 3 party conference press CONF button twice ...

Page 17: ...END or button to make the call 9114 LINE 001 00 01 01 TRANS CONF MUTE DIALED CALLS 0 07 24 10 56 1234 BACK DELETE SEND Or press DETAIL to show the detailed information of DIALED CALLS SUN MON TUE WED THU FRI SAT 1 2 3 4 5 6 7 8 9 10 11 12 13 14 15 16 17 18 19 20 21 22 23 24 25 26 27 28 29 30 31 2004 07 01 Press DELETE to delete the call log while checking the detail information Press SEND to dial ...

Page 18: ... Intercom Ring Back CALL TO STA XXX FEB 01 04 05 34 pm MSG FLASH MSG Press the MSG button to leave a message FLASH Press the FLASH button to disconnect the line and re seize 5 Intercom Busy BUSY STA 100 CALLBK CMAP STEP MSG CAMP ON FLASH MSG Press the MSG button to leave a message CAMP ON Press the CAMP ON button to allows you to send a call waiting tone to a busy station indicating that they have...

Page 19: ...ansfer the incoming call to another station CONF Press the CONF button to make a conference MUTE Press the MUTE button to mute the handset speakerphone or headset but does not affect the speech coming over the speaker or handset Pressing the SPEAK button again activates the microphone 10 CO Line Busy CO LINE 001 BUSY QUEUING CALLBK CALLBK CALLBK Pess the CALLBK button to reserve CO line 6 Intercom...

Page 20: ...the FLASH button to disconnect the line and re seize ACNR Press the ACNR button to set the automatic call number redial 12 Checking messages VMIB MSG FROM EXTERNAL NEXT REPEAT DELETE VMIB MSG FROM EXTERNAL ADD REWIND CALL BACK ADD Press the ADD button to leave a message to the party who leave a message to me REWIND Press the REWIND button to rewind CALLBK Press the CALLBK button to reserve CO line...

Page 21: ...ALL OK Use to select the list Press SEND to dial the desired one Press DETAIL to see the information in detail RECEIVED CALLS 1234 5678 BACK DETAIL SEND RECEIVED CALL 01 09 20 10 15 1234 BACK DELETE SEND Press DELETE to delete the call log while checking the detail information Press SEND to dial NOTE NOTE Return to the previous BACK ...

Page 22: ...in detail DIALED CALLS 1234 5678 BACK DETAIL SEND DIALED CALL 01 09 20 10 15 1234 BACK DELETE SEND Press DELETE to delete the call log while checking the detail information Press SEND to dial Use to select the list Press the SELECT button to select the following functions ANSWER DEL CUR delete current DEL ALL delete all SAVE NAME TEL NOTE NOTE Return to the previous BACK ...

Page 23: ... 03 10 16 02 CNT 01 BACK SELECT DEL CUR NOTE NOTE Return to the previous BACK Call Log 3 3 DEL ALL ALL CLI DELETE Press HOLD Key BACK SELECT DEL ALL Press the HOLD button to confirm delete all function All numbers are erased 0123456789 14 07 16 02 CNT 01 BACK SELECT DEL ALL Press SELECT until DEL ALL appears in display Press DEL ALL to initiate delete all function ...

Page 24: ...l is registered 0123456789 03 10 16 02 CNT 01 BACK SELECT NAME TEL See the page 52 To save CLI press SAVE button 0123456789 03 10 16 02 CNT 01 BACK SELECT SAVE OR if a name is displayed to check the associated number press the NAME TEL button NOTE NOTE Return to the previous BACK To check the name of the selected number press the NAME TEL button Call Log ...

Page 25: ...K 1 NEW ENTRY 2 SEARCH BY NAME 3 SEARCH BY NUMBER 4 SEARCH BY GROUP 5 EDIT CO ACCESS CODE EXIT OK PHONE BOOK 6 DELETE ALL ENTRY EXIT OK 1 NEW ENTRY NEW ENTRY NAME TYPE MOBILE CO CODE NOT USE NUMBER GROUP NO GR BACK ABC SAVE PHONE BOOK 1 NEW ENTRY 2 SEARCH BY NAME 3 SEARCH BY NUMBER 4 SEARCH BY GROUP 5 EDIT CO ACCESS CODE EXIT OK The PHONE BOOK is used for registering the new phone number and searc...

Page 26: ...number or office number or home number or fax number or e mail or address or memo NEW ENTRY NAME JANE TYPE MOBILE CO CODE CODE 1 NUMBER GROUP NO GR BACK SAVE Enter the phone number In case of selecting e mail or address or memo on type the contents is available NEW ENTRY NAME JANE TYPE MOBILE CO CODE CODE 1 NUMBER 123456789 GROUP NO GR BACK SAVE Select the group Use to select NO GR family friend o...

Page 27: ...l name or the part of the name ex ABC and press FIND The name will be displayed Use to select the desired name Press EDIT to correct the phone number Press SEND to make a call Use the button to select type RESULTS 001 JONE MARK 003 ABRAHAM 007 LUCKY MOBILE 01011111234 BACK EDIT SEND Press the 2 button PHONE BOOK 1 NEW ENTRY 2 SEARCH BY NAME 3 SEARCH BY NUMBER 4 SEARCH BY GROUP 5 EDIT CO ACCESS COD...

Page 28: ... SEARCH BY NUMBER 4 SEARCH BY GROUP 5 EDIT CO ACCESS CODE BACK FIND SEARCH BY NUMBER INPUT NUMBER 123 When entering the phone number enter the part of the phone number or the full number and press FIND The name will be displayed Use to select the desired name Press EDIT to correct the phone number Press SEND to make a call RESULTS 001 JONE MARK 003 ABRAHAM 007 LUCKY MOBILE 01011111234 BACK EDIT SE...

Page 29: ...ND OFFICE Press the 4 button PHONE BOOK 1 NEW ENTRY 2 SEARCH BY NAME 3 SEARCH BY NUMBER 4 SEARCH BY GROUP 5 EDIT CO ACCESS CODE EXIT OK Use to select the group and press FIND The name will be displayed Use to select the desired name Press EDIT to correct the phone number Press SEND to make a call RESULTS 001 JONE MARK 003 ABRAHAM 007 LUCKY MOBILE 01011111234 BACK EDIT SEND ...

Page 30: ...ENTRY Exit OK PHONE BOOK 6 Delete All Entry BACK OK Use to select YES Press OK to delete all the phone book Use to select the code and enter the CO ACCESS CODE Press SAVE to save The entered CO ACCESS CODE is entered when the phone number registers or corrects ARE YOU SURE TO DELETE DATA NO YES 1 NEW ENTRY 2 SEARCH BY NAME 3 SEARCH BY NUMBER 4 SEARCH BY GROUP 5 EDIT CO ACCESS CODE EXIT OK ...

Page 31: ...CEIVED CALLS 1234 5678 BACK DETAIL SEND Use to select the list Press SEND to dial the desired one Press DETAIL to see the information Use to select the list Press SEND to dial the desired one RECEIVED CALL 01 09 20 10 15 1234 BACK DELETE SEND Use DETAIL to see the detailed information of DIALED CALLS Press DELETE to delete the information Also press SEND to make the call Press DETAIL to see the in...

Page 32: ...number press the NAME TEL button On the contrary to check the number of the selected name press the NAME TEL button 1 DIAL BY STA SPD 2 DIAL BY SYS SPD 3 DIAL BY ICM NAME 4 DIAL BY STA SPD NAME 5 DIAL BY SYS SPD NAME BACK EXIT Press the 2 button 1 3 1 DIAL BY STA SPD 1 3 2 DIAL BY SYS SPD Use to select the desired one Also press SEND to make the call 1234 001 4567 002 5678 003 BACK NAME TEL SEND 9...

Page 33: ...desired one Also press SEND to make the call 1 DIAL BY STA SPD 2 DIAL BY SYS SPD 3 DIAL BY ICM NAME 4 DIAL BY STA SPD NAME 5 DIAL BY SYS SPD NAME BACK SEND Press the 4 button 1 3 3 DIAL BY ICM NAME 1 3 4 DIAL BY STA SPD NAME Use to select the desired one Also press SEND to make the call JANE 001 ROBERT 002 HEAY 003 BACK SEND JANE 001 ROBERT 002 HEAY 003 BACK NAME TEL SEND ...

Page 34: ...AL BY SYS SPD 3 DIAL BY ICM NAME 4 DIAL BY STA SPD NAME 5 DIAL BY SYS SPD NAME BACK EXIT Press the 5 Button Use to select the desired one Also press SEND to make the call 1 3 5 DIAL BY SYS SPD NAME JANE 2002 ROBERT 2004 HEAY 2001 BACK NAME TEL SEND ...

Page 35: ...ded station group VMIB FORWARD TO STA 158 U 06 SEP 04 11 42am PICKUP CONF REDIAL Enter the forwarded station group VMIB 2004 07 01 SUN MON TUE WED THU FRI SAT 1 2 3 4 5 6 7 8 9 10 11 12 13 14 15 16 17 18 19 20 21 22 23 24 25 26 27 28 29 30 31 1 UNCONO FWD 6 9 OFFNET NO ANS 2 BUSY FWD 7 IN CO OFFNET 3 NO ANS FWD 0 FOLLOW ME 4 BUSY NO ANS CANCEL FWD 5 8 OFFNET UNC ENTER FORWARD TYPE 0 9 BACK EXIT 1 ...

Page 36: ...E MM DD 05 OUT OF OFFICE ENTER TIME HH MM BACK SAVE EXIT The absent message list will be displayed Use NEXT button or BACK button to enter the number of the desired absent message To erase the absent message press CANCEL Press HOLD button to save Enter the time e g am 07 30 Î enter 0730 pm 03 30 Î enter 1530 01 LUNCH RETURN AT HH MM 02 ON VACATION 03 OUT OF OFFICE HH MM 04 OUT OF OFFICE MM DD 05 O...

Page 37: ...NT ALL 7 ALL INT EXT 3 EXT ZONE 1 4 EXT ZONE 2 5 EXT ZONE 3 BACK EXIT Select the paging zone Enter the detailed zone 1 INTERNAL 6 EXT ALL 2 INT ALL 7 ALL INT EXT 3 EXT ZONE 1 4 EXT ZONE 2 5 EXT ZONE 3 ENTER INT PAGE NO 01 35 BACK EXIT Start paging by lifting handset After finishing paging put the handset down 1 INTERNAL 2 INT ALL 3 EXT ZONE 1 4 ALL INT EXT BACK EXIT 1 INTERNAL 2 INT ALL 3 EXT ZONE...

Page 38: ...6 PAGING 2 RECEIVED CALLS7 DO NOT DISTURB 3 SPEED DIAL 8 WAKE UP 4 CALL FORWARD 5 ABSENT MESSAGE ENTER YOUR WAKEUP TIME HH MM 04 01 pm BACK SAVE EXIT Enter the alarm time After setting the alarm time press the SAVE button The alarm icon will be displayed on the top of LCD and is blinking 1 DIALED CALLS 6 PAGING 2 RECEIVED CALLS7 DO NOT DISTURB 3 SPEED DIAL 8 WAKE UP 4 CALL FORWARD 5 ABSENT MESSAGE...

Page 39: ... CUSTOMIZE 5 SETTING EXIT Press the MENU button 2 PHONE BOOK PHONE BOOK 1 NEW ENTRY 2 SEARCH BY NAME 3 SEARCH BY NUMBER 4 SEARCH BY GROUP 5 EDIT CO ACCESS CODE EXIT OK PHONE BOOK 6 DELETE ALL ENTRY EXIT OK For the detailed information about the phone book see phonebook p25 ...

Page 40: ...e number of the schedule can be added up to 50 The calendar of schedule is from 1960 to 2040 Use to select the date and press the OK button to save it Press TODAY or 5 to move to current date Press 1 to move to last year Press 3 to move to next year Press 7 to move to last month Press 9 to next month SCHEDULE ADD Use ADD to add the schedule Use number key to enter the time directly am 7 00 0700 pm...

Page 41: ...to save the schedule CHECK SCHEDULE 01 JUL 04 06 01 pm 07 2004 The alarm icon will be displayed on the top of LCD and it will ring for the time After checking the schedule the icon will be disappeared SUN MON TUE WED THU FRI SAT 1 2 3 4 5 6 7 8 9 10 11 12 13 14 15 16 17 18 19 20 21 22 23 24 25 26 27 28 29 30 31 DATE 01 JUL 04 SAT TIME PM 06 59 REPE NONE ALARM 00 HOUR 00 MIN BEFORE TEXT CONFERENCE ...

Page 42: ...T BACK ALL FIND FIND SCHEDULE Use to select the year Use to select the month RESULTS SEARCH SCHEDULE YEAR 2004 MONTH 06 TEXT BACK ALL FIND DATA 01 JUL 04 1 1 AM 07 45 CONFERENCE BACK VIEW Press the FIND button and the result will be displayed Use the VIEW button to check the contents of schedule ...

Page 43: ...EDULE CHECK SCHEDULE 01 JUL 04 07 45 am SUN MON TUE WED THU FRI SAT 1 2 3 4 5 6 7 8 9 10 11 12 13 14 15 16 17 18 19 20 21 22 23 24 25 26 27 28 29 30 31 2004 07 03 When the stored schedule comes the schedule icon will be displayed on the top of LCD And the alarm ring will ring to inform the time ALARM SCHEDULE Check the schedule Press the DEL to clear the schedule icon or Press the BACK to leave th...

Page 44: ...nction 3 5 DELETE ALL SCHEDULE PAST SCHEDULE PAST SCH 01 BACK OK ARE YOU SURE TO DELETE DATA NO YES Use to select YES or NO Press OK to delete the all schedule If selecting YES delete it If selecting no don t delete it ...

Page 45: ...1 CHANGE LANG 6 BRIGHT LEVEL 2 REGISTER NAME 3 RING TYPE 4 SPKR HEADSET 5 E MIC MEADSET JAN ENTER NAME BACK ABC OK Press the 2 and enter the name Press the OK button to save it CALL TO JAN 01 JUL 04 07 45 am MSG FALSH SUN MON TUE WED THU FRI SAT 1 2 3 4 5 6 7 8 9 10 11 12 13 14 15 16 17 18 19 20 21 22 23 24 25 26 27 28 29 30 31 2004 07 03 When the another station calls the name on the LCD will be ...

Page 46: ...rom 01 to 15 e g 01 Setting the CO ring is the same 1 ICM RING 2 ICM MELODY 3 CO RING 4 CO MELODY BACK EXIT Pleasure 10 01 Cancan 02 Trumpet Ensemble 03 Pathetique 04 Russian Dance 05 Bohe Folk Song EXIT OK Press the 2 button Use to select the desired category Press the OK or button and then the melody is changed Press the EXIT button to cancel Setting the CO melody is the same To set the melody M...

Page 47: ...MIC HEADSET 1 CHANGE LANG 6 BRIGHT LEVEL 2 REGISTER NAME 3 RING TYPE 4 SPKR HEADSET 5 E MIC HEADSET EAR MIC HEADSET 1 ON 0 OFF OFF BACK SAVE EXIT Note To use an earphone the speaker mode is required to set in speaker headset mode Press 1 to use an earphone and 0 not to use an earphone Press SAVE to save it 4 6 BRIGHT LEVEL 1 CHANGE LANG 6 BRIGHT LEVEL 2 REGISTER NAME 3 RING TYPE 4 SPKR HEADSET 5 E...

Page 48: ...ATION 100 T 1234 CLEAR SEND SUN MON TUE WED THU FRI SAT 1 2 3 4 5 6 7 8 9 10 11 12 13 14 15 16 17 18 19 20 21 22 23 24 25 26 27 28 29 30 31 2004 07 03 In en block mode when dialing press the CLEAR button to erase the entered number Press SEND to make a call In case of dialing in en block mode don t use HOLD to make a call 1 Ez MENU 6 VOICE MAIL 2 PHONE BOOK 3 SCHEDULE 4 CUSTOMIZE 5 SETTING EXIT Pr...

Page 49: ...eeded Press the 1 TEMPORARY COS Press the SAVE button to down the COS 1 TEMPORARY COS 2 WALKING COS ENTER CURRENT PASSWORD BACK SAVE EXIT CANCEL TEMPORARY COS Enter the password If the password is wrong the warning tone will be heard Press the SAVE button to restore the COS 1 TEMPORARY COS 2 WALKING COS BACK EXIT Select the item 5 2 1 TEMPORARY COS ...

Page 50: ...RY COS 2 WALKING COS ENTER COS OVERRIDE CODE BACK SAVE EXIT Enter the COS Override code Press the SAVE button to use the walking COS 5 2 2 WALKING COS 1 TEMPORARY COS 2 WALKING COS ENTER COS OVERRIDE CODE PRESS HOLD KEY BACK SAVE EXIT ...

Page 51: ...TION COS 3 PASSWORD 4 SPEED PGM 5 ANSWER MODE ENTER CURRENT PASSWORD BACK SAVE EXIT CHANGE PASSWORD After entering the password 3 11 digits press the HOLD button to save it Press the 3 PASSWORD Enter the current password 1 ENBLOCK MODE 2 STATION COS 3 PASSWORD 4 SPEED PGM 5 ANSWER MODE ENTER PASSWORD BACK SAVE EXIT After entering the new password 3 11 digits press the HOLD button to save it ...

Page 52: ...N DIGIT 005 PAUSE FLASH D TONE SUN MON TUE WED THU FRI SAT 1 2 3 4 5 6 7 8 9 10 11 12 13 14 15 16 17 18 19 20 21 22 23 24 25 26 27 28 29 30 31 2004 07 01 Enter phone number and then press the HOLD button e g 12345 A certain CO line can be selected by pressing CO BTN But if the CO line is not idle when dialing by SPEED other CO line is seized LORA ENTER NAME SPD 005 ABC OK SUN MON TUE WED THU FRI S...

Page 53: ...MODE 2 STATION COS 3 PASSWORD 4 SPEED PGM 5 ANSWER MODE ENTER ICM ANS MODE H 1 T 2 P 3 BACK SAVE EXIT Press the 5 ANSWER MODE There are three modes and select the desired mode Press the SAVE button to save it 1 HANDSFREE MODE 2 TONE MODE 3 PRIVATE MODE ...

Page 54: ...E 4 CUSTOMIZE 5 SETTING EXIT Press the MENU button VMIB MSG FROM STA 130 NEXT REPEAT DELETE Press the 1 button Press NEXT to hear another voice mail press REPEAT to repeat the current message and to erase the message press DELETE SUN MON TUE WED THU FRI SAT 1 2 3 4 5 6 7 8 9 10 11 12 13 14 15 16 17 18 19 20 21 22 23 24 25 26 27 28 29 30 31 2004 07 03 ...

Page 55: ...OICE MAIL BACK EXIT 620 BACK NEXT ANSWER Use NEXT to move to the next voice mail group To check the external voice mail press ANSWER Press the 2 button SUN MON TUE WED THU FRI SAT 1 2 3 4 5 6 7 8 9 10 11 12 13 14 15 16 17 18 19 20 21 22 23 24 25 26 27 28 29 30 31 2004 07 03 ...

Page 56: ...aracters Enter the figure ABC abc NUM Enter the letters ABC abc Enter the symbol ABC abc NUM SYMBL Dial Dial Norm 1 4 0 _ Use the button and then select the symbol A B C D E F G H I J K L M N O P Q R S T U V W X Y Z ...

Page 57: ...Direct Dial Inwards or Direct Inwards Dialing ISDN lines can be provided with multiple telephone numbers which are each routed to individual extensions or Hunt Groups Digital Key Telephone Unit a Marconi digital telephone Single Line Telephone an analogue telephone A type of CO line that comes in multiples of 2 or more Voice Message Interface Board Marconi s integral Voice Processing card Conferen...

Reviews: