


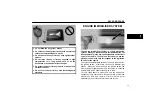


KEYS AND DOORS
16
11L030−1
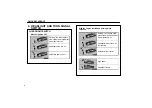
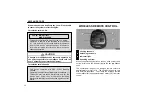
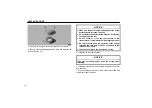
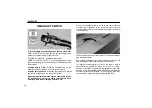
3. Remove the 2 screws to take out the lid of the module.
4. Take out the discharged battery and put a new battery with
the positive side up.
NOTICE
Make sure the positive side and negative side of the
battery should be faced correctly.
Do not replace the battery with wet hands. Water may
cause unexpected rust.
Do not touch or move any components in the
transmitter, or it may interfere with proper operation.
Be careful not to bend the electrode of the battery
insertion and that dust or oils do not adhere to the
inside of the module.
Take care not to lose the screws and O−ring.
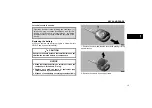
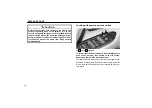
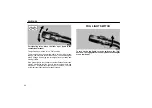
5. Install the lid with the 2 screws.
NOTICE
Take care not to damage or bend the O−ring when
installing.
6. Install the module into the key frame and secure the cover
with the screw.
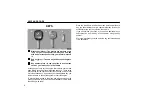
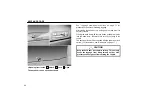
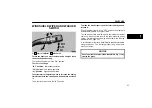
7. When pushing any switch on the wireless key, make sure
the indicator light comes on.
Summary of Contents for LX 470
Page 4: ...INTRODUCTION iv ...
Page 8: ...PICTORIAL INDEX viii INSTRUMENT PANEL 00X001i ...
Page 10: ...PICTORIAL INDEX x INSTRUMENT CLUSTER Vehicles sold in U S A 00X002u ...
Page 12: ...PICTORIAL INDEX xii INSTRUMENT CLUSTER Vehicles sold in Canada 00X014p ...
Page 16: ...PICTORIAL INDEX xvi ...
Page 22: ...QUICK REFERENCE 6 ...
Page 38: ...KEYS AND DOORS 22 ...
Page 68: ...GAUGES METERS AND SERVICE REMINDER INDICATORS 52 ...
Page 98: ...EXTERIOR EQUIPMENT 82 ...
Page 176: ...AIR CONDITIONING 160 20X018d Air flow selection See Lower vent on page 168 ...
Page 188: ...AIR CONDITIONING 172 ...
Page 252: ...STARTING AND DRIVING 236 ...
Page 302: ...MAINTENANCE 286 ...
Page 350: ...ELECTRICAL COMPONENTS 334 ...
Page 361: ...INDEX 345 ...


