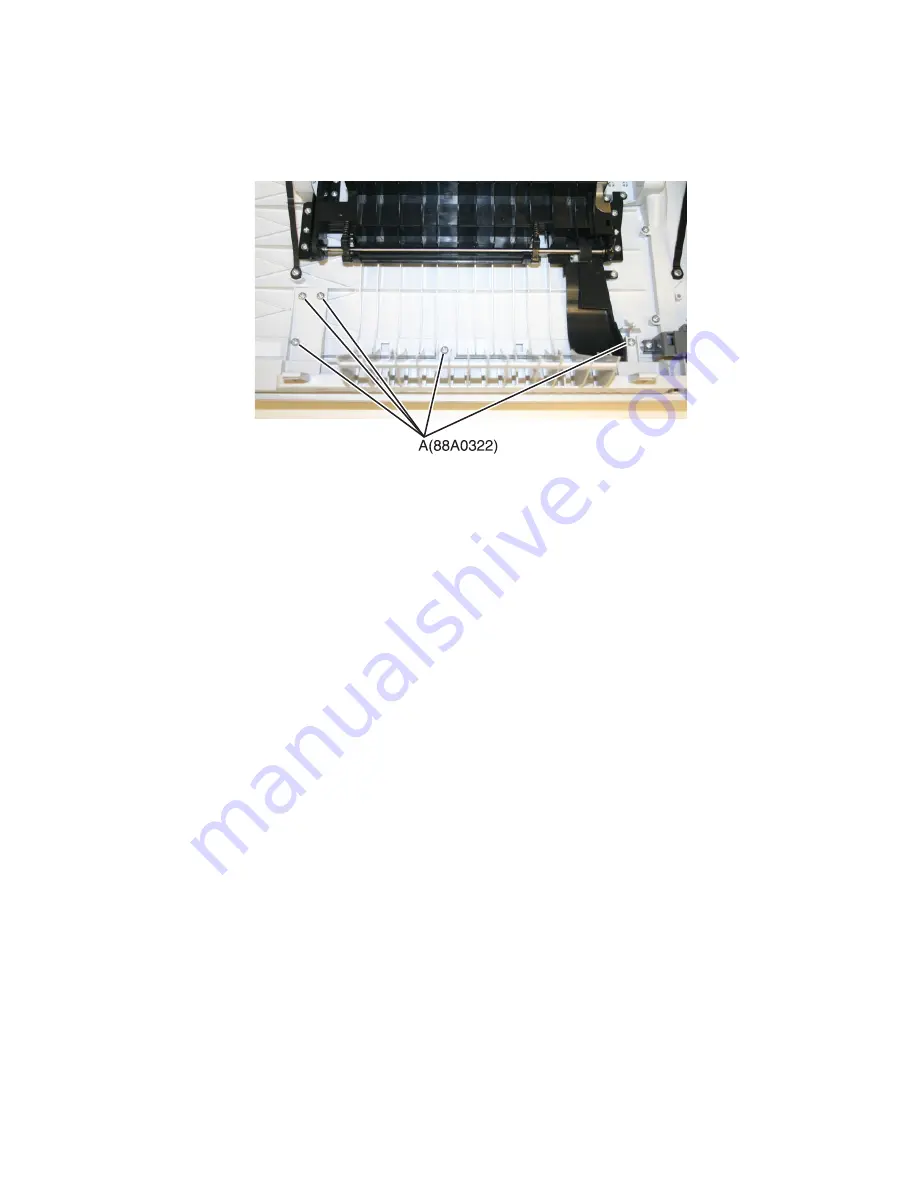
Front middle cover removal
1
Open the front cover.
2
Remove the five screws (A) attaching the front middle cover to the lower front cover.
3
Pull the front middle cover away from the front cover to remove.
Front logo cover removal
1
Grasp the front logo.
Note:
A flat-tipped screw may have to be used at the outer edges on the CX510. This cover part does not give
access to any other part and therefore does not need to be removed except for replacement.
2
Sharply pull the front logo.
Operator panel bezel removal
1
Lift the flatbed scanner on the right side.
2
Lift the bezel away from the operator panel, and remove.
Note:
The picture below shows the bezel removal for the CX310 and CX410 models. The bezel for CX510 models
is removed the same way.
7527
Repair information
275
Summary of Contents for XC2132
Page 18: ...7527 18 ...
Page 22: ...7527 22 ...
Page 34: ...7527 34 ...
Page 54: ...2 Open the top door 7527 Diagnostic information 54 ...
Page 184: ...7527 184 ...
Page 226: ...7527 226 ...
Page 314: ...5 Disconnect the belt C 6 Disconnect the fan and remove 7527 Repair information 314 ...
Page 345: ...Component locations Controller board CX310 models 7527 Component locations 345 ...
Page 346: ...CX410 models 7527 Component locations 346 ...
Page 352: ...7527 352 ...
Page 359: ...7527 359 ...
Page 361: ...Assembly 1 Covers 7527 Parts catalog 361 ...
Page 363: ...Assembly 2 Scanner 7527 Parts catalog 363 ...
Page 365: ...Assembly 3 Paperpath 7527 Parts catalog 365 ...
Page 368: ...7527 Parts catalog 368 ...
Page 369: ...Assembly 4 Operator panels 7527 Parts catalog 369 ...
Page 372: ...7527 Parts catalog 372 ...
Page 373: ...Assembly 5 Electronics 7527 Parts catalog 373 ...
Page 376: ...7527 Parts catalog 376 ...
Page 377: ...Assembly 6 Cables and sensors 7527 Parts catalog 377 ...
Page 379: ...Assembly 7 Media drawers and trays 7527 Parts catalog 379 ...
Page 382: ...7527 382 ...
Page 390: ...7527 390 ...
Page 404: ...7527 404 ...
Page 422: ...7527 Part number index 422 ...
Page 428: ...7527 Part name index 428 ...


