background image

By default this shows Inbox but may have been changed.  Tapping on the 

 symbol will reveal a drop 

down menu with 5 category choices.  You can save emails or move them into any one of the categories.  
 
Categories are:- 

Inbox

 – where, by default, emails arrive when received 

[only applicable if you have used the "Import 

Emails" function of the SyncMan

®

 program.]


Outbox

 – where, by default, emails are saved after being sent and are ready to transmit 

Draft

 – part finished or emails needing to be sent at a later time can be saved into this category.  

Sent

 – where, by default, emails that have been transmitted are saved.  Normally emails that were in 

the Outbox would move to here after a syncronisation has taken place between the unit and a PC. 

Trash

 – where, by default, emails that have been deleted are saved, pending a hard deletion. 


At the bottom of the display, to the left, is shown how many emails are unread and to the right how many 
total emails exist. 
 
To view or read an email:  Tap on any mail.  This will take you to the view screen.  Here you can review 
the content of the email. 
 
To delete an email: Highlight the email or view it. Tap 

 to delete the highlighted mail.  You can also 

delete an email if you are reviewing it. 
 
You can Reply 

, Reply All 

or forward 


a mail through the icons provided on the screen.  Within the 

viewing screen tap on any one of these icons to start the function.  When replying the recipient(s) email 
address will automatically appear.  If forwarding an email the To: box will be empty and an email address 
will have to be entered. 


New Email creation:- 

 
Tap 

.  From the email edit screen use the drop down arrows to select a priority.  Then choose where to 

save to by using the drop down arrows.  You can save to either the Outbox or Draft category. 
  
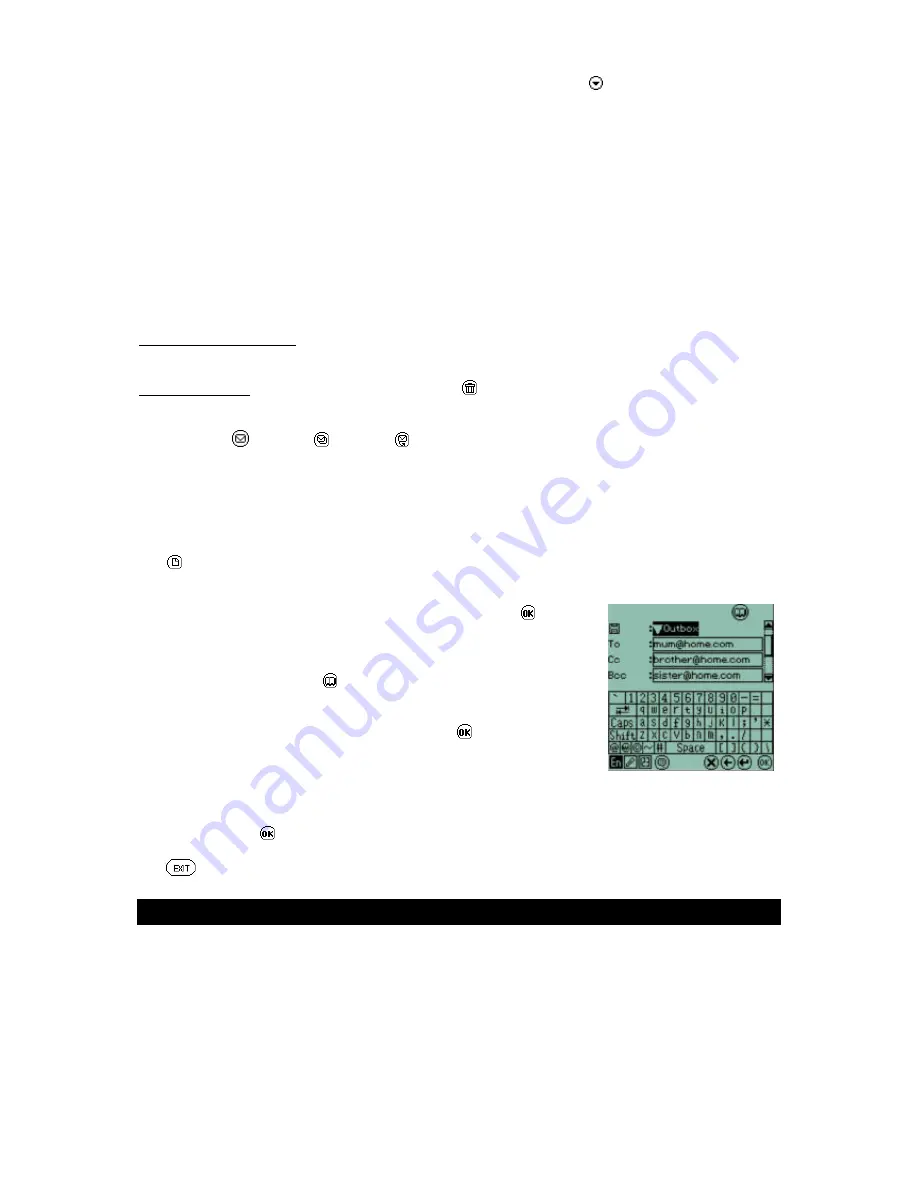
Input the receiver address, subject, content and lock, then tap 

 to save 

the mail to either the Outbox or Draft category. 
 
You may input the e-mail address directly or from the email address book 
by tapping address book icon 

 at upper right corner of the screen to 

retrieve e-mail address data which you have input earlier.  NOTE: when 
looking up an email address use either the keyboard or the handwriting 
recognition option to search for addresses, then tap 

 
In the Email function email addresses from the main phonebook are not 
available. 
 
Entering data in this function is similar to the other function already discussed.  Once you have finished 
an email tap on the 

 to complete the email and store it. 


Tap 

 to exit the application and return the Officer folder.  


E- Book 

 
The E-Book function is a program that allows you to read electronic-books (E-Books).  
 
You can download e-books (*.prc or *.pdb) using the SyncMan® program from our CD or other places, 
such as the Internet or the My Lexibook secure web site and read these in the E-Book application. 
 
Using the SyncMan® program download any E-Book with the file extension of .prd or .prc.  Details on 
how to do this are explained in the help function in the SyncMan® program.  
 

Summary of Contents for TAB102

Page 1: ...T TA AB B 1 10 00 0 S Se er ri ie es s U Us se er rs s I In ns st tr ru uc ct ti io on n M Ma an nu ua al l Contents and Index page...

Page 2: ...keys power supply input methods screen displays virtual keyboard and so on so that you can use your handheld more efficiently and more easily Layout of the unit Above are the essential areas and keys...

Page 3: ...a They can also be configured to turn the PDA on when touched and go straight to an application When shipped the Hot Keys are configured as follows Hotkey 1 Phonebook Hotkey 2 To do Hotkey 3 Calculato...

Page 4: ...ere are five levels representing from low power to full power You can also tap on the battery indicator and it will show the remaining power in percentage tap on the percentage number to change back t...

Page 5: ...ndidate row Tap the correct candidate character to input it If a candidate character isn t tapped the unit will select the first candidate and use it After entering a character you can edit it easily...

Page 6: ...re of calibration targets on the screen sequentially 3 After the screen calibration the login screen will display if login password is activated 4 Enter correct login password to go to Main Menu Syste...

Page 7: ...month to a view calendar and show and schedules at a glance Owner information stores personal information of the owner This can be displayed when the unit is turned on Time Displays the home and world...

Page 8: ...con in the shortcut bar provides a quick access to enable or disable the Lock function Scroll Bar If the display screen is more than one page a scroll bar will appear on the right hand side of the scr...

Page 9: ...out the people s names and phone numbers in this Department c Sort by City This allows you to search all the people who are in a particular city Tap the City name to display a list of cities Then sele...

Page 10: ...fields using the keypads and when finished tap to save and exit entry Editing functions are as described in Chapter 1 Editing records a Category Tap the category arrow to select the category you want...

Page 11: ...t a record a Tap on the date field and enter change the date of an appointment from Calendar Keyboard b Tap in the All day box to automatically set the start and end time as 8 00am to 6 00pm or c Tap...

Page 12: ...to the screen to create notes signatures and similar small graphical files Tap on the icon to start the application 1 Tap to create a new record from the index screen or tap to edit an already saved r...

Page 13: ...t title then tap to save the record Tap to exit the application and return the Organizer folder To do Click on to start the To Do function You may input due date status and content of your tasks for e...

Page 14: ...number current account number social security number commemorate date notes Enter data in the same manner as the other applications Tap to exit the application and return the Organizer folder Time Th...

Page 15: ...matically appears after you switch on your device refer to the set up for this in the Settings folder Information which can be displayed includes A Personal information 1 Owner s name 2 Company name 3...

Page 16: ...n a Log file is automatically created by the TAB100 series device This log file can then be read using the Text application Tap to exit the application and return the Officer folder Email You can crea...

Page 17: ...lying the recipient s email address will automatically appear If forwarding an email the To box will be empty and an email address will have to be entered New Email creation Tap From the email edit sc...

Page 18: ...the view screen you can read a file and activate the following functions 1 Tap the icon at the lower left corner of the screen to return to the index screen 2 Tap to show bookmark screen a If there ar...

Page 19: ...t match to your entry and the word you require will appear presuming it is in the database Then tap on the word in the list and you will be shown the translation Next to each translated word is the la...

Page 20: ...t metric conversion function provides a two way conversion tool between common units of measurement e g length area weight etc Tap on the icon the start the conversion application From the list of cat...

Page 21: ...is set to a default of 3 minutes Use the drop down list to change this 3 EL Auto off period To save power EL backlight will be switched off automatically if there is no activity after a certain period...

Page 22: ...ith a pin number you will first have to enter this From the following display tap in the pin number There will be a pause whilst the unit reads the data on the SIM card Once the data has been read two...

Page 23: ...option more than once you will place duplicate records into your SIM card 2 Paste additional data transfer ONLY the records that do not match an entry already in the SIM 3 Overwrite current data overw...

Page 24: ...he settings and exit Password The Password application allows you to set a private password to protect your data Tap on the icon to start this application There are two password setting available in t...

Page 25: ...should it be missing or faulty please contact the customer service number at the end of this manual for a replacement Alternatively you can download the latest version of SyncMan from the secure web s...

Page 26: ...his application You will be shown a list of the four keys and next to each key is an icon Tap on this icon to reveal a list of the available applications that can be assigned to the key Then select th...

Page 27: ...ck on to save the record and exit You will be taken back to the file listing screen The editing functions are the same as the other applications discussed earlier Tap to leave the Hot Key application...

Page 28: ...cloth Do not twist or bend the unit Batteries The TabletPC uses 1 x AAA Alkaline battery If the display becomes too dim to read properly use the display contrast control to increase the contrast If th...

Page 29: ...misuse damage or abuse This does not affect your statutory rights If you wish to register your product for our extended 3 year warranty program please enclose a cheque made payable to Lexibook UK Limi...

Page 30: ...Navigation 18 Reading Word files 18 SyncMan program 18 Viewing files 18 Email Categories 17 Creating 17 Creating and Syncronising emails 16 Index screen 16 Indicator boxes 16 Inserting email addresse...

Page 31: ...17 Email Application 16 Mini Text 16 Organiser Folder 7 Calendar 14 Drawpad 13 General 7 Notes 11 Owner Information 14 Scheduler 11 Shorthand 12 To Do 13 Today 15 Owner Information Business Card 14 P...

Page 32: ...23 Transferring data form the TAB100 to a SIM card 23 Soft Reset 6 SyncMan COM port types 25 Installing SyncMan software 25 Large database transfer 26 Secure web site 25 Synchronising and file transf...

Page 33: ...V Virtual Keyboard 4 Virtual Keyboard Picture 4...

Reviews: