9
Click
Next
to continue.
More local accounts can be added by clicking the
Back
button in
Step 4
.
Step 4: Confirm and Restart
Click
Finish
to save current settings and restart the
system.
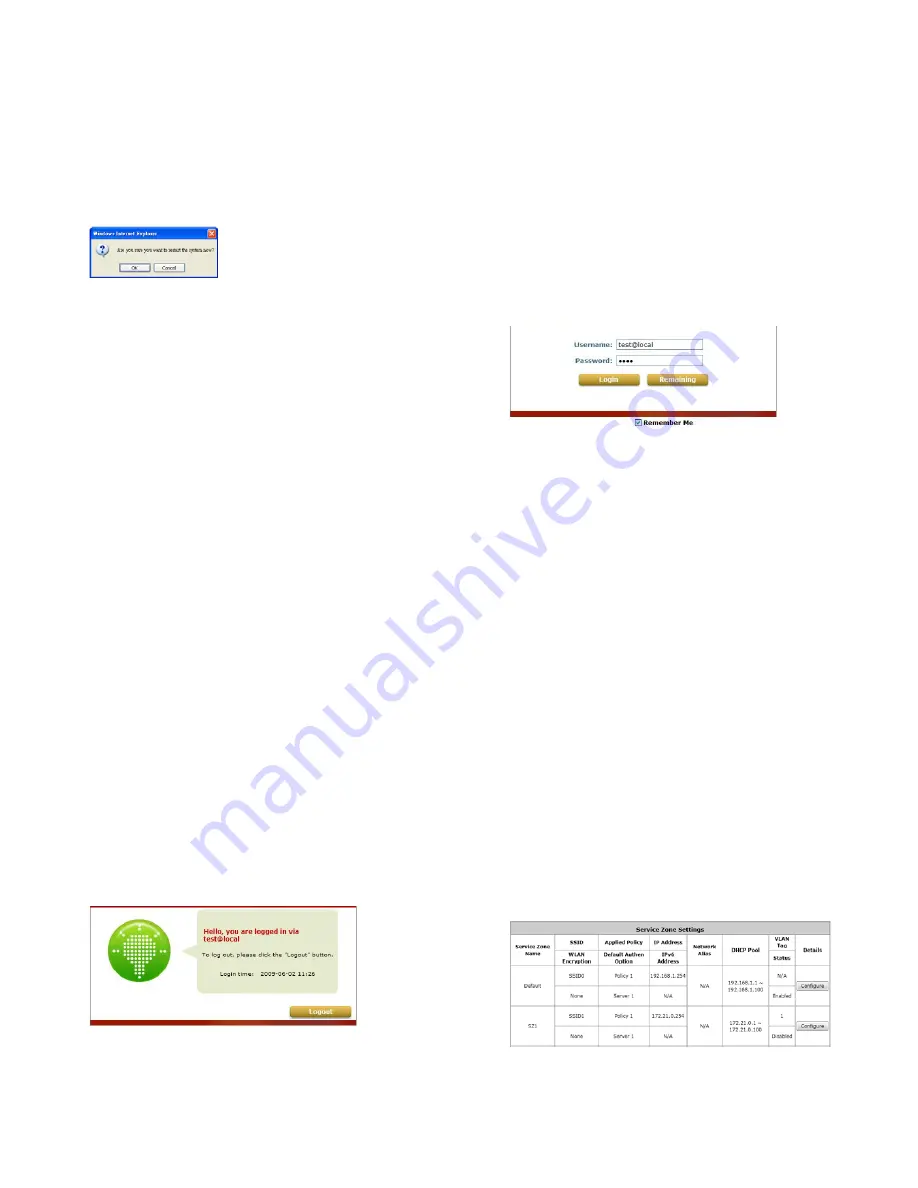
A confirmation dialog box will then appear. Click
OK
to
continue.
A
Confirm and Restart
message will appear on the
screen during the restarting process. Please do not
interrupt the system until the Administrator Login Page
appears.
Note:
The system is trying to locate a DNS server at this stage. Therefore, a
longer startup time is required if the configured DNS cannot be found.
When the following Administrator Login Page appears,
it means the restart process is now completed.
10
User Login
To verify whether the configuration of the new local user
account(s) created via the Setup Wizard has been
completed successfully:
1. Connect a client device (e.g. laptop, PC) to any LAN
Port of WHG. The device will obtain an IP address
automatically via DHCP.
2. Open a web browser on a client device, access any
URL, and then the default User Login Page will
appear.
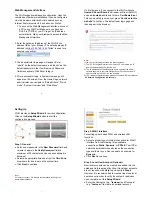
3. Enter the Username and Password of a local user
account previously generated via Setup Wizard (e.g.
“
testuser@local
” as the Username and “
testuser
” as
the Password); then Click Login.
Note:
1. WHG supports multiple authentication options including built-in local
user database and external authentication database (e.g. RADIUS).
The system will automatically identify which authentication option is
used from the full username entered.
11
2. The format of a full (valid) username is
userid@postfix
, where “
userid
”
is the user ID and “postfix” is the name of the selected authentication
option.
3. Exception: The postfix can be omitted only when the default
authentication option is used. For example, “LOCAL” is the default
authentication option at this system; therefore, you may enter either
“
testuser
” or “
testuser@local
” in the Username field.
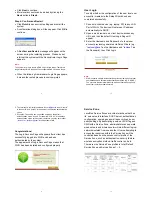
Congratulations!
The Login Success Page will appear after a client has
successfully logged into WHG and has been
authenticated by the system.
The appearance of Login Success Page means that
WHG has been installed and configured properly.
12
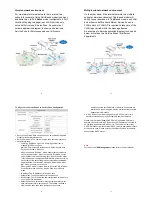
Service Zone
LevelOne Service Zones are virtual machines that has
its’ own network interface, DHCP server, authentication
configuration, user pages as well as security and user
policy settings. By associating a unique VLAN Tag and
SSID with a Service Zone, administrators can separate
wired network and wireless network into different logical
networks isolated from one another. Users attempting to
access the resources within the Service Zone will be
controlled based on the access control profile of the
Service Zone, such as authentication, security feature,
wireless encryption method, traffic control, and etc.
There are nine Service Zone profiles in total, Default
Service Zone and Service Zones 1 ~ 8.


