213
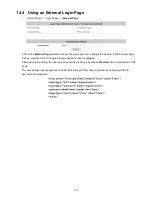
And if the user-defined login page includes an image file, the image file path in the HTML code must be the
image file to be uploaded.
Default Service Zone: <img src=images0/xx.jpg”>
Service Zone 1 : <img src=images1/xx.jpg”>
Service Zone 2 : <img src=images2/xx.jpg”>
Service Zone 3 : <img src=images3/xx.jpg”>
Service Zone 4 : <img src=images4/xx.jpg”>
Click the Browse button to select the file to upload. Then click Submit to complete the upload process.
Next, enter or browse the filename of the images to upload in the Upload Images field on the Upload Images
Files page and then click Submit. The system will show the used space and the maximum size of the image
file of 512K. If the administrator wishes to restore the factory default of the login page, click the Use Default
Page button to restore it to default.
After the image file is uploaded, the file name will show on the “Existing Image Files” field. Check the file and
click Delete to delete the file.
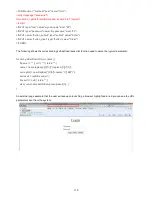
After the upload process is completed and applied, the new login page can be previewed by clicking Preview
button at the button.
Summary of Contents for WHG-505
Page 1: ...LevelOne WHG 505 Secure WLAN Controller User Manual V1 00...
Page 19: ...13...
Page 33: ...27...
Page 57: ...51...
Page 66: ...60...
Page 91: ...85 6 Local Area AP Management...
Page 115: ...109...
Page 129: ...123...
Page 147: ...141...
Page 172: ...166...
Page 198: ...192...
Page 211: ...205...
Page 266: ...260 5 Click Install Certificate 6 Click Next...
Page 307: ...301...

